
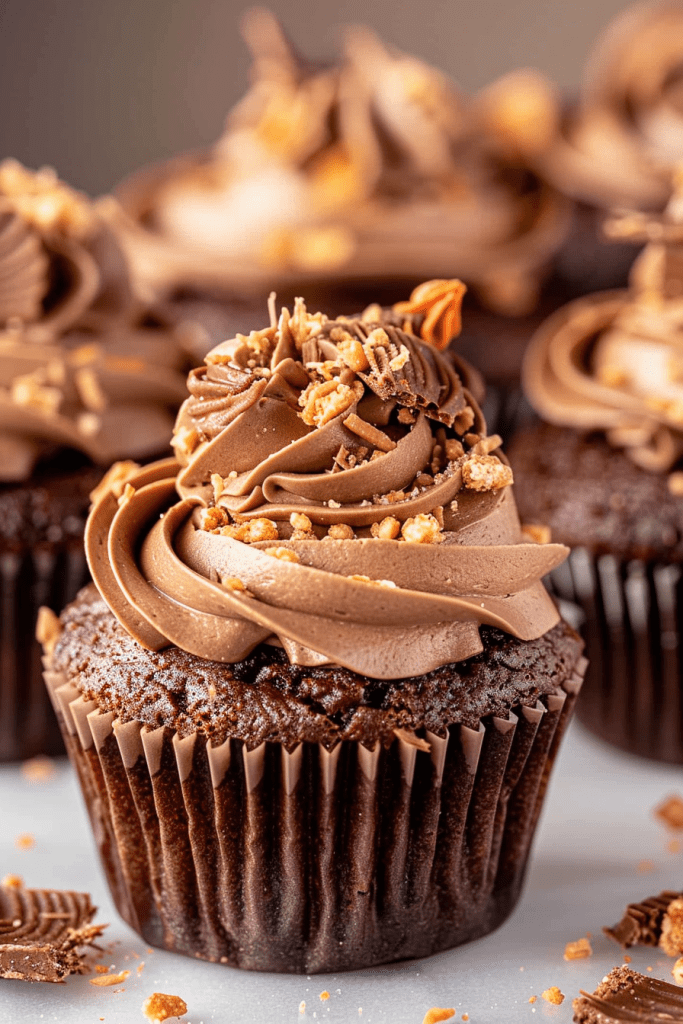
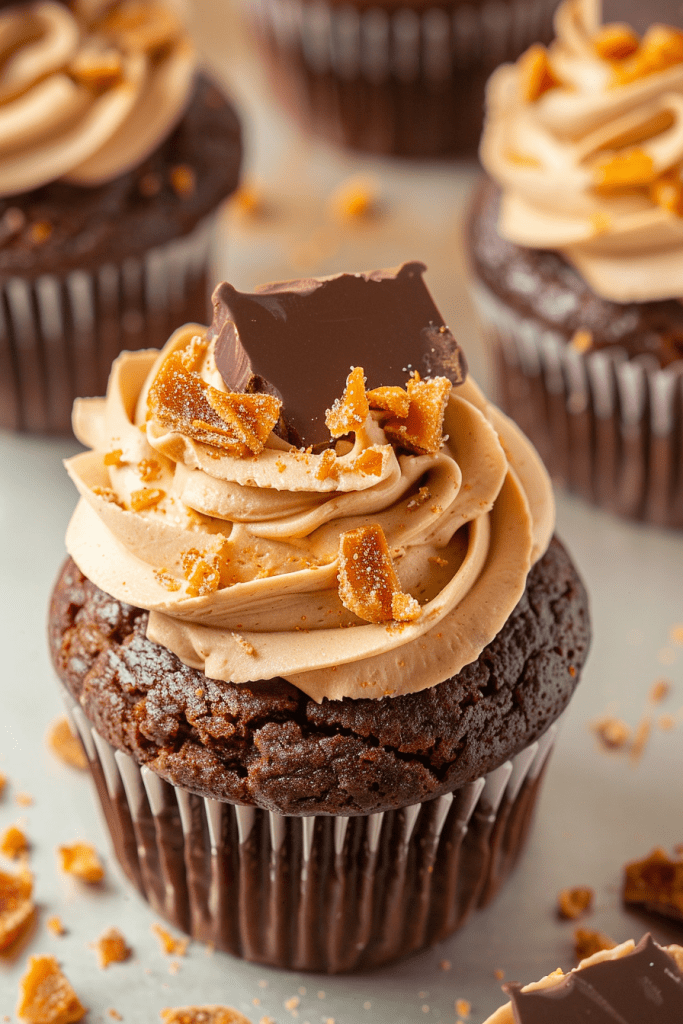
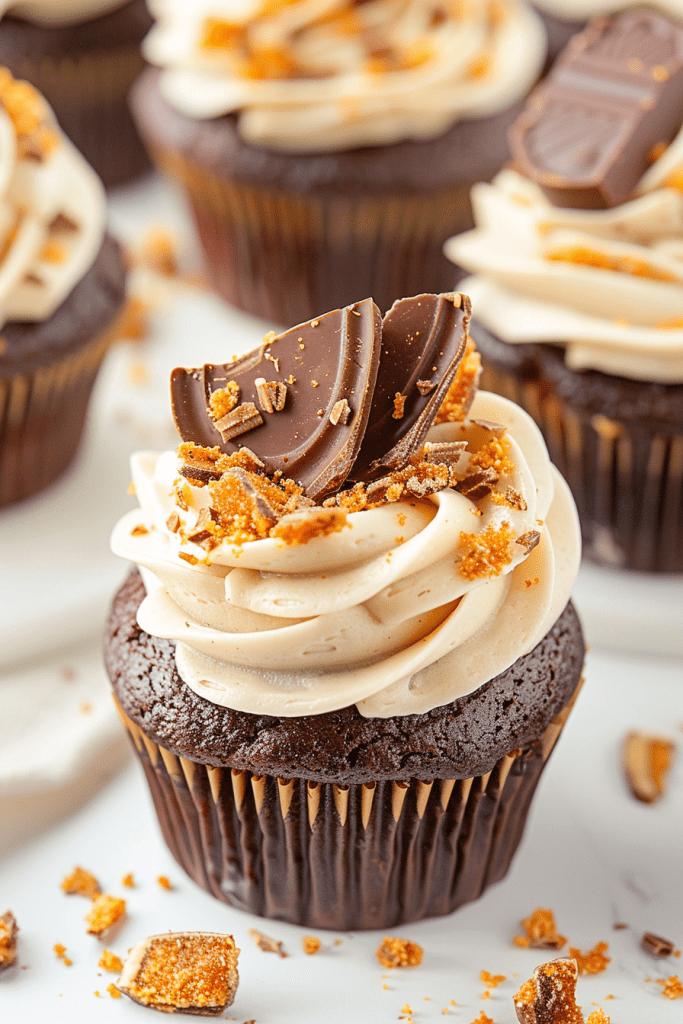
Indulge in the decadent world of Butterfinger Chocolate Cupcakes, where moist chocolate cupcakes meet creamy peanut butter Butterfinger frosting. These delightful treats are a perfect fusion of rich flavors and textures, topped with crunchy Butterfinger bits for a playful twist. As a chocolate enthusiast and cupcake aficionado, I’ve curated a recipe that promises a symphony of sweet and nutty notes in every bite.
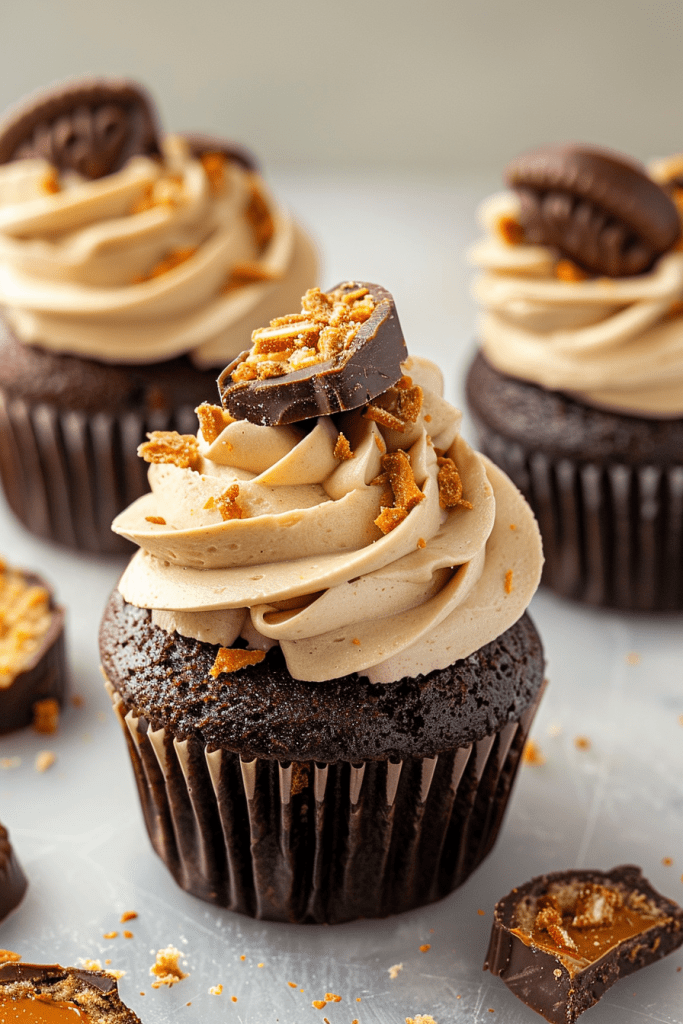
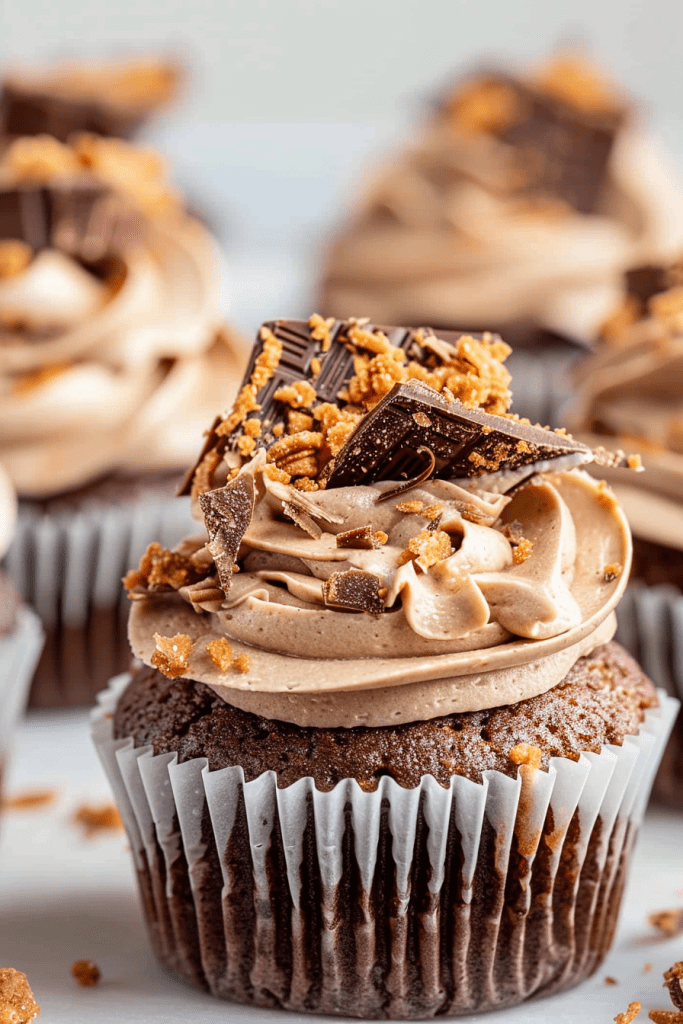
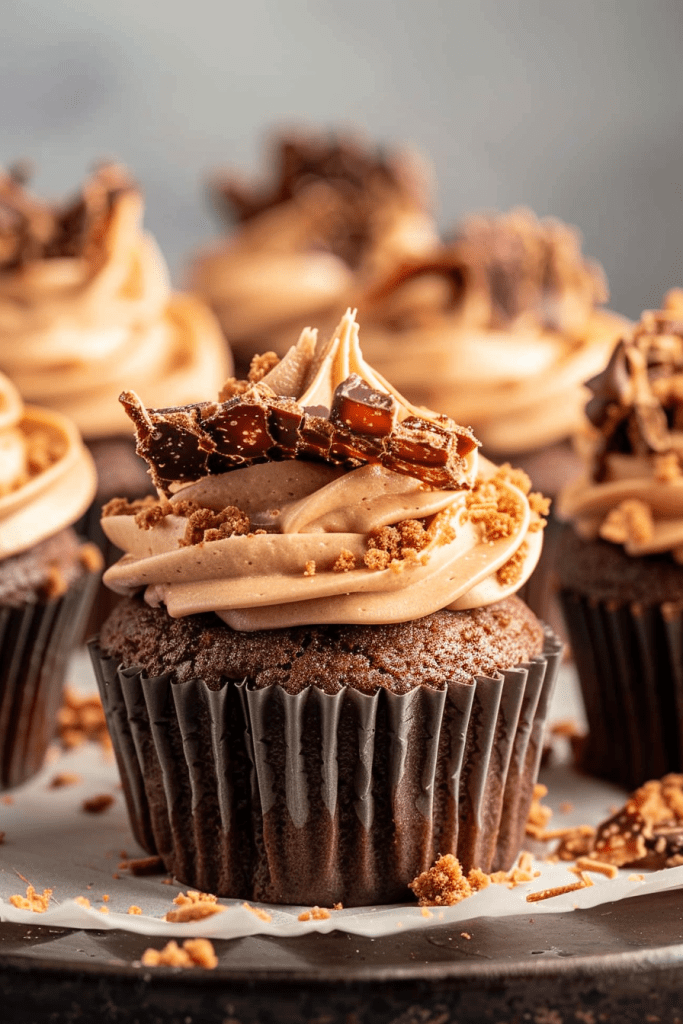
In the realm of irresistible desserts, Butterfinger Cupcakes stand out as the ultimate indulgence. With a luscious combination of peanut butter cupcakes, velvety chocolate ganache, and a generous dollop of peanut butter frosting, these cupcakes are a celebration of all things sweet and satisfying. Join me on a journey to discover the magic of Butterfinger Cupcakes and elevate your baking repertoire with this show-stopping recipe.
Ingredients
Creating these delightful Butterfinger Chocolate Cupcakes requires a mix of specific ingredients to achieve the perfect balance of flavors and textures. Let me guide you through the key components needed for the Chocolate Cupcakes, Peanut Butter Frosting, and Butterfinger Topping.
For the Chocolate Cupcakes
- 1/2 cup sugar
- 1/4 cup brown sugar
- 1/4 cup unsalted butter (room temperature)
- 1/2 cup creamy peanut butter
- 1/4 cup sour cream (room temperature)
- 1 teaspoon vanilla extract
- 3 large egg whites (room temperature)
- 1 1/4 cups all-purpose flour
- 2 teaspoons baking powder
- 1/4 teaspoon salt
- 6 tablespoons milk
For the Peanut Butter Frosting
- Peanut butter (creamy)
- Powdered sugar
- Unsalted butter
- Heavy cream
- Vanilla extract
- Salt
- Butterfinger candy bars (crushed)
- Mini Butterfinger candy bars (for garnish)
Equipment Needed
To bring these irresistible Butterfinger Chocolate Cupcakes to life in your own kitchen, you’ll need a few essential tools and equipment. Here’s what you’ll require to embark on this delightful baking adventure:
For Baking:
- Cupcake pan
- Cupcake liners
- Mixing bowls (medium and large)
- Electric mixer (hand or stand)
- Measuring cups (liquid and dry)
- Measuring spoons
- Wire rack
For Ingredients Preparation:
- Wooden spoons or spatulas
- Whisk
- Rubber spatula
- Kitchen scale (optional for precise measurements)
- Piping bags or offset spatula for frosting
- Butter knife or cupcake corer for filling cupcakes
- Cooling rack
- Small saucepan for making chocolate ganache
Prep the Ingredients
To ensure the Butterfinger chocolate cupcakes turn out perfectly, it’s crucial to prep all the ingredients beforehand. Here’s a detailed guide on prepping the necessary components for this decadent treat:
Chocolate Cupcakes:
- All-purpose Flour: Measure out 1 cup of all-purpose flour, ensuring it is sifted for a light texture.
- Unsweetened Cocoa Powder: Prepare 1/2 cup of unsweetened cocoa powder, adding a rich chocolate flavor to the cupcakes.
- Baking Soda and Baking Powder: Measure out 1/2 teaspoon of baking soda and 1/2 teaspoon of baking powder for proper leavening.
- Salt: Include 1/2 teaspoon of salt to enhance the overall taste of the cupcakes.
- Granulated Sugar: Have 1 cup of granulated sugar ready to sweeten the batter.
- Eggs and Vegetable Oil: Use 2 large eggs at room temperature and 1/2 cup of vegetable oil for moisture and structure.
- Buttermilk: Prepare 1/2 cup of buttermilk at room temperature to add richness to the cupcakes.
- Vanilla Extract: Measure out 1 teaspoon of vanilla extract for a hint of aromatic flavor.
Peanut Butter Frosting:
- Butter and Peanut Butter: Get 1 cup of unsalted butter and 1/3 cup of creamy peanut butter ready for the luscious frosting.
- Powdered Sugar: Prepare 4 cups of powdered sugar to sweeten and stabilize the frosting.
- Milk: Have 2 to 4 tablespoons of milk on hand to adjust the frosting consistency.
- Butterfinger Bits: Crush 12 mini Butterfinger bars or use Butterfinger bits to sprinkle on top of the cupcakes for a crunchy finish.
By organizing and prepping these ingredients meticulously, you set yourself up for success when creating these divine Butterfinger chocolate cupcakes.
Cupcake Batter Preparation
Before diving into the delightful world of Butterfinger Chocolate Cupcakes, let’s ensure we have our cupcake batter ready for baking. Here’s a step-by-step guide to preparing the perfect batter for these decadent treats.
Mixing Dry Ingredients
In a large mixing bowl, combine the flour, cocoa powder, baking soda, and sea salt. Whisk the dry ingredients together until well incorporated. This step ensures even distribution of leavening agents for a consistent rise in the cupcakes.
Combining Wet Ingredients
In a separate bowl, mix together the buttermilk and water. In another bowl, cream together the softened sweet cream butter and sugar until light and fluffy. Add eggs one at a time, ensuring each is fully incorporated before adding the next. Finally, incorporate the vanilla extract for a touch of aromatic sweetness.
Merging Wet and Dry Mixes
It’s time to bring the wet and dry mixes together. Alternate adding the dry ingredients and the buttermilk-water mixture to the butter-sugar-egg mixture. Beat well after each addition to create a smooth and homogenous cupcake batter. This process helps achieve a moist and tender cupcake texture with a rich chocolate flavor.
Baking the Cupcakes
Now that we have prepared the decadent batter for our Butterfinger Chocolate Cupcakes, it’s time to bake these delightful treats to perfection.
- Filling the Cupcake Liners:
Scoop about 1/4 cup of batter into each cupcake liner in the prepared cupcake pan. This ensures even distribution and consistent baking of each cupcake. - Baking the Cupcakes:
Place the cupcake pan into the preheated oven set at 350 degrees Fahrenheit. Bake the cupcakes for approximately 15 to 20 minutes or until a toothpick inserted in the center comes out clean. - Cooling the Cupcakes:
Once the cupcakes are done baking, remove them from the oven and transfer to a cooling rack. Allow them to cool completely before frosting to ensure the frosting sets properly. - Enjoying the Butterfinger Bliss:
With the tantalizing aroma of freshly baked Butterfinger Chocolate Cupcakes filling the air, it’s time to indulge in these moist, buttery delights topped with luscious chocolate buttercream and crunchy Butterfinger bits.
Frosting Preparation
Creating the Base
To start creating the base of the frosting, melt together peanut butter, butter, and chocolate in the microwave, stirring in 30-second intervals until smooth. Alternatively, you can melt the ingredients over low heat on the stovetop.
Adding Peanut Butter
In a medium bowl, combine flour, baking soda, baking powder, cocoa powder, and salt. Stir well to blend all the dry ingredients. In a separate large bowl, whisk together eggs, egg yolk, sugar, and vanilla until smooth. Gradually add the cooled chocolate mixture to the egg mixture, ensuring thorough incorporation. Alternately add the flour mixture and milk, stirring just until combined. Finally, gently stir in the hot water, being careful not to overmix.
Assembling the Cupcakes
Filling the Cupcakes
After the cupcakes have cooled, it’s time to fill them with a delightful surprise. Using a paring knife, cut out a 1-inch circle from the top center of each cupcake. Be careful not to cut through the bottom, ensuring a pocket for the ganache filling.
Frosting the Cupcakes
To frost the cupcakes, spoon the prepared chocolate frosting generously on top of each cupcake, covering the filled center. You can also opt to pipe the frosting using a piping bag for a more decorative touch, resembling a scoop of frosting similar to the Disney cupcake style.
Adding the Butterfinger Topping
It’s time to add the Butterfinger crunch! Using a food processor, crush the Butterfinger candy bars until they form small, crunchy pieces. Sprinkle the crushed Butterfinger candy over the chocolate frosting, ensuring a generous topping on each cupcake. For an alternative approach, gently dip the top of each cupcake into the crushed Butterfinger pieces, ensuring a delicious and visually appealing finish.
Make-Ahead and Storage Tips
As a food blogger, I always strive to make the cooking and serving process as convenient as possible. With these Butterfinger Chocolate Cupcakes, you can definitely prepare in advance to save time and ensure freshness. Here are some handy make-ahead and storage tips to help you enjoy these decadent treats at their best:
Make-Ahead Tips:
- Cupcake Batter: You can prepare the cupcake batter in advance and store it in the refrigerator for up to 24 hours. When ready to bake, simply bring it to room temperature before filling the cupcake liners.
- Frosting: The frosting for these cupcakes can be made ahead of time and refrigerated in an airtight container. Remember to let it come to room temperature before piping it onto the cupcakes for the best consistency.
- Ganache Filling: If you plan to fill the cupcakes with ganache, you can prepare it a day ahead and store it in the fridge. Allow it to soften slightly at room temperature before piping into the cupcakes.
- Unfrosted Cupcakes: Store unfrosted cupcakes in an airtight container at room temperature for up to 2 days. If you need to keep them longer, freeze them for up to 3 months.
- Frosted Cupcakes: Once frosted, store the cupcakes in the refrigerator in a covered container. They will stay fresh for about 3-4 days. Before serving, allow them to come to room temperature for the best taste and texture.
- Butterfinger Topping: For any leftover crushed or chopped Butterfinger candy bars, store them in a sealed container at room temperature or in the refrigerator. They can be used to top ice cream, cakes, or even added to milkshakes for a delicious twist.
Serving Suggestions
After creating these delicious Butterfinger Chocolate Cupcakes, I recommend serving them as a delightful dessert for special occasions or as a sweet treat for everyday indulgence. Here are some creative serving suggestions to enhance the presentation and enjoyment of these scrumptious cupcakes:
- Garnish with Extra Butterfinger: Sprinkle some additional crushed Butterfinger candy on top of the frosted cupcakes before serving. This will not only add a pop of color but also provide an extra crunch with every bite.
- Pair with a Hot Beverage: Serve these rich and chocolaty cupcakes alongside a steaming cup of coffee or hot chocolate. The combination of the sweet cupcakes and a warm drink creates a comforting and satisfying experience.
- Create a Cupcake Tower: For a special occasion or party, arrange the Butterfinger Chocolate Cupcakes on a tiered cupcake stand to create an eye-catching display. This not only showcases your baking skills but also makes it convenient for guests to grab a cupcake.
- Serve with Ice Cream: Elevate the dessert experience by serving a scoop of vanilla ice cream alongside the cupcakes. The creamy texture of the ice cream complements the decadent flavors of the cupcakes, creating a delightful contrast.
- Customize with Personal Touches: Add personalized decorations such as colorful sprinkles, edible glitter, or themed cupcake toppers to make the presentation more festive and tailored to the occasion.
By following these serving suggestions, you can elevate the serving experience of your Butterfinger Chocolate Cupcakes and impress your family and friends with a delectable treat that is not only delicious but also visually appealing. Enjoy the delightful combination of rich chocolate, creamy frosting, and crunchy Butterfinger candy in every bite of these irresistible cupcakes.
Conclusion
Creating these Butterfinger Chocolate Cupcakes is a delightful experience that promises to impress your taste buds and guests alike. The careful preparation of each component, from the rich cupcake batter to the luscious frosting, ensures a delectable outcome. By following the provided steps and tips, you can easily master the art of making these indulgent treats. Whether enjoyed as a standalone dessert or paired with your favorite beverage, these cupcakes are sure to be a hit at any gathering. With the option to customize and garnish to your liking, you can add a personal touch to elevate the presentation and flavor. Prepare in advance to save time and savor the joy of sharing these irresistible Butterfinger Chocolate Cupcakes with your loved ones.