Okay, let me tell you about a super easy recipe I just love. Baked eggs in a muffin tin! Seriously, these are a lifesaver on busy mornings. But honestly? They’re great any time. Picture little egg nests, just for you, and you can jazz them up however you like.
Making these “Easy Baked Eggs in Muffin Tins” is just so simple. You might have seen fancy baked eggs on brunch menus, the kind cooked in little dishes with cream and herbs. Well, using a regular muffin tin makes it way easier for everyone! It’s quicker, you can make a big batch at once, and cleanup is a snap. This recipe here? It’s the basic one, the starting point for all those cool variations you see around. It’s all about enjoying a simple, perfectly baked egg. So, let’s get to it! I’ll show you how to make these little bites of sunshine.
Your Guide to Perfect Muffin Tin Eggs
Recipe Lowdown: Quick, Easy, and So Yum!
Let’s see what we’re getting into. Good news: it’s really straightforward!
- Prep and Cook Time: You’ll hardly break a sweat. It’s about 5 minutes to get things ready and then 14-17 minutes in the oven. That means you can have a whole batch ready in less than 25 minutes! Pretty cool, right?
- How Many and How to Change It: This recipe makes 12 baked eggs, using a standard 12-cup muffin tin. But guess what? It’s super easy to make more or less.
- Making Fewer: Got a 6-cup muffin pan? Or just don’t need a dozen? Easy peasy. Just use 6 eggs and cut the other stuff in half.Making More: Need a bunch? If you have more than one muffin tin, you can double it. Just make sure your oven isn’t too crowded so the air can move around.
| Servings | Eggs | About How Much Oil/Butter |
|---|---|---|
| 6 | 6 | ½ – 1 teaspoon |
| 12 | 12 | 1 – 2 teaspoons |
| 24 | 24 | 2 – 4 teaspoons |
| (Salt and pepper? That’s always up to you for each egg!) |
- How Hard Is It?: I’d say this is a Beginner Level 1 out of 5. Seriously, if you can crack an egg and turn on an oven, you’re all set. It’s almost impossible to mess up.
- What You’ll Need:
- Standard 12-cup Muffin Tin: A non-stick one is great, but any kind works if you grease it well.
- Other ideas: You can use silicone muffin liners inside your metal tin. They make getting the eggs out even easier, especially if your tin likes to stick. Or, use individual silicone muffin cups on a baking sheet.
- Oven (of course!)
- Small bowl or ramekin (optional but handy): Good for cracking eggs into before putting them in the tin. This helps if you want perfect yolks or want to make sure no sneaky shell bits get in. I always do this after one too many shell-fishing expeditions!
- Standard 12-cup Muffin Tin: A non-stick one is great, but any kind works if you grease it well.
- Make-Ahead Magic: This is where these eggs really shine. Perfect for meal prep! Learning “How to Bake Eggs in a Muffin Tin for Meal Prep Breakfast” will change your mornings. Bake a batch on Sunday, and bam! Quick, protein-packed breakfast for days.
What Goes In Them: The Simple Ingredients
The best part about this recipe is how simple it is. We’re starting with the basics, so good quality stuff is nice, but don’t worry too much!
Here’s what you’ll need:
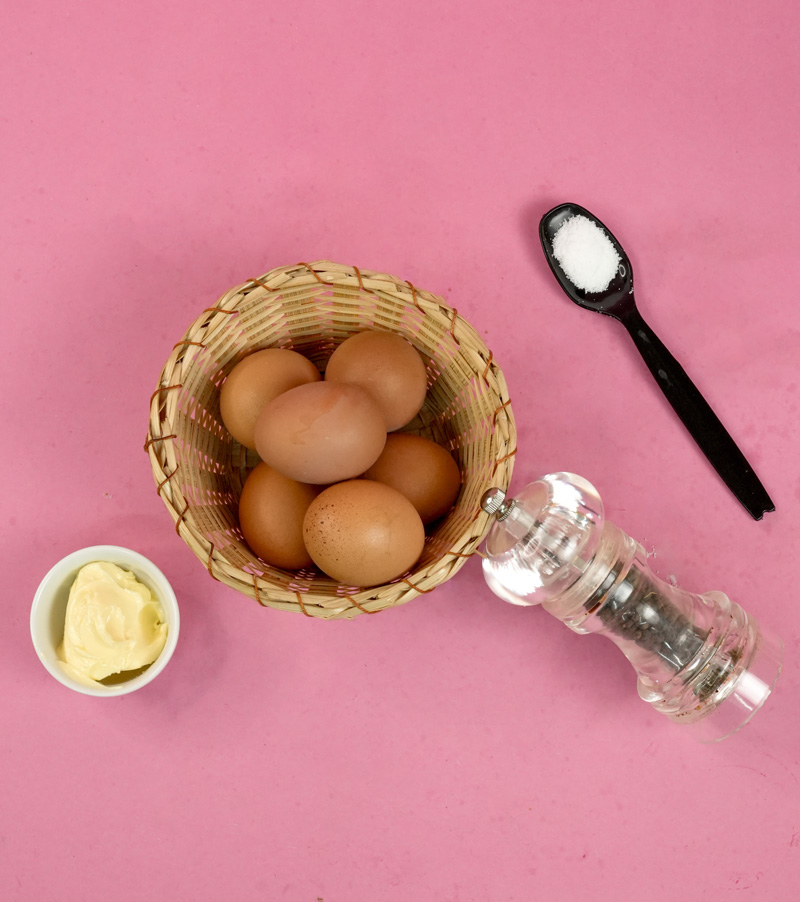
- 12 Large Eggs: Fresh eggs usually have yolks that sit up a bit nicer, but any good eggs will do. If you have time, let them sit out for about 30 minutes to get to room temperature. Sometimes this helps them cook a little more evenly, but it’s okay if you skip this.
- Oil or Butter to Grease the Pan: You’ll need about 1-2 teaspoons total.
- Cooking Spray: Super quick and usually gets an even coat.
- Melted Butter: Adds a nice, subtle rich taste. Use a pastry brush.
- Olive Oil or Other Plain Oil: A healthy choice. Use a paper towel or pastry brush to spread it.
- Salt to Taste: A little pinch for each egg is a good start. I love using flaky sea salt if I’m feeling a bit fancy – it gives a nice little crunch!
- Freshly Ground Black Pepper to Taste: Again, a little sprinkle on each egg. Trust me, freshly ground pepper tastes so much better than the pre-ground stuff.
That’s it! For real. This basic “eggs in oven muffin tins” recipe is all about letting the egg be the star.
Step-by-Step: How to Make Perfect Muffin Tin Eggs
Wake Up Your Oven: Preheat to 350°F (175°C)
Alright, first things first! Let’s get that oven warming up. Think of it like the oven is doing a little warm-up stretch. We want it at a steady 350°F (or 175°C). Why? Because this steady heat means your eggs cook evenly as soon as they go in. No sitting in a cold oven that’s slowly heating up – that can make them cook weird. While the oven is getting ready – most will beep or show you when it’s hot enough – you can grab your ingredients and your trusty muffin tin. And make sure one of your oven racks is in the middle. That’s usually the best spot for even baking. You might hear the oven humming or feel the warmth – that means it’s getting there!
Super Important Prep: Grease That Muffin Pan Well!
Okay, this step seems small, but believe me, it’s a game-changer for getting your eggs out nicely. Eggs, bless their hearts, love to stick. So, we need to make each muffin cup super slick. Grab your standard 12-cup muffin tin. A non-stick one is great, but even then, a little extra grease is like an insurance policy. I learned this the hard way once – scrubbing eggs off a pan is not my idea of fun!
- Using oil or melted butter (Mmm, butter adds such a nice flavor!): Pour a little bit, maybe half a teaspoon, into a small dish. Dip a pastry brush or even a folded paper towel into it. Then, gently brush the inside of each muffin cup. Don’t just do the bottom; get all the way up the sides, right to the top. You want a thin, shiny coat, not a puddle.
- Using cooking spray (So easy!): Hold the can about 6 to 8 inches from the tin. Give each cup a light, even spray, bottom and sides. You’ll see a fine mist – perfect.
The idea is to cover it all, but not too much. Too little grease, and you’ll be fighting to get your eggs out. Too much, and the edges might get a bit too fried and oily, and we want a nice bake. So, take a peek into each cup and make sure it looks ready.
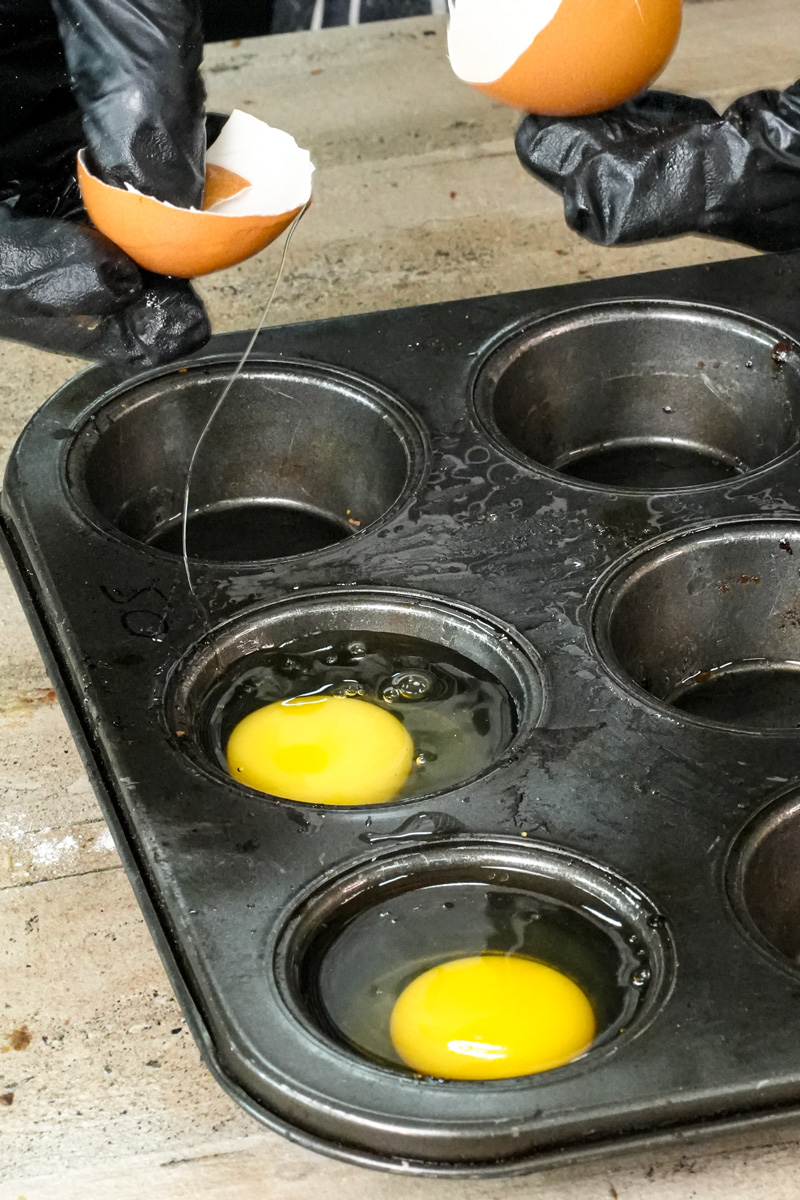
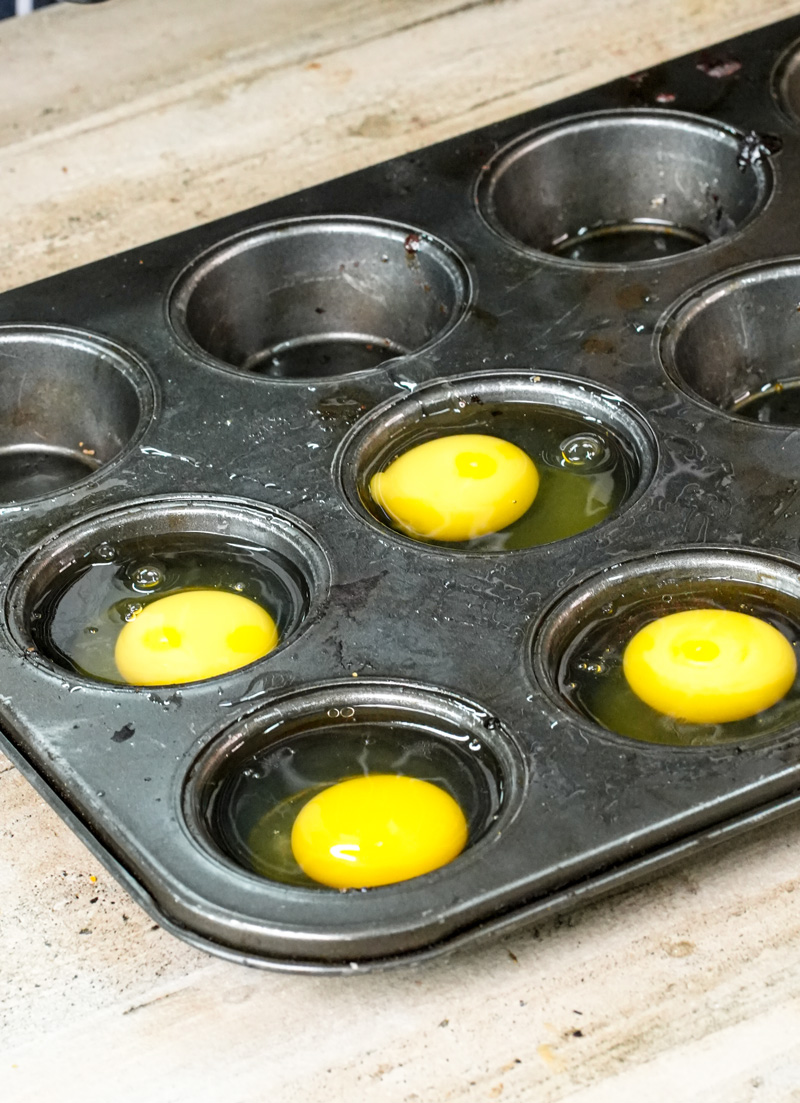
The Star of the Show: Cracking Your Eggs!
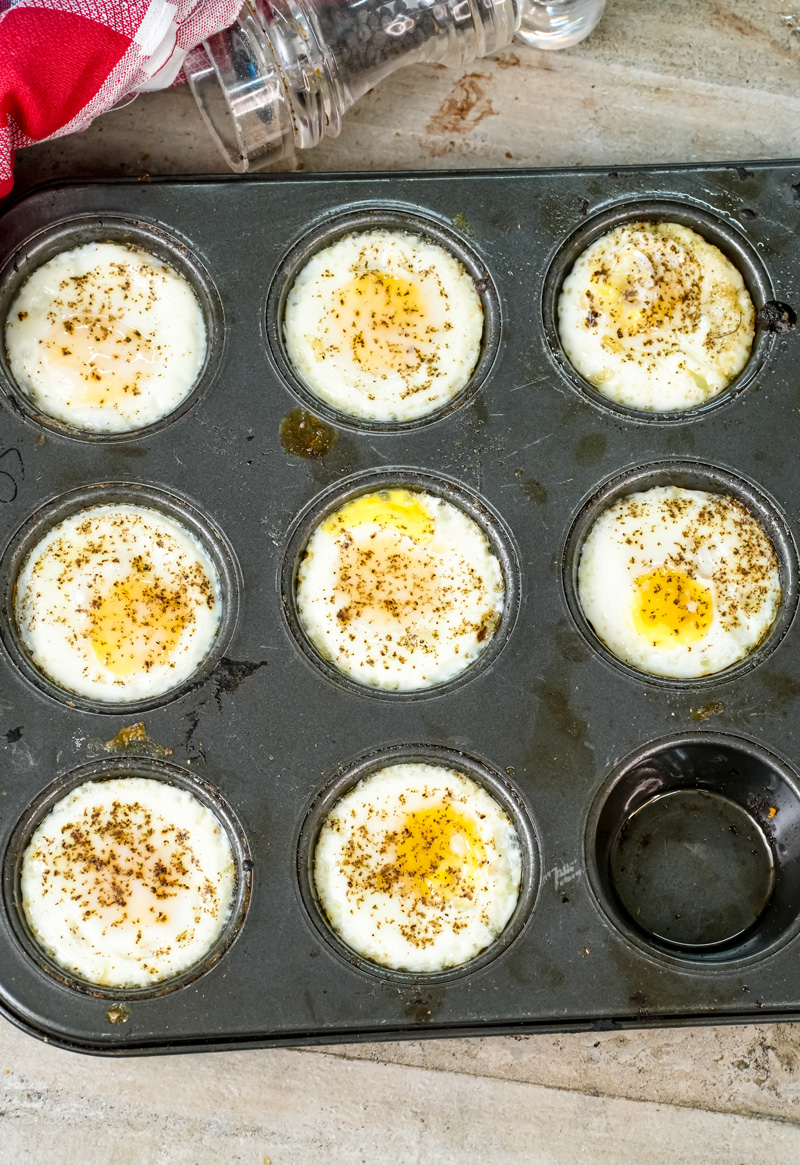
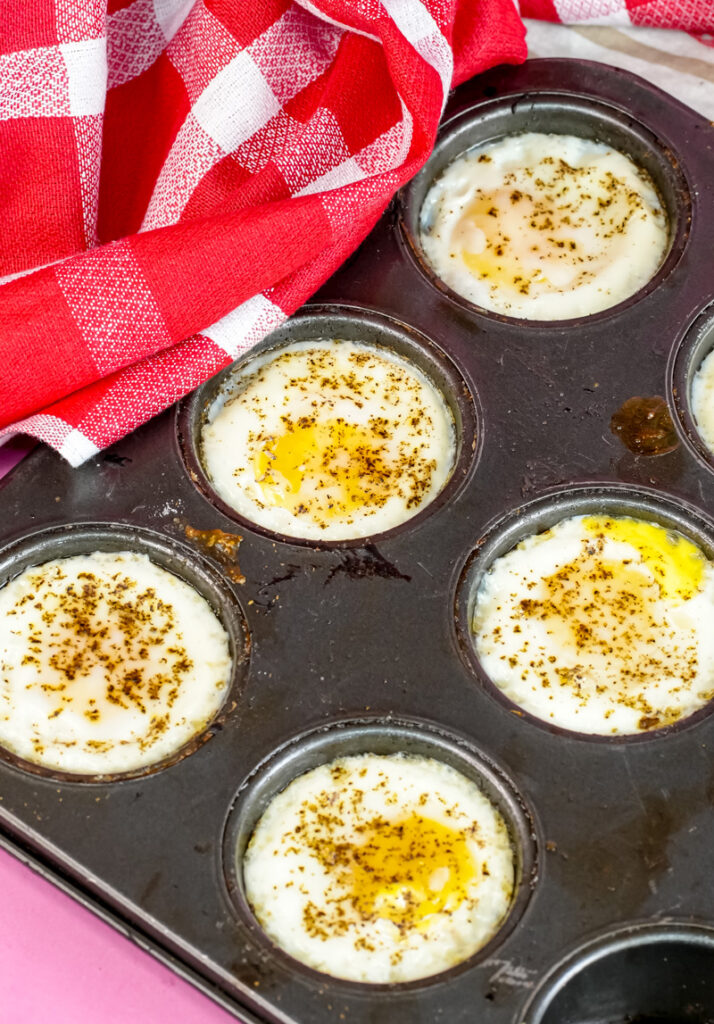
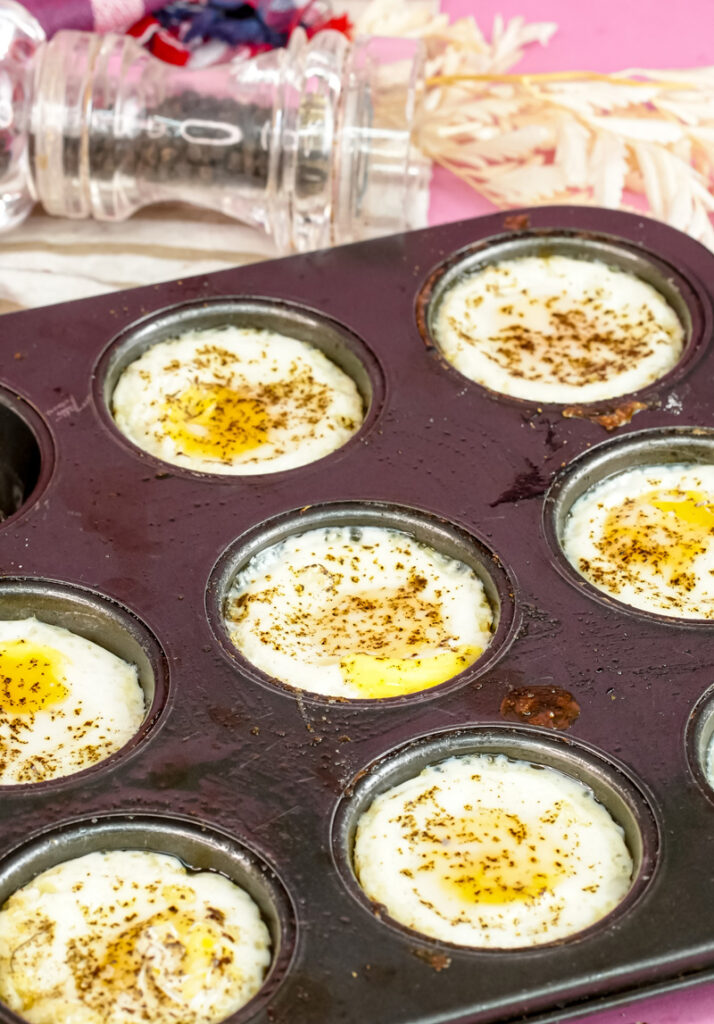
Muffin tin prepped? Oven hot? Time for the eggs! Gently crack one large egg into each of the 12 greased muffin spots.
- Here’s a little tip I always use, especially if I want those yolks looking perfect or if I’m having a clumsy day with shells (it happens to all of us!): Crack each egg into a small, separate bowl first. This way, you can check for any tiny bits of shell. Easy to get out now! Yolk look good? Great! Then, just gently slide the egg from the bowl into the muffin cup. This also helps if you break a yolk by accident and you really want them all whole; you can save that one for scrambled eggs later.
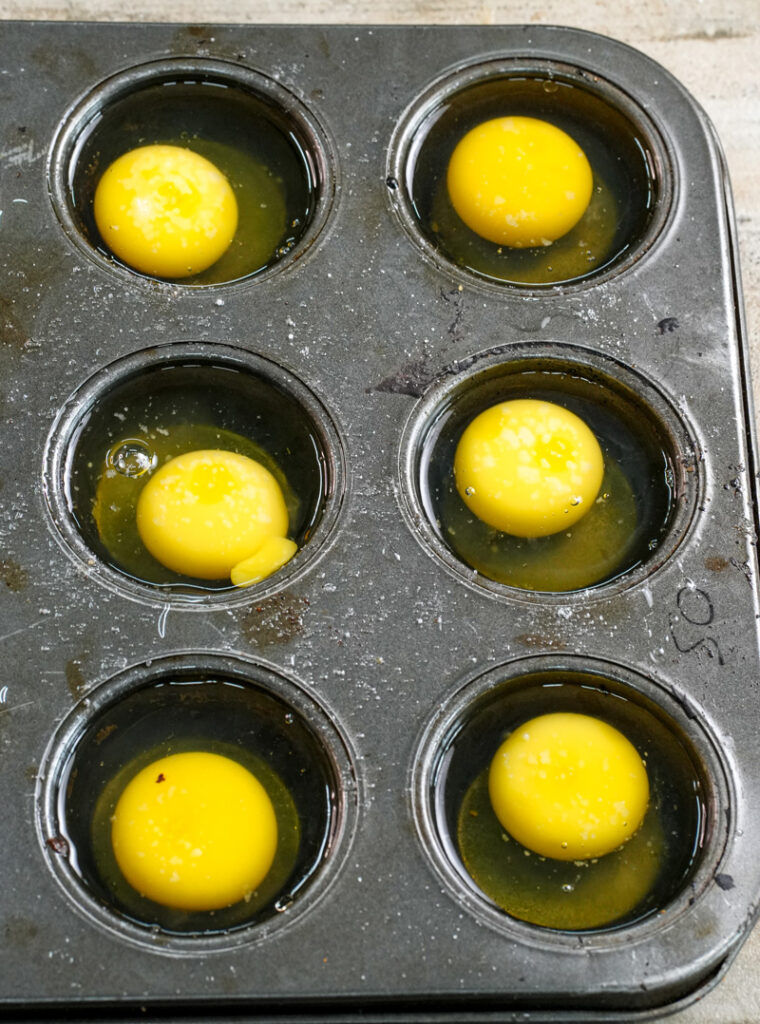
- Try to get the egg in the middle of the cup. The yolks will settle. You’re making 12 little pools of egg, ready to be baked. Don’t stress if they don’t all look exactly the same; that’s part of the homemade charm!
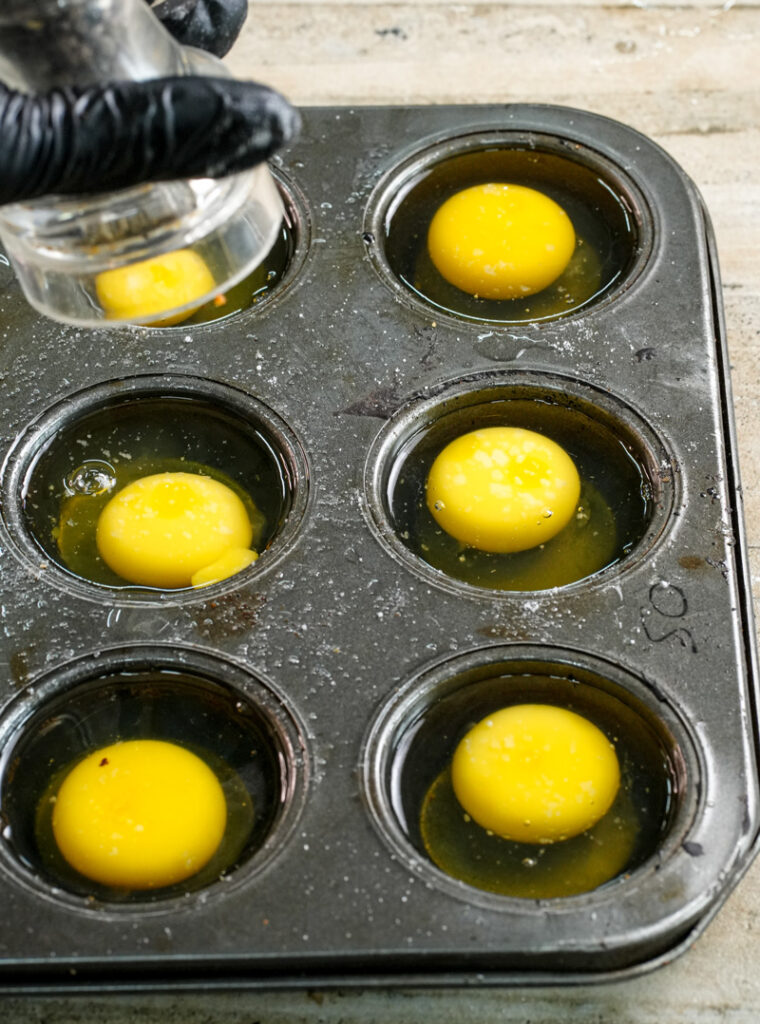
A Little Bit of Flavor: Season Them Up!
Now that your eggs are chilling in their cups, let’s make them even tastier with some seasoning. This is where you can start making them your own. We’re keeping it simple with salt and freshly ground black pepper.
- Sprinkle a little salt over each egg. Think about how you like your regular fried or scrambled eggs. If you’re using fine salt, a tiny pinch is good. If you have coarser kosher salt or flaky sea salt (my favorite for that little crunch!), you can use a bit more.
- Then, a few twists of freshly ground black pepper over each one. The smell of fresh pepper is just so much better!
Seasoning before baking lets the flavors sink in while they cook. You can always add a bit more salt later if you need to, so it’s better to go a little light now. Give each egg a little sprinkle – it’s like a tiny flavor hug before they go into the warm oven.
Into the Oven: Bake ‘Em How You Like ‘Em!
Here we go! Carefully, using oven mitts, put your egg-filled muffin tin into your preheated 350°F (175°C) oven. Put it on that middle rack we talked about. Now, the baking time is up to you and how you like your yolks. It’ll be somewhere between 14-17 minutes.
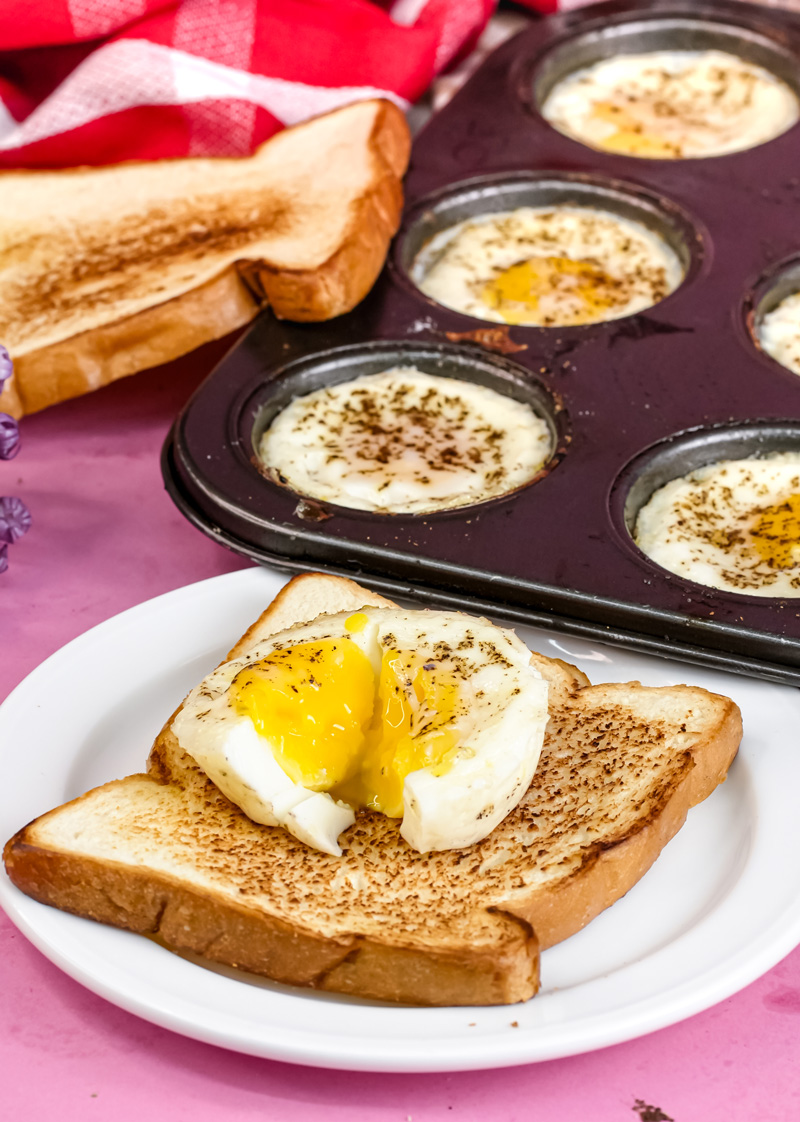
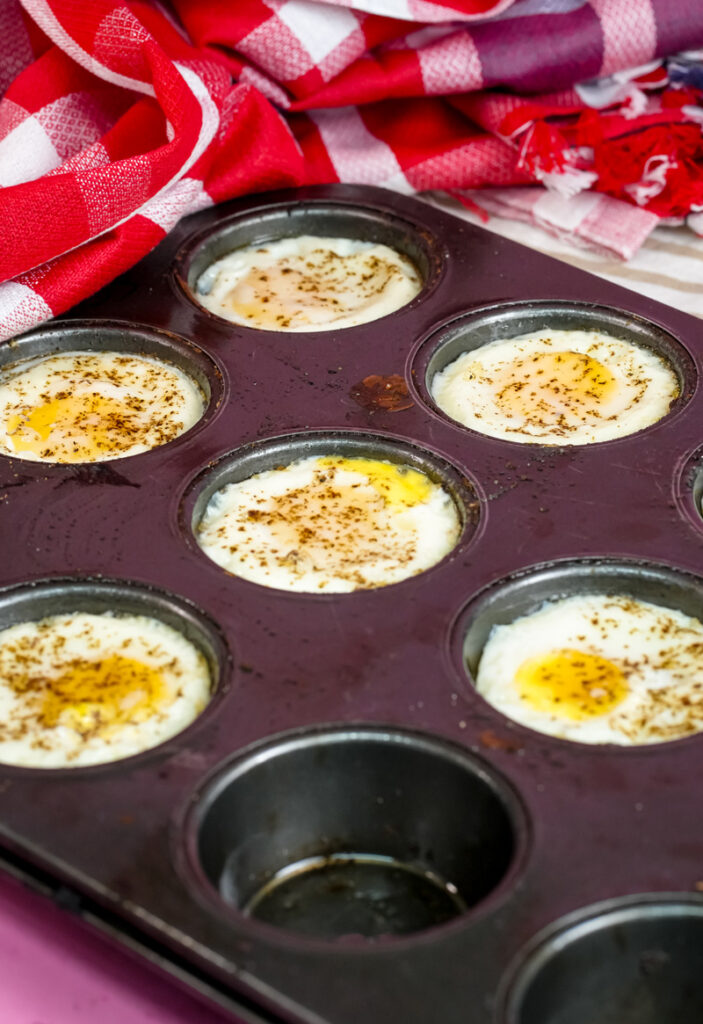
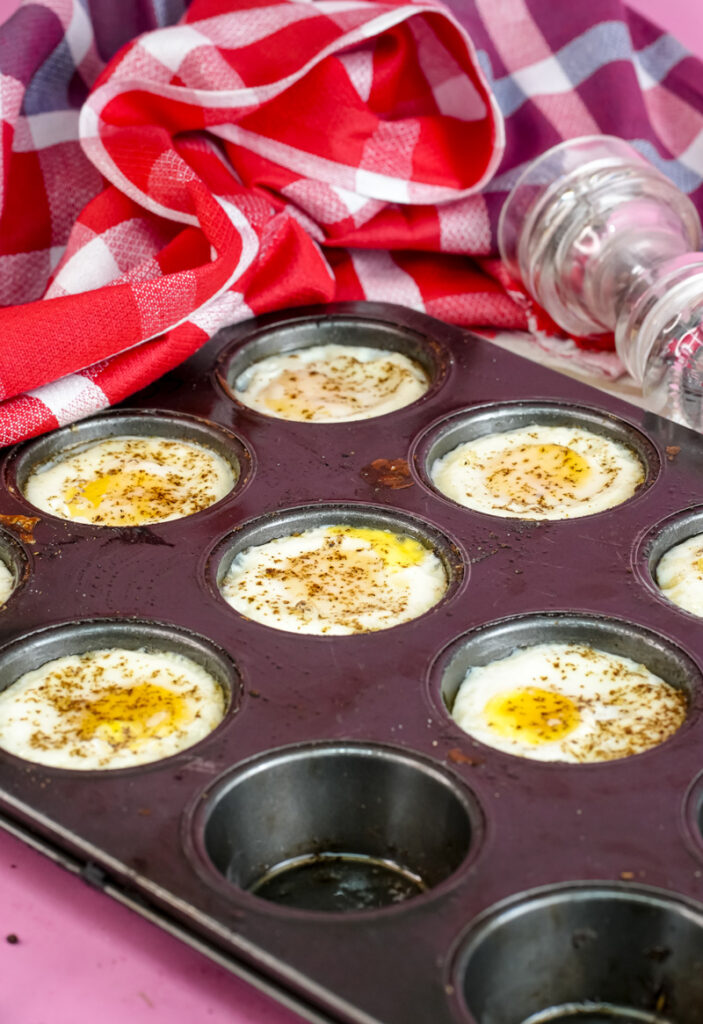
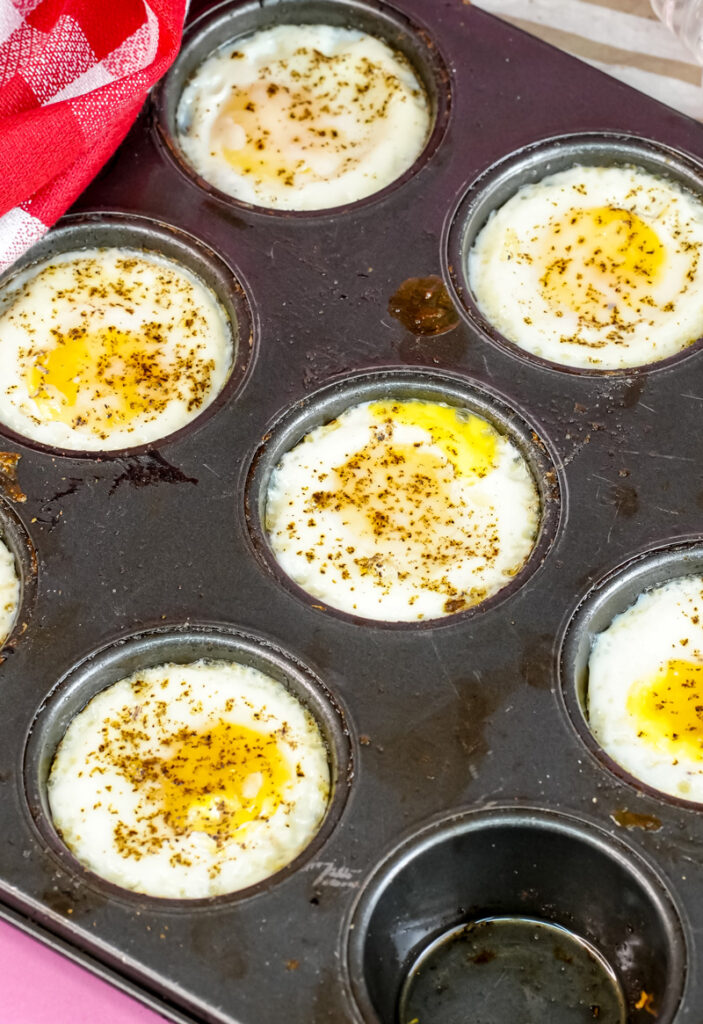
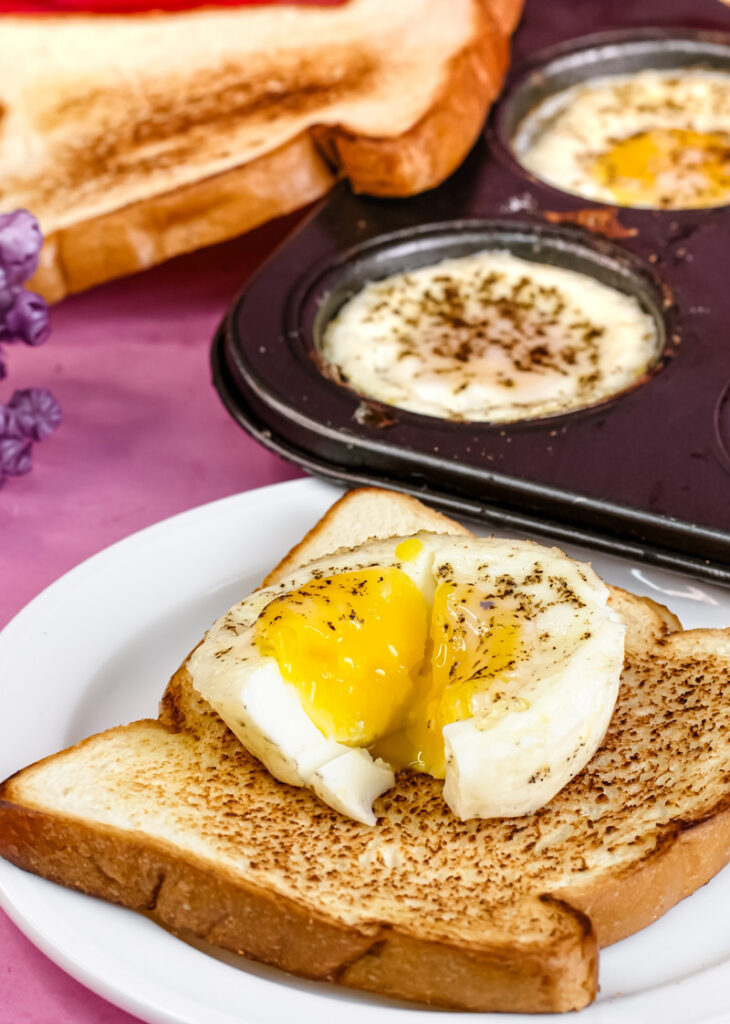
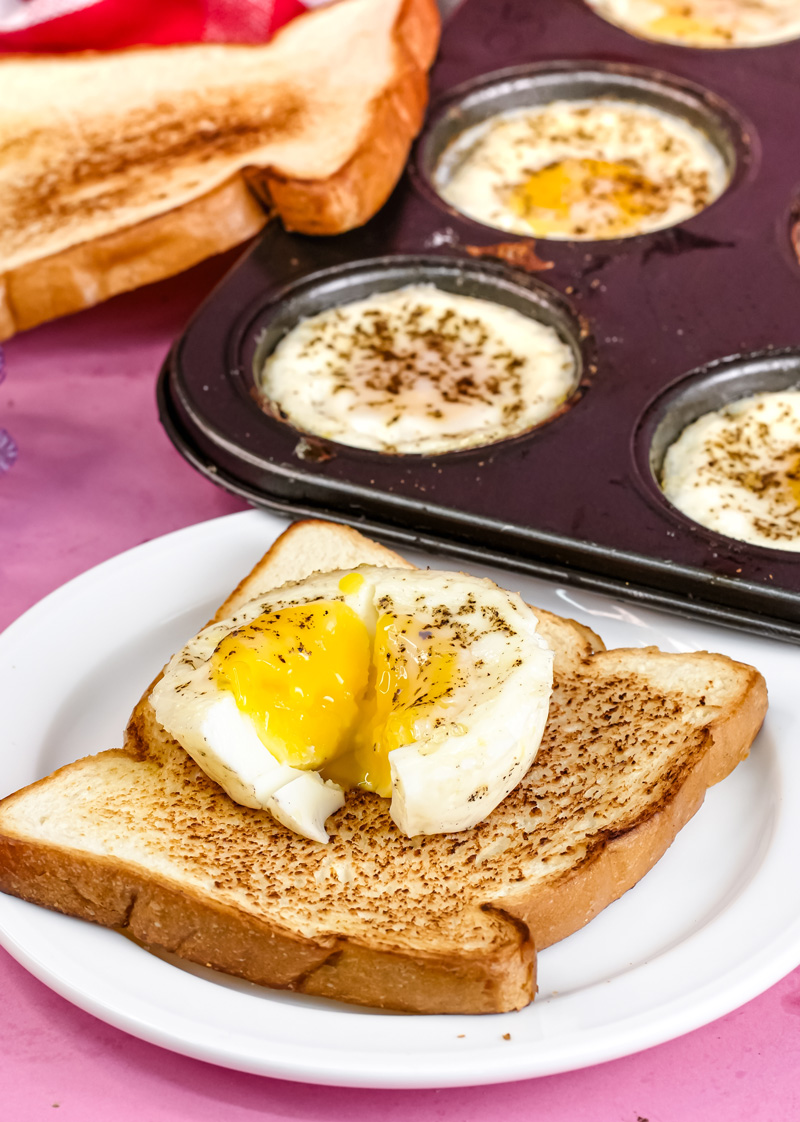
- For Runny Yolks (14 Minutes, just like you wanted!): Love a yolk that oozes out like liquid gold? Perfect for dipping toast! Then 14 minutes is your sweet spot. The egg whites will be totally white and set – no jiggly, clear bits. If you gently poked one, it would feel firm. The yolks will still look pretty shiny and will wobble a bit if you gently shake the pan.
- For Jammy, Soft Yolks (Around 15-16 Minutes): This is how I like mine! The whites will be perfectly firm. The yolks will be set around the edges but still have a wonderfully soft, gooey, jam-like center. They’ll look a bit less shiny than runny yolks and won’t jiggle as much.
- For Fully Cooked, Firm Yolks (17+ Minutes): If you like your yolks cooked all the way through, kind of like a hard-boiled egg (but with a much softer white!), then let them bake a bit longer. The yolks will look more matte and will be firm.
- Look and See: Keep an eye on them through the oven door if you can. You’ll see the whites go from clear to cloudy, then to a nice solid white. Your kitchen will start to smell amazing, like baking eggs – so good! Try not to open the oven door too much, because that lets the heat out and can mess with your cooking time. A quick peek is fine. If you give the pan a super gentle nudge (with an oven mitt!), how much the whites jiggle tells you if they’re done. No jiggle in the whites means they’re set!
The Big Finish: Rest and Take ‘Em Out!
Once your timer goes off and a look in the oven shows your eggs are just how you like them, carefully take the muffin tin out of the oven with your mitts. Put it on something that won’t get burned, like a cooling rack. Now, a very important little pause: let the eggs rest in the tin for about 1 to 2 minutes. This little rest lets them finish cooking just a tiny bit more (it’s called carryover cooking). More importantly, it helps them firm up so they’re easier to get out without breaking.
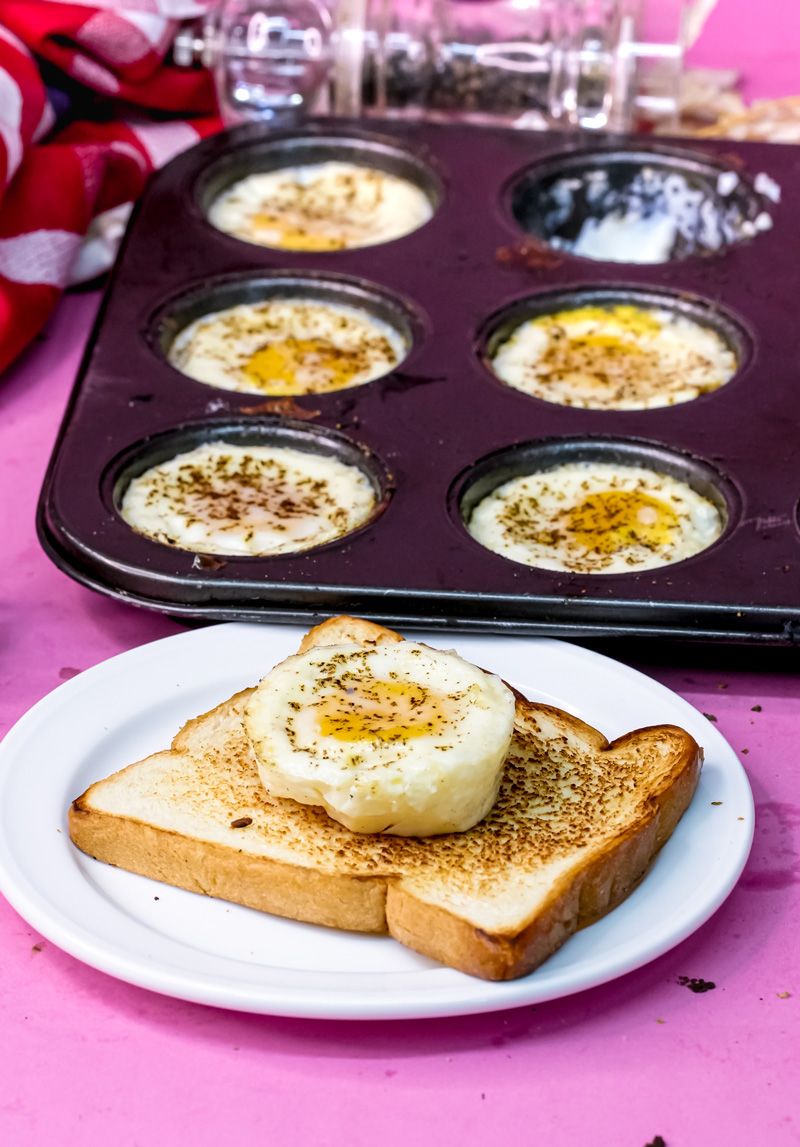
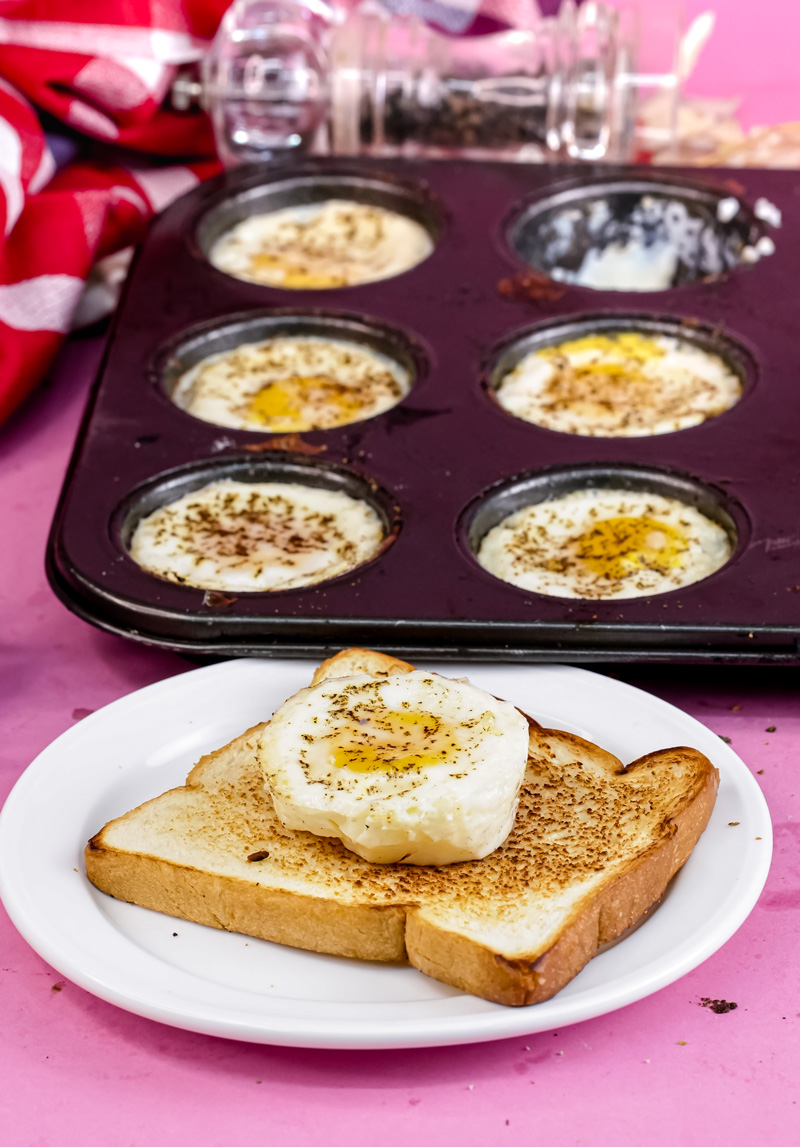
- To get your beautiful baked eggs out, take a thin silicone spatula, an offset spatula, or even just a butter knife. Gently slide it all the way around the edge of one egg, between the egg and the muffin cup, to loosen it. Then, carefully scoop or lift the egg out. If you greased your pan well (good job!), they should pop out pretty easily.
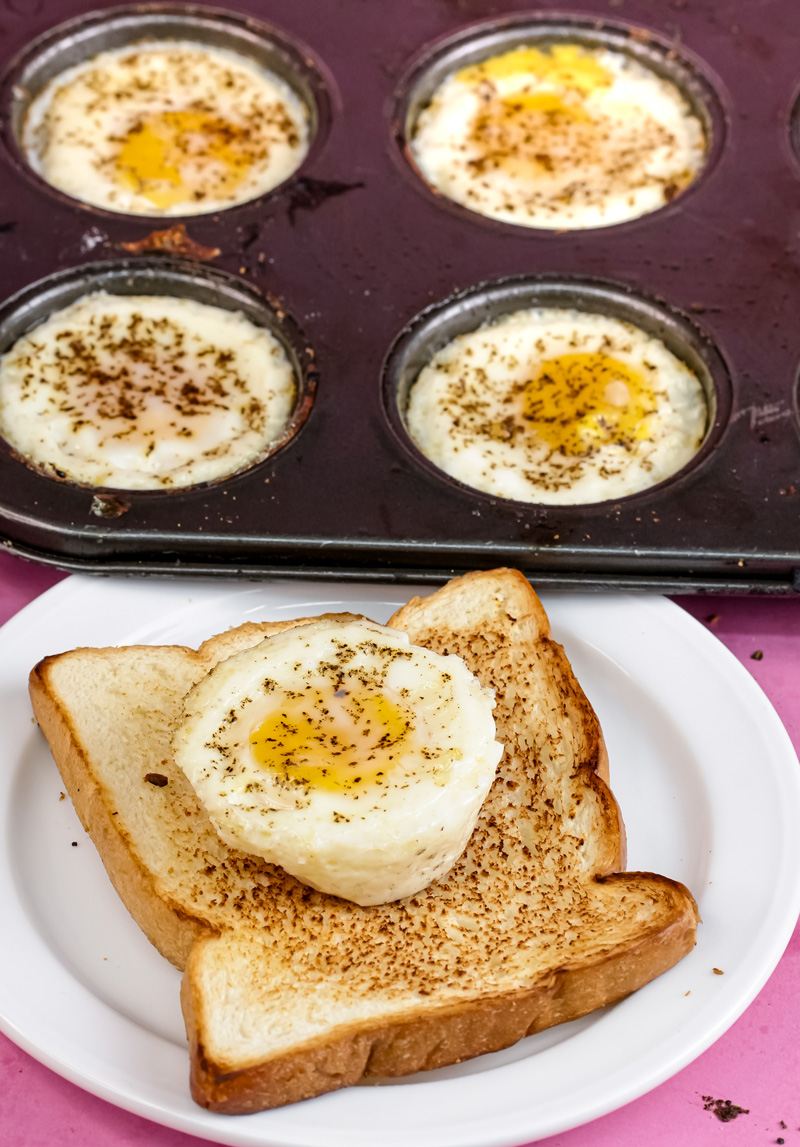
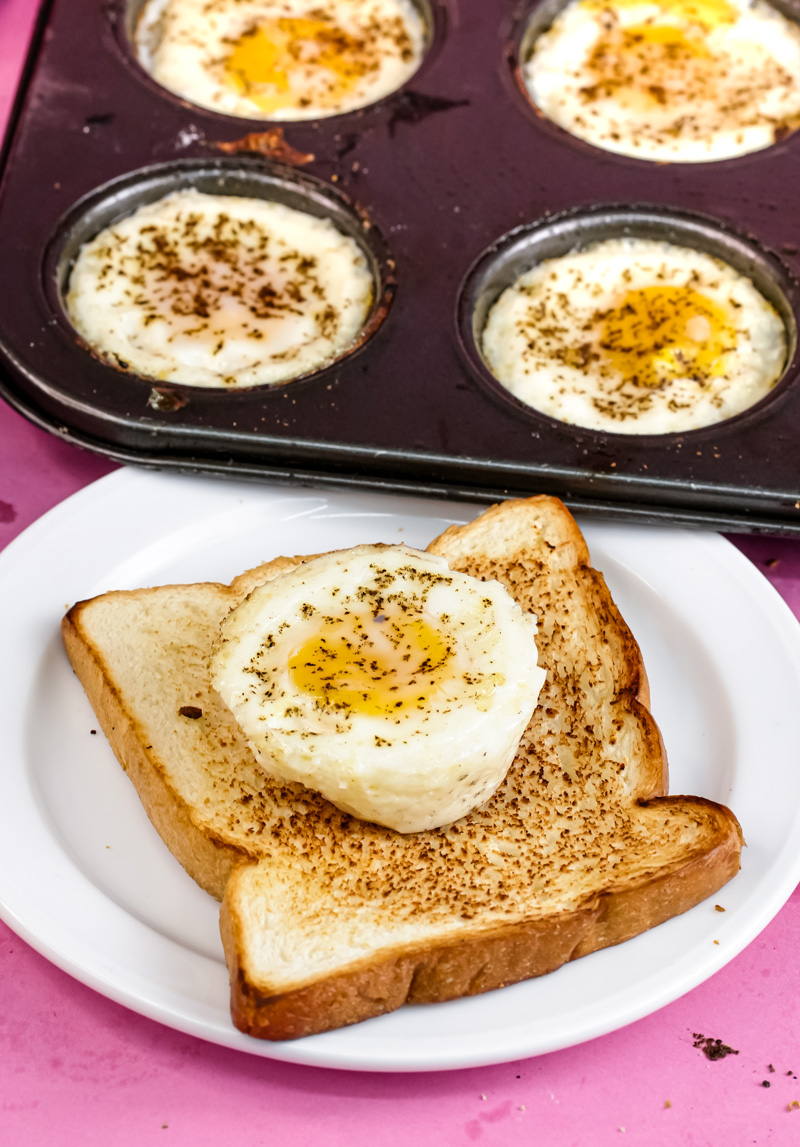
- Put them on a plate, on toast, or right into your meal prep containers.
And that’s it! Twelve perfectly baked, super simple, and totally delicious eggs. All thanks to your muffin tin and a little kitchen magic. They should look fluffy, feel tender, and smell wonderful.
Mix It Up: Fun Ways to Customize Your Eggs!
Now, this is where you can get really creative! That simple recipe is just the start. Think of “How to Bake Eggs in a Muffin Tin” like a basic recipe, and the extras are your chance to have fun.
- Cheese, Glorious Cheese!
- Sprinkle a tablespoon of shredded cheddar, Monterey Jack, mozzarella, Gruyère, or crumbled feta over each egg before baking. Parmesan is amazing too!
- For everyday: A good sharp cheddar does the trick.
- Feeling fancy?: Try goat cheese crumbles with a little fresh thyme.
- Veggies Galore:
- Quick Adds: Finely chopped green onions, chives, or fresh spinach leaves can go right in with the raw egg.
- Cook These First: For chunkier veggies like diced bell peppers (any color!), onions, mushrooms, or broccoli bits, it’s best to cook them in a pan for a few minutes until they’re a little soft. Then add them to the muffin cups under the egg or on top. This stops them from making the eggs watery. I’ve found this really makes them tastier!
- What’s in Season?: Asparagus in spring, diced zucchini in summer, or roasted butternut squash in the fall – yum!
- For Meat Fans:
- Add a tablespoon of cooked crumbled bacon, sausage, diced ham, or even shredded cooked chicken to each cup before the egg.
- Herby Goodness:
- Fresh herbs like parsley, dill, or cilantro, chopped up and sprinkled on top after baking, add a fresh taste. Dried herbs like oregano or Italian seasoning can be mixed in with the salt and pepper before baking.
- Spice Things Up!
- A pinch of red pepper flakes for a little heat.
- A dash of your favorite hot sauce swirled in or served on the side.
- Smoked paprika adds a nice color and smoky flavor.
- Special Diets:
- Gluten-Free: Good news! This recipe is already gluten-free.
- Dairy-Free: Just make sure to use oil for greasing, and skip the cheese (or use a dairy-free kind).
- Vegan: Well, these are egg cups! For a vegan muffin tin breakfast, you’d need a different recipe, maybe with tofu scramble or a chickpea flour batter.
Here’s a quick idea table to get you started:
| Flavor Idea | What to Add (Under or Over Egg) |
|---|---|
| Classic Diner | Cooked onions & peppers, shredded cheddar, cooked bacon bits |
| Mediterranean | Spinach, crumbled feta, chopped sun-dried tomatoes, oregano |
| Tex-Mex | Cooked bell peppers & onions, black beans, corn, Monterey Jack, cilantro |
| Green Power | Chopped spinach, green onions, parsley, a bit of pesto on top |
Just remember, if you add a lot of cold stuff, you might need to bake them a minute or two longer.
Serving & Storing: Enjoy Now, Save for Later!
You’ve totally got this “Easy Baked Eggs in Muffin Tins” thing down. So how do you enjoy these little guys?

- How to Serve Them:
- Just put them on a plate for a simple, nice breakfast.
- Put one or two on top of buttered toast or an English muffin. So good!
- Add them to a breakfast bowl with avocado, salsa, and some greens.
- Make mini breakfast sandwiches with small biscuits or slider buns.
- What Goes Well With Them:
- Crispy bacon or sausage.
- Fresh fruit salad.
- Sliced avocado.
- Hash browns or roasted breakfast potatoes.
- A simple side salad if you’re having them for a light lunch.
- Storing Them:
- Let them cool down all the way. Then, put the baked eggs in an airtight container.
- They’ll stay good in the fridge for 3-4 days.
- Reheating Tips: These are awesome for “How to Bake Eggs in a Muffin Tin for Meal Prep Breakfast” because they reheat so well!
- Microwave: Put them on a microwave-safe plate and heat for 20-40 seconds for each egg, or until they’re warm. Don’t overdo it, or they can get a bit rubbery. Nobody wants that!
- Toaster Oven/Oven: Reheat them at 300°F (150°C) for 5-10 minutes until warm. This way usually keeps their texture the best.
- Eat Cold: Some people even like them cold, right out of the fridge!
- Making Ahead and Freezing:
- Make-Ahead: Bake a whole batch at the start of the week. Breakfast sorted!
- Freezing: Yep, you can freeze them!
- Let the baked eggs cool completely.
- You can wrap each one in plastic wrap or beeswax wraps. Then put them in a freezer-safe bag or container. Or, freeze them on a baking sheet until they’re solid, then move them to a bag. This stops them from sticking together.
- They can be frozen for up to 2-3 months.
- To Reheat from Frozen: Let them thaw in the fridge overnight and reheat like usual. Or, microwave them straight from frozen, just add a little more time. The texture might be a tiny bit different after freezing, but still really good!
There you have it! Everything you need to know to make the tastiest and most versatile baked eggs in a muffin tin. I hope you give this super simple recipe a try and have fun making it your own. Happy baking!
PrintBaked Eggs in a Muffin Tin

Say hello to your new breakfast (or anytime!) favorite! These muffin tin eggs are so simple to make and even easier to customize. Think perfect little portions of eggy goodness, ready in a flash. Great for busy mornings or prepping ahead!
- Prep Time: 5 minutes
- Cook Time: 14-17 minutes (your choice of yolk!)
- Total Time: About 20-22 minutes
- Yield: 12 individual eggs 1x
- Category: Breakfast, Brunch, Meal Prep
- Cuisine: American / Versatile
Ingredients
- 12 Large Eggs: Fresh is great, but any will do!
- 1–2 teaspoons Oil or Butter: For greasing that tin. Don’t skip this!
- Salt: To your taste. A little pinch per egg works wonders.
- Freshly Ground Black Pepper: Again, to your liking. Freshly ground really pops!
Instructions
- Oven On! First thing: get your oven heating up to 350°F (175°C). Pop a rack in the middle.
- Grease ‘Em Up! This is key, folks! Thoroughly grease each of the 12 cups in your muffin tin with oil or melted butter. Get the bottoms and all the way up the sides. Seriously, good greasing means happy egg removal.
- Egg Drop! Gently crack one egg into each greased muffin cup.
- Little tip: Crack eggs into a small bowl first to catch any sneaky shells, then pour into the tin. Works like a charm!
- Season ‘Em! Sprinkle each egg with a pinch of salt and a bit of freshly ground black pepper.
- Bake Time! Carefully slide that muffin tin into your hot oven. Now, how do you like your yolks?
- Runny & Dippy: Bake for about 14 minutes. The whites will be set, yolks gloriously runny.
- Jammy & Soft: Try 15-16 minutes. Whites firm, yolks soft and custardy in the center.
- Fully Cooked & Firm: Go for 17+ minutes. Yolks will be cooked through.
- Rest & Serve! Take the tin out and let the eggs rest right there for 1-2 minutes. This makes them easier to get out. Then, gently run a thin spatula or knife around each egg and lift it out. Enjoy!
Notes
- Serving Ideas: These are fab on their own! Or try them:
- On top of buttered toast or an English muffin.
- With a side of avocado and fresh fruit.
- Tucked into a breakfast sandwich.
- Tips & Tricks for Success:
- Grease well! Did I say that already? It’s that important for non-stick results.
- Customize! Feel free to get creative. Before baking, add a sprinkle of:
- Shredded cheese (cheddar, Monterey Jack)
- Cooked bacon bits or sausage crumbles
- Finely chopped veggies (spinach, chives, pre-cooked peppers/onions)
- Watch ’em close! Ovens vary, so keep an eye on your eggs the first time you make them to nail your perfect yolk.
- Storing & Reheating (Meal Prep Magic!):
- Fridge: Let them cool completely, then store in an airtight container in the fridge for 3-4 days.
- Reheating:
- Microwave: 20-40 seconds per egg. Quick and easy!
- Oven/Toaster Oven: 5-10 minutes at 300°F (150°C) helps keep the texture great.
- Freezing? Yep! Cool completely, wrap individually (or flash freeze on a tray then bag), and freeze for up to 2-3 months. Thaw in the fridge before reheating. Texture might change a tad, but still tasty!