Oh my goodness, are you ready to make some amazing applesauce muffins? Seriously, there’s nothing quite like a warm muffin fresh from the oven. Especially when it’s packed with healthy stuff like applesauce.
These aren’t just any muffins, though. They’re super easy to make and surprisingly light. I like to call them “healthy applesauce muffins,” and they’re perfect for, well, just about anything!

The Magic of Applesauce
Applesauce is like a secret weapon in baking. It makes things incredibly moist. So moist, in fact, that you can usually use less fat! Plus, it gives everything a subtle, fruity sweetness that’s totally irresistible.
Muffins have been around for a while. They started as simpler, less sweet “quick breads.” But using fruit purees like applesauce? That became popular as people wanted healthier and tastier options.
This recipe is special. It uses whole grains like whole wheat flour and rolled oats. The sugar is kept to a minimum. And it’s so versatile! I like to think it’s inspired by the idea of a treat that’s both good for you and delicious. Perfect for breakfast, lunchboxes, or a guilt-free snack.
Ready to get baking? Let’s do it!
Your Guide to Perfect Applesauce Muffins
Get ready for your kitchen to smell amazing! This Easy Applesauce Muffins Recipe is about to become a new favorite.

Recipe Overview: What to Expect
Before we start, let’s see what’s ahead. These muffins are seriously fun to make!
- Prep and Cook Time: Only about 10 minutes of prep! Can you believe it? Baking time is 16-20 minutes for mini muffins or 22-24 minutes for regular ones. Total time? About 26-35 minutes until you’re munching on a warm muffin.
- Servings and Scaling Tips: This recipe makes about 12 standard muffins or 24 mini muffins. Want more or less?
- Scaling Up or Down: Double it if you need more! Just make sure you have enough muffin tins. Or, halve the recipe for a smaller batch (6 standard or 12 mini muffins). Check out this handy guide:
| Ingredient | Half Batch Amount |
|---|---|
| Applesauce | ½ cup |
| Melted Butter/Oil | 1 tablespoon |
| Egg | (Use 1 small egg, or ½ of a beaten large egg approx. 2 tbsp) |
| Milk | ¼ cup |
| Vanilla Extract | ½ teaspoon |
| Whole Wheat Flour | ½ cup |
| Rolled Oats/AP Flour | ¼ cup oats (or ⅛ cup AP Flour) |
| Sugar/Maple Syrup | 2 tablespoons |
| Baking Powder | ½ teaspoon |
| Baking Soda | ¼ teaspoon |
| Cinnamon | ½ teaspoon |
| Salt | ⅛ teaspoon |
| Note on halving an egg: For the best texture in a half batch, you can lightly beat one large egg and then use approximately half of it (about 2 tablespoons). |

- Difficulty Level: Super easy. If you can stir stuff in a bowl, you can make these! Perfect for beginners or baking with kids.
- Equipment Needed: Nothing fancy needed!
- Mixing Bowl: A medium or large one.
- Muffin Pan: Mini (for 24) or standard (for 12).
- Substitute: Only have one standard pan? Bake in batches! No muffin pan at all? Try sturdy paper baking cups on a sheet. They might spread a bit, though.
- Measuring Cups and Spoons: Gotta be accurate!
- Whisk and Spatula: Whisk for wet, spatula for folding.
- Storage Containers: Keep those muffins fresh (if they last!).
- Make-Ahead/Meal Prep Options: These muffins are meal prep champions! Bake on the weekend, and you’re set for the week. They store and freeze great.
Ingredients: The Heart of Your Muffins
Let’s talk ingredients. Good stuff makes a difference, but this recipe is pretty forgiving.
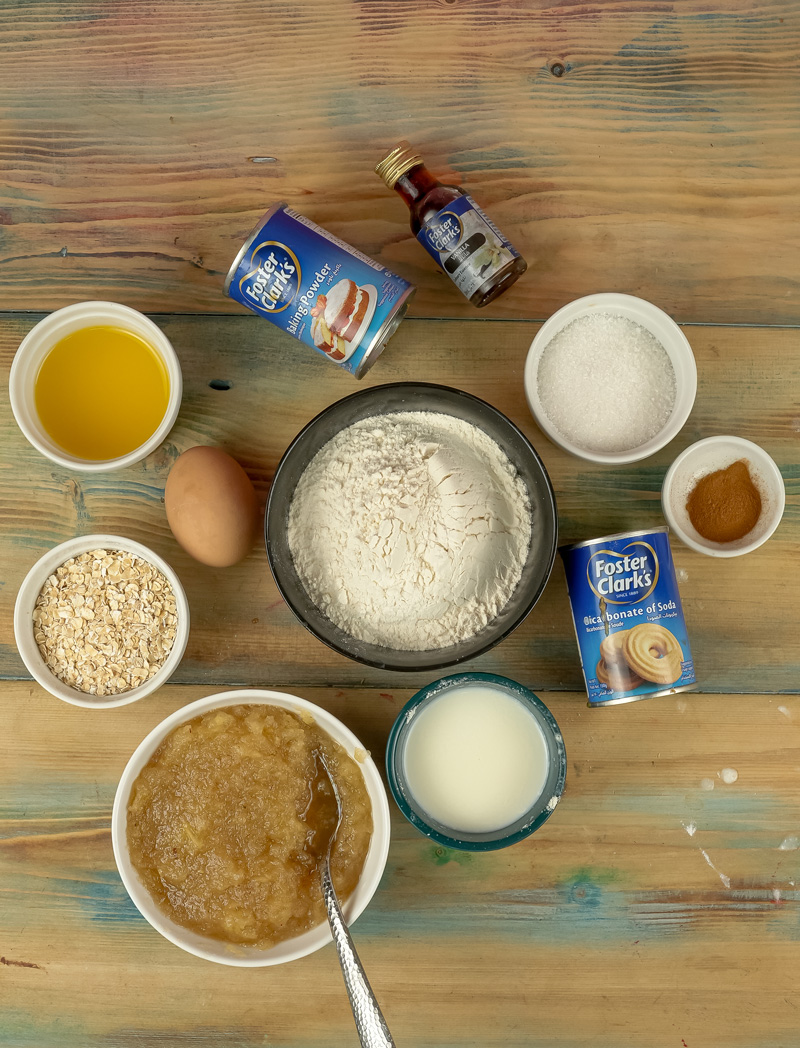
Here’s what you need:
- 1 cup unsweetened applesauce: The star! Unsweetened lets you control the sweetness. If you only have sweetened, use less sugar. Homemade? Even better! Make sure it’s room temperature.
- 2 tablespoons melted butter, slightly cooled (or neutral oil like canola): Butter adds richness. Oil works too, for dairy-free. If using butter, let it cool so it doesn’t cook the egg.
- 1 egg (lightly beaten): Binds everything together. Room temperature is best. Take it out of the fridge about 30 minutes before you start.
- ½ cup milk (dairy or unsweetened plain nondairy): Whole milk, almond, soy, oat – they all work! Unsweetened non-dairy keeps the flavor consistent. Room temperature is ideal.
- 1 teaspoon vanilla extract: That warm, bakery smell and flavor.
- 1 cup whole wheat flour: Nutty flavor and extra fiber for healthy applesauce muffins. For a lighter texture, use half whole wheat and half all-purpose.
- ½ cup rolled oats (or ¼ cup all-purpose flour): Chewy texture and more whole grains. No oats? Use an extra ¼ cup of all-purpose flour. Quick-cooking oats work too, but old-fashioned give more texture.
- ¼ cup sugar (or maple syrup): Not too much sugar! Granulated sugar is fine. Maple syrup is a natural option with extra flavor. Brown sugar would be yummy too, adding a hint of molasses.
- 1 teaspoon baking powder: Helps the muffins rise. Make sure it’s fresh!
- ½ teaspoon baking soda: Gives an extra lift. Check its freshness too.
- 1 teaspoon cinnamon: The perfect spice for apples! Adjust to your taste. Freshly ground is best.
- ¼ teaspoon salt: Enhances all the flavors. Don’t skip it!
Step-by-Step Method: Let’s Bake Together!
Preheat and Prep the Pan: Setting the Stage for Muffin Magic First things first: preheat that oven to 375°F (190°C). While it’s warming up, grease your muffin tin really well. Every little spot needs a coating. You can use butter, baking spray, or even oil. If you’re using paper liners, spray the inside of the liners too! This is helpful for these healthy applesauce muffins because they’re lower in fat and can stick. Pan prepped? Great! Let’s move on.
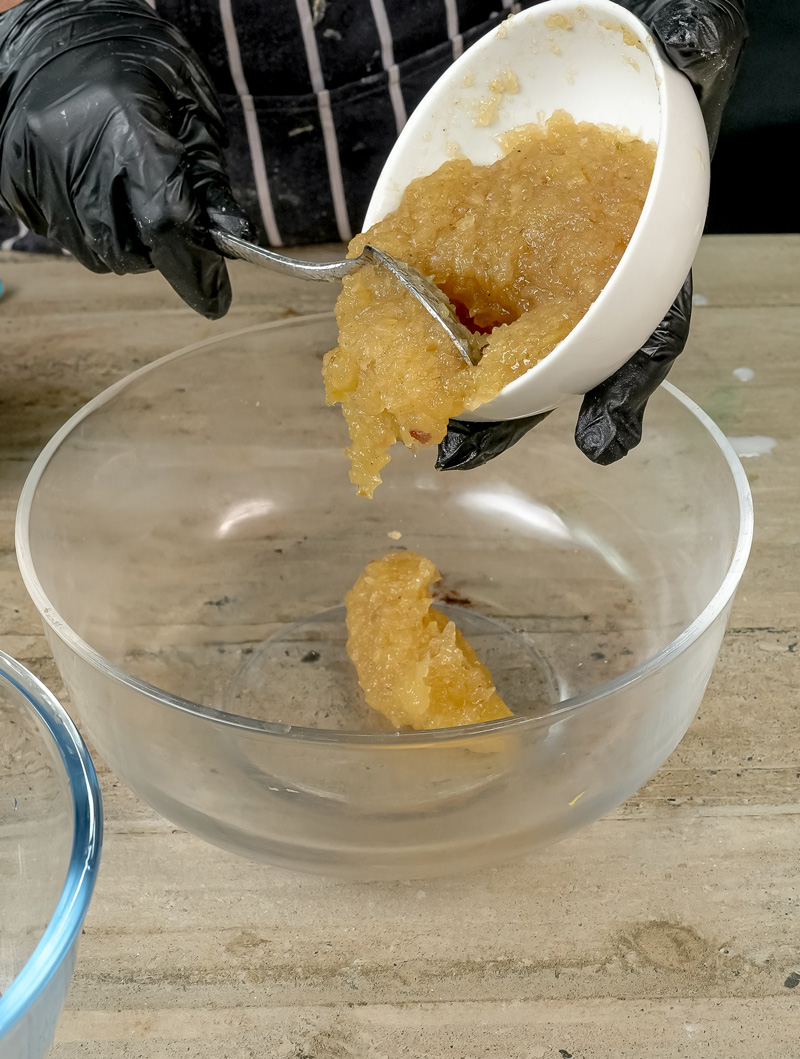
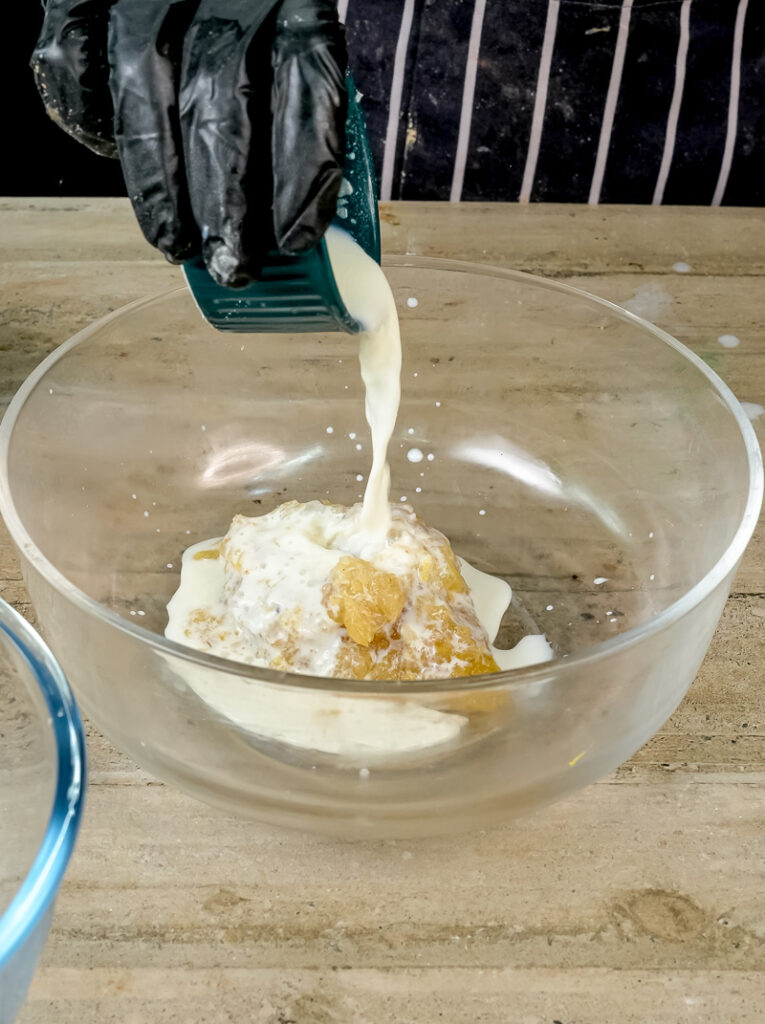
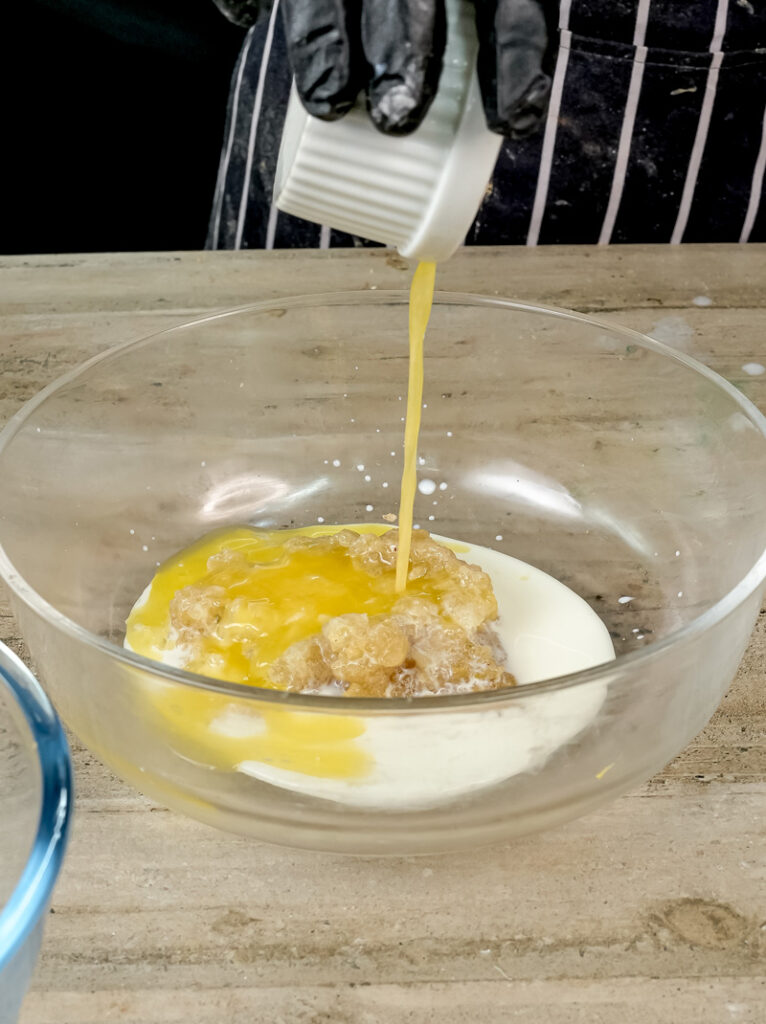
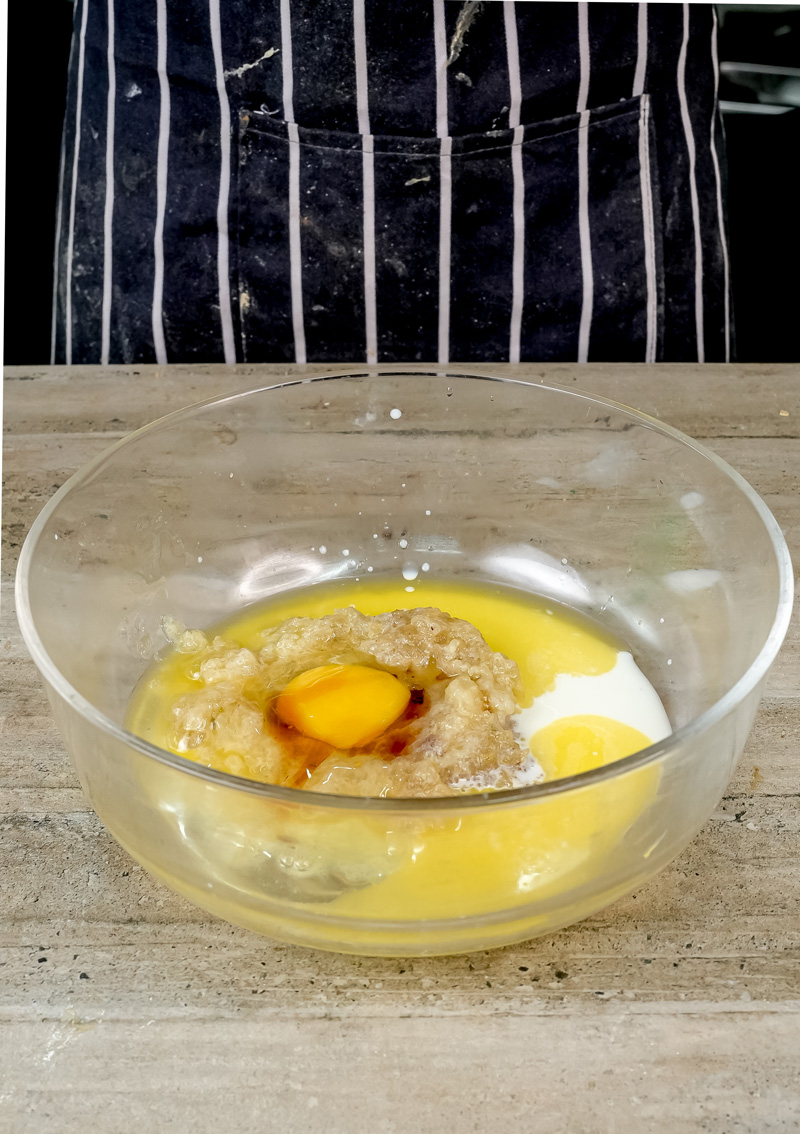
Combine the Wet Ingredients: Creating the Flavor Base Grab a medium mixing bowl. Pour in your 1 cup of unsweetened applesauce. Next, add the 2 tablespoons of melted (and cooled!) butter or oil. If the butter’s too hot, it’ll cook the egg! Speaking of which, add your lightly beaten egg. Room temperature is better. Then, add ½ cup of milk and 1 teaspoon of vanilla extract. Whisk everything together until it’s smooth and creamy. You should start smelling the applesauce and vanilla already!
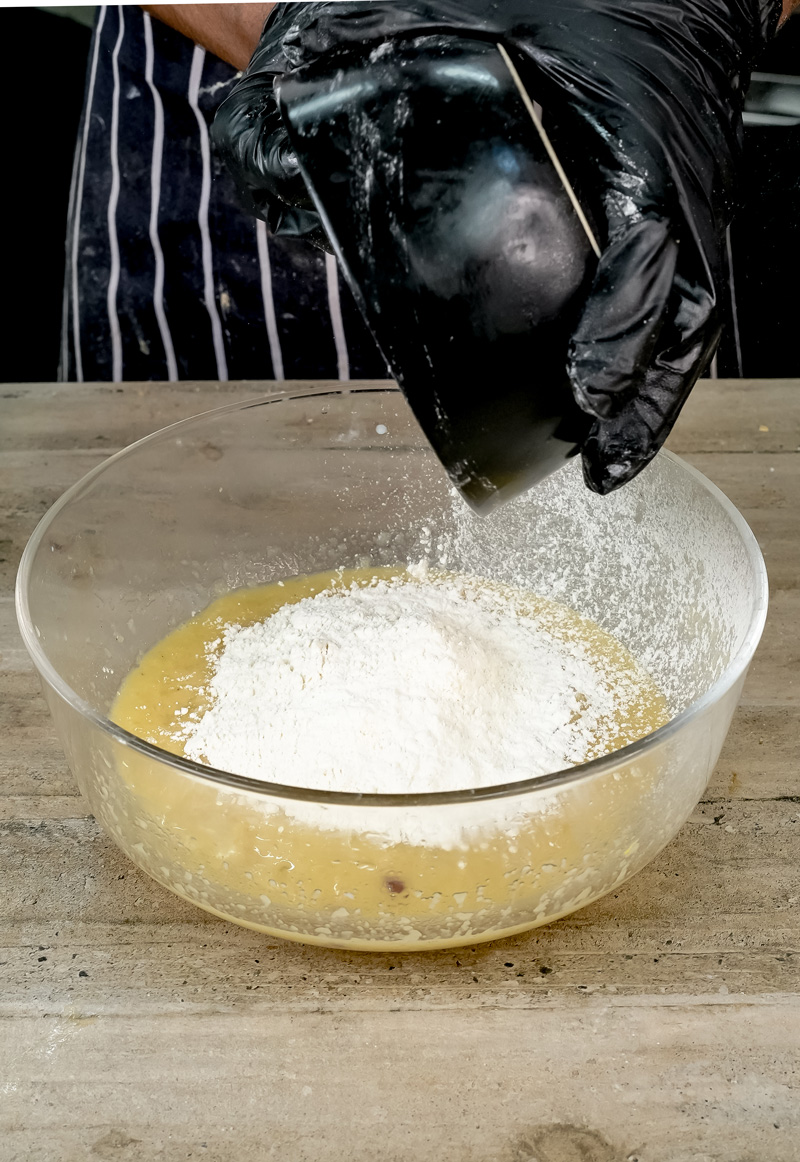
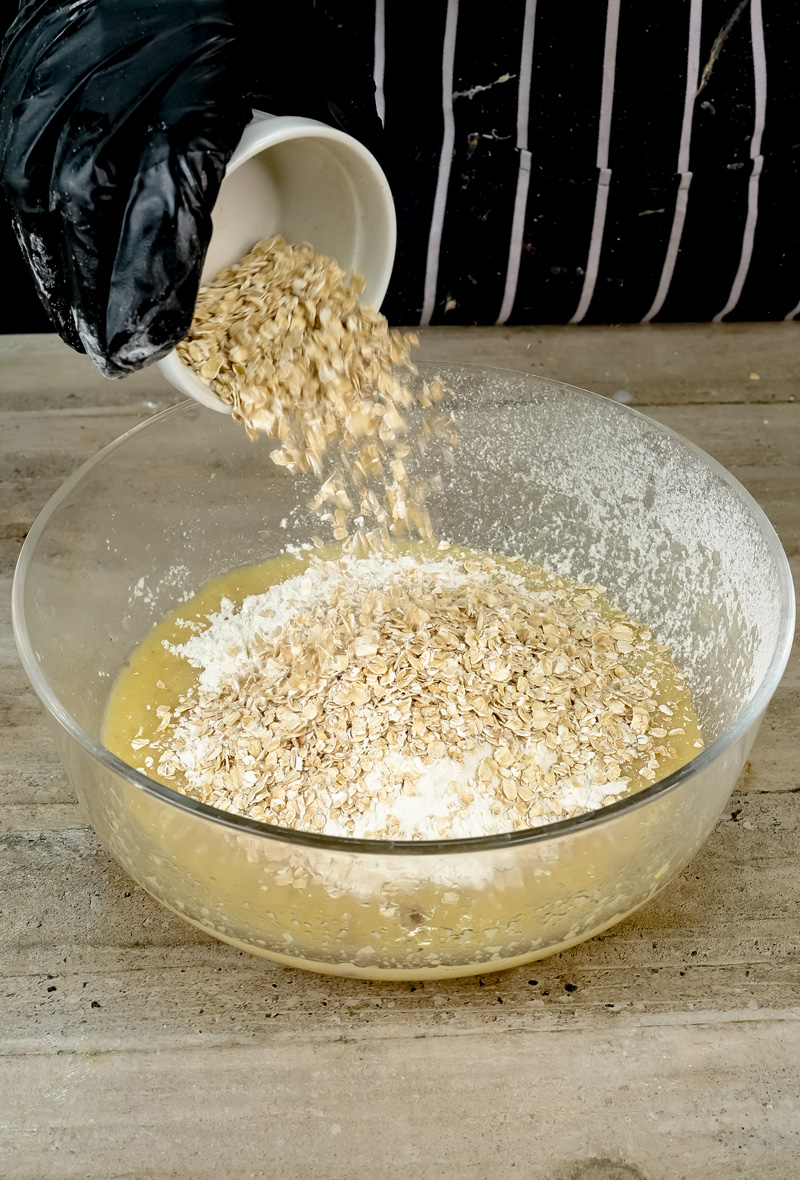
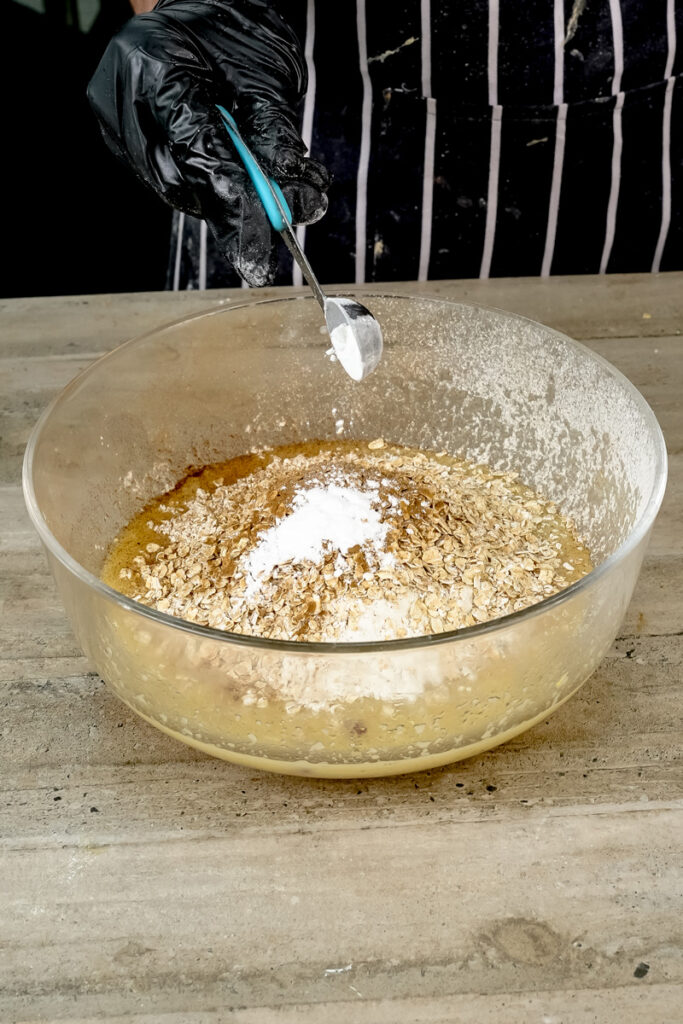
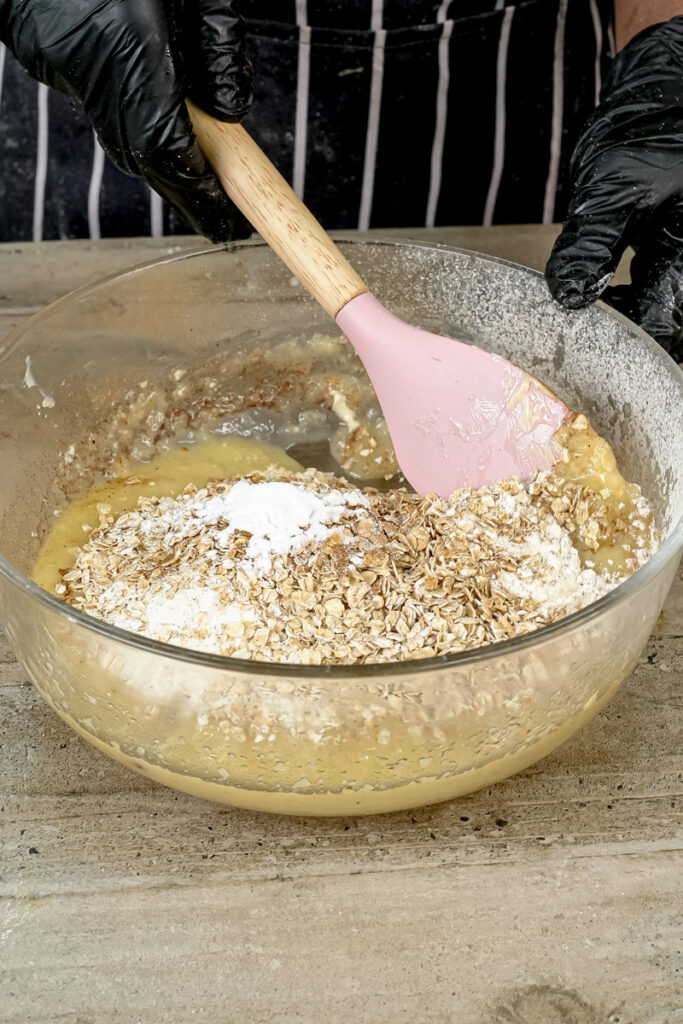
Add the Dry Ingredients: Building the Muffin Structure Now for the dry stuff! Right into the same bowl, add your 1 cup of whole wheat flour. Then, add the ½ cup of rolled oats (or ¼ cup of all-purpose flour). Sprinkle in the ¼ cup of sugar (or maple syrup). Next, add the leavening dream team: 1 teaspoon of baking powder and ½ teaspoon of baking soda. Then, the warming embrace of 1 teaspoon of cinnamon and the crucial ¼ teaspoon of salt. You should have a pile of dry stuff sitting on top of the wet stuff.
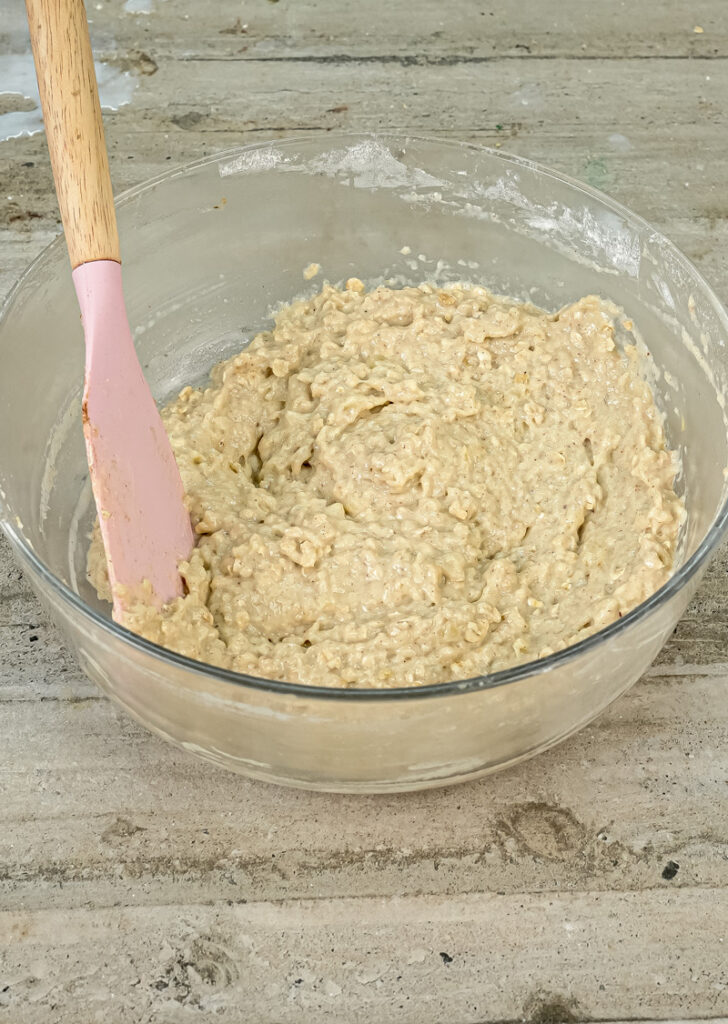
Fold Gently – The Secret to Tender, Fluffy Muffins! This is where the magic happens! Grab your spatula. We’re going to fold the dry into the wet. Don’t stir or beat! Gently scoop from the bottom, bring the wet over the dry, turn the bowl, and repeat. Keep folding just until the last streaks of flour disappear. The batter will look a bit lumpy. That’s perfect! Don’t overmix! Overmixing makes tough muffins. Embrace the lumps!
Fill the Muffin Tin: Portioning Out Happiness Time to fill the muffin tin!
- For mini muffins, fill each cup almost to the top.
- For standard muffins, use about ¼ cup of batter per cup. Fill them about two-thirds to three-quarters full.
Bake to Golden Perfection: The Aromatic Transformation Slide your filled muffin tin into the preheated oven.
- For mini muffins, set the timer for 16-20 minutes.
- For standard muffins, they’ll need 22-24 minutes.
Cooling Down: The Gentle Transition Take the muffin tin out of the oven and put it on a wire rack. Let the muffins cool in the pan for 2 to 5 minutes. This helps them set up. If they’re sticking, run a knife around the edges to loosen them. Then, transfer them to the wire rack to cool completely.
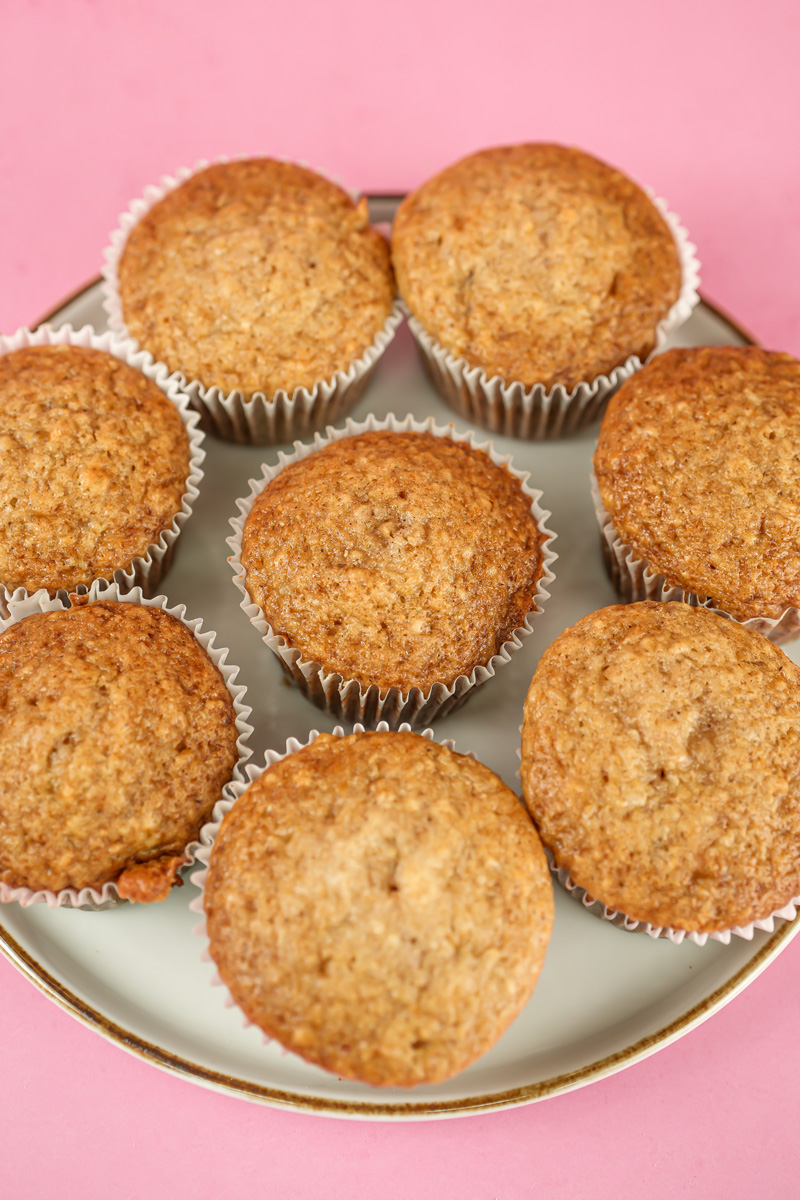
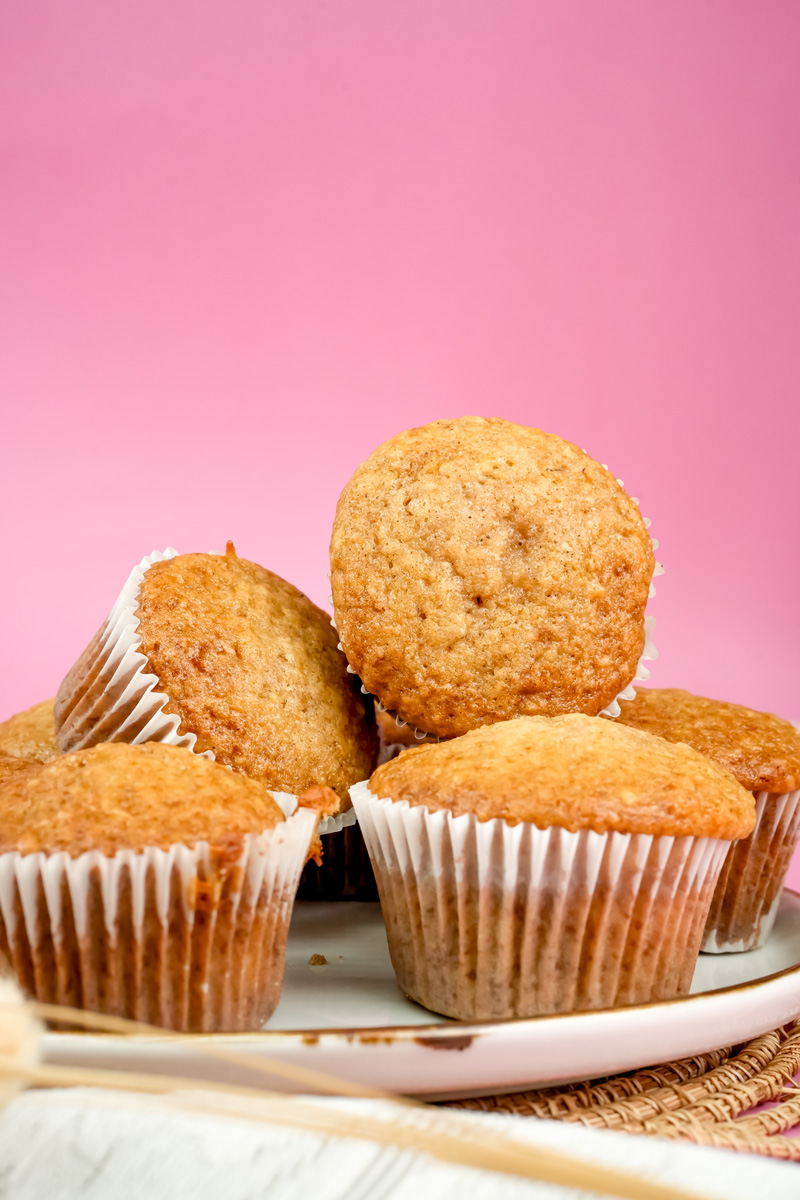
Serve and Enjoy: The Delicious Reward! You did it! A beautiful batch of Easy Applesauce Muffins Recipe. They’re amazing warm from the oven. Soft, moist, and subtly sweet. A little butter melting on top is pure bliss. They’re also great cooled to room temperature, perfect for lunchboxes or with coffee.
Variations & Customization: Make Them Your Own!


This recipe is a great starting point. Let’s see how you can customize these simple applesauce muffins!
- Dietary Modifications:
- Gluten-Free: Use a 1:1 gluten-free baking flour blend instead of the wheat flour and oats.
- Vegan:
- Egg: Replace the egg with a flax egg (1 tablespoon ground flaxseed + 3 tablespoons water, let sit for 5-10 minutes to thicken). You can also use ¼ cup of mashed banana or additional applesauce, though this will alter the flavor and texture slightly.
- Butter/Milk: Use plant-based oil and non-dairy milk.
- Sugar: Use vegan sugar or maple syrup.
- Dairy-Free: Use oil instead of butter and non-dairy milk.
- Spice It Up (or Down!):
- Love spice? Add more cinnamon, nutmeg, allspice, ginger, or cardamom.
- Prefer it milder? Use less cinnamon.
- Fancy vs. Everyday Versions:
- Everyday: The recipe as is.
- A Little Fancier:
- Add-Ins (about ½ to ¾ cup total): Chocolate chips, nuts, dried fruit, or coconut.
- Streusel Topping: Before baking, sprinkle on a streusel made from flour, sugar, butter, and cinnamon.
- Simple Glaze: Drizzle with a glaze made from powdered sugar and milk or lemon juice.
- Seasonal Adaptations:
- Autumn Delight: Use brown sugar, more spice, and chopped apple or pear.
- Summer Freshness: Add fresh blueberries.

Serving & Storage: Enjoying Your Muffins to the Fullest
You’ve baked your muffins! Here’s how to serve and store them.
- Plating Suggestions: Serve them warm on a plate for breakfast or brunch. Butter melting on top is amazing. For a snack, they’re great with tea or coffee. Greek yogurt or cream cheese can be lovely too.
- Best Side Dishes:
- For Breakfast: Fresh fruit, yogurt, a smoothie, or scrambled eggs.
- For a Snack: Milk, herbal tea, or coffee.
- Storage Instructions:
- Room Temperature: Store in an airtight container for 2-3 days. Use a paper towel to absorb moisture.
- Refrigerator: Store in an airtight container for up to a week.
- Reheating Tips:
- Microwave: Heat for 10-20 seconds.
- Oven/Toaster Oven: Reheat at 300°F (150°C) for 5-7 minutes.
- Make-Ahead and Freezing Guidance: These are great for freezing!
- Cool the muffins completely.
- Wrap each muffin individually or place them in a freezer-safe bag.
- Freeze for up to 3 months.
- To Thaw: Thaw at room temperature or microwave for 20-30 seconds. You can also reheat them from frozen in a 300°F (150°C) oven for about 10-15 minutes.
I hope you love this Easy Applesauce Muffins Recipe as much as I do! They’re such a simple and healthy treat. Happy baking, and enjoy!
PrintApplesauce Muffins

Whip up a batch of these super easy and deliciously moist applesauce muffins! They’re a perfect healthy-ish treat for breakfast or anytime snacking. Your kitchen will smell amazing, and you’ll have a wholesome bite ready in no time.
- Prep Time: 10 minutes
- Cook Time: 16-20 mins (mini) / 22-24 mins (standard)
- Total Time: About 30 minutes
- Yield: 12 standard or 24 mini muffins 1x
- Category: Breakfast, Snack, Quick Bread
- Cuisine: American
Ingredients
- 1 cup unsweetened applesauce
- 2 tablespoons melted butter (let it cool a bit!) or a neutral oil (like canola)
- 1 large egg, lightly beaten
- ½ cup milk (any kind works – dairy or non-dairy!)
- 1 teaspoon vanilla extract
- 1 cup whole wheat flour
- ½ cup rolled oats (the old-fashioned kind, not instant) or ¼ cup all-purpose flour if you prefer
- ¼ cup sugar or pure maple syrup
- 1 teaspoon baking powder (check it’s fresh!)
- ½ teaspoon baking soda
- 1 teaspoon ground cinnamon (yum!)
- ¼ teaspoon salt (it makes everything taste better!)
Instructions
- Get Ready: First things first, preheat your oven to 375°F (190°C). Grab your muffin tin and grease it really well. If you’re using paper liners, it’s a good idea to give the inside of the liners a quick spray too – helps prevent sticking!
- Mix the Wet Stuff: In a medium-sized bowl, whisk together the applesauce, melted butter (or oil), your beaten egg, milk, and vanilla extract. Mix it until it’s all lovely and combined.
- Add the Dry Stuff: Now, add the whole wheat flour, rolled oats (or all-purpose flour), sugar (or maple syrup), baking powder, baking soda, cinnamon, and salt right on top of your wet ingredients in the same bowl. One less dish to wash, right?
- Fold Gently – The Big Secret! Using a spatula, gently fold the dry ingredients into the wet ones. You want to mix just until you don’t see any more dry flour. Seriously, stop right there! The batter will look a bit lumpy. Lumps are good! Overmixing makes tough muffins, and nobody wants that.
- Fill ‘Er Up & Bake: Carefully spoon the batter into your prepared muffin cups.
- For mini muffins, fill them almost to the very top.
- For standard muffins, fill them about two-thirds to three-quarters full.
Now, pop them into the oven! - Bake mini muffins for 16-20 minutes.
- Bake standard muffins for 22-24 minutes.
They’re done when they’re beautifully golden and a toothpick poked into the center of one comes out clean (or with just a few moist crumbs).
- Cool Down Time: Carefully take the hot muffin tin out of the oven and let the muffins cool in the pan for about 2 to 5 minutes. This little rest helps them firm up. Then, gently take them out and place them on a wire rack to cool completely. This stops them from getting soggy bottoms!
Notes
- Serving Ideas: These are absolutely divine served warm, maybe with a little pat of butter melting on top. Perfect with your morning coffee or as an afternoon pick-me-up!
- My Top Tips & Tricks:
- The golden rule: Do NOT overmix the batter! A lumpy batter makes a tender muffin.
- Using room temperature egg and milk helps them mix in more easily.
- Want to change it up? Toss in ½ cup of chocolate chips, chopped nuts, or raisins with the dry ingredients.
- Storing Your Muffins:
- Room Temp: Keep them in an airtight container for 2-3 days. A paper towel in the container can help keep them fresh.
- Fridge: They’ll last up to a week in an airtight container in the fridge.
- Reheating Magic:
- Microwave: 10-20 seconds for that fresh-baked warmth.
- Oven/Toaster Oven: For a slightly crispy top, reheat at 300°F (150°C) for 5-7 minutes.
- Freeze for Later: These muffins freeze like a dream! Cool completely, then wrap individually or pop into a freezer bag. They’re good for up to 3 months. Thaw at room temp or give them a quick zap in the microwave.