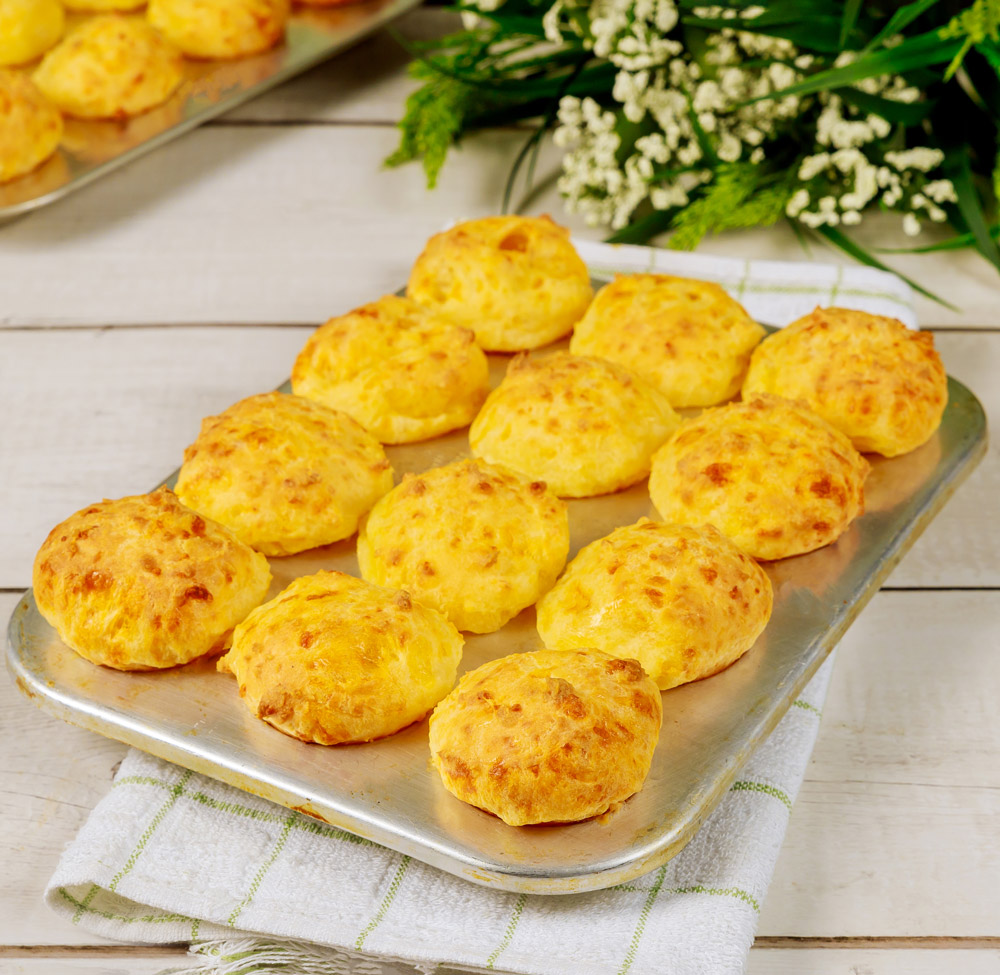
Warm. Cheesy. Addictively good. That’s Brazilian Cheese Bread, or as locals call it, Pão de Queijo. These little golden balls are a must-try. They’re crispy on the outside, soft and chewy on the inside, and loaded with cheesy flavor.
The best part? They’re naturally gluten-free!
Pão de Queijo has a long history in Brazil, especially in the region of Minas Gerais, where it’s a staple at breakfast and teatime. And even though it sounds fancy, it’s really easy to make at home. Trust me, if you’ve got tapioca flour and cheese, you’re halfway there.

We’ll go step by step, so it feels like we’re cooking together. Ready? Let’s get started.
Recipe Overview
Here’s a quick rundown:
- Prep Time: 15 minutes
- Cook Time: 25 minutes
- Total Time: 40 minutes
- Servings: 12–15 cheese bread rolls
How hard is it?
Super easy. If you can boil water and mix ingredients, you can nail this recipe.
Tools You’ll Need:
- Medium saucepan
- Mixing bowl
- Wooden spoon (or any sturdy spoon)
- Mini muffin tin (or just a baking sheet lined with parchment)
- Optional: Cookie scoop (if you like perfectly shaped rolls)
Meal Prep Ideas:
- You can make the dough ahead of time and freeze it. Then bake fresh whenever the craving hits.
- Once baked, they stay fresh at room temperature for 1–2 days. Just reheat and they’re good as new!

What You’ll Need
Ingredients (and some extra tips):
- 2 cups tapioca flour (or starch): This gives pão de queijo its stretchy, chewy magic. You’ll find it in most grocery stores or in the baking aisle.
- 1/2 teaspoon salt: Adjust this based on how salty your cheese is.
Wet Ingredients:
- 1/2 cup milk: Whole milk works best, but you can use 2% too.
- 1/4 cup vegetable oil or olive oil: Olive oil adds a richer flavor, but vegetable oil works just fine.
The Egg:
- 1 large egg: Let it sit at room temperature. Cold eggs? They won’t mix as well.
The Cheese (oh yes!):
- 1 cup grated Parmesan cheese: Adds a sharp, nutty kick.
- 1 cup grated mozzarella: Makes them gooey and irresistible. Swap this for cheddar or gouda if you like.
Step-by-Step Instructions

Let’s break it down:
1. Heat Things Up
Preheat your oven to 375°F (190°C). If you’re using a mini muffin tin, grease it well. No muffin tin? No worries. Just line a baking sheet with parchment paper.
2. Cook the Milk and Oil
Pour the milk, oil, and salt into a saucepan. Heat this gently over medium heat. You want it to bubble, but don’t let it boil over. Why this step? It preps the tapioca flour for that amazing stretchy texture.
3. Mix Dry and Wet
Place your tapioca flour in a bowl. Slowly pour the hot milk mixture over it, stirring constantly. The dough will look weirdly sticky and lumpy at this point. Totally normal. Set it aside for 5–10 minutes to cool down.
4. Add the Cheesy Goodness
Crack your egg into the cooled dough. Mix it well until it’s all combined. Then fold in the grated cheese. Go slowly. The dough should be soft, stretchy, and a little sticky. Too dry? Add a tablespoon of milk.
5. Shape the Dough
Lightly grease your hands with oil (or use a cookie scoop). Roll the dough into small balls—about 1.5 inches wide. Place them on the muffin tin or baking sheet.
6. Into the Oven
Bake for 20–25 minutes, or until the bread is puffed and golden. Halfway through, rotate the tray for even cooking. The smell? Absolutely mouthwatering.
7. Time to Enjoy
Let them cool for just 5 minutes (if you can wait that long). Serve them fresh and warm.

Make It Your Own
Want to mix things up? Here are a few ideas:
- Not a fan of Parmesan? Try cheddar, gouda, or a mix of your favorite cheeses.
- Need a dairy-free option? Use vegan cheese and almond milk. It works surprisingly well!
- Spice it up: Add a pinch of garlic powder, smoked paprika, or even diced jalapeños.
Serve & Store

How to Serve:
- Serve these with tea, coffee, or even a light soup.
- For a fancy twist, pair them with a garlic dipping sauce or tomato chutney.
Storing Leftovers:
- At Room Temp: Keep them in an airtight container for up to 2 days.
- Reheating: Pop them into a 350°F oven for 5–7 minutes. Good as new!
- Freezing the Dough: Roll the dough into balls and freeze them on a tray. Once frozen, transfer to a bag and bake straight from frozen. Add a few extra minutes to the bake time.
Final Thoughts
There’s something magical about making pão de queijo. They’re simple, comforting, and a little addictive. Whether you make them for breakfast, a snack, or as a side dish, they bring a little piece of Brazil into your home.
And trust me, once you’ve had one, you’ll definitely go back for seconds. Happy baking!
PrintBrazilian Cheese Bread (Pão de Queijo)
Pão de Queijo is Brazil’s iconic cheese bread—crispy on the outside, soft and chewy on the inside, and bursting with cheesy flavor! Naturally gluten-free and easy to prepare, it’s perfect for breakfast, snacks, or as a side dish.
- Prep Time: 15 mins
- Cook Time: 25 mins
- Total Time: 40 mins
- Yield: 12–15 rolls 1x
- Category: Snack, Side Dish
- Cuisine: Brazilian
Ingredients
Dry Ingredients:
- 2 cups tapioca flour
- 1/2 teaspoon salt
Wet Ingredients:
- 1/2 cup milk (whole preferred)
- 1/4 cup vegetable or olive oil
Egg:
- 1 large egg, room temperature
Cheese:
- 1 cup grated Parmesan cheese
- 1 cup grated mozzarella cheese (or semi-hard cheese like cheddar)
Instructions
Set oven to 375°F (190°C). Grease a mini muffin tin or line a baking sheet with parchment paper.
In a saucepan, combine milk, oil, and salt. Heat gently until it just starts bubbling. Remove from heat before boiling.
Pour the hot liquid over the tapioca flour in a large bowl, stirring constantly. Let it cool slightly for 5–10 minutes.
Beat in the egg until smooth. Gradually fold in the Parmesan and mozzarella. The dough should be soft and slightly sticky.
Grease your hands or use a cookie scoop to form small balls (about 1.5 inches in diameter). Arrange them in the muffin tin or on the baking sheet.
Bake in the oven for 20–25 minutes, or until golden and puffed. Rotate halfway through for even baking.
Notes
Serving Suggestions:
- Great with coffee, tea, or as a side to soups.
- Garnish with fresh parsley for a pop of color.
Tips & Tricks:
- If the dough feels too dry, add 1–2 tablespoons of milk.
- For variety, use cheddar, gouda, or add a pinch of garlic powder.
Storage & Reheating:
- Store: Keep at room temperature in an airtight container for up to 2 days.
- Reheat: Warm in a 350°F oven for 5–7 minutes to restore crispness.
- Freeze: Freeze unbaked dough balls. Bake directly from frozen, adding 3–5 minutes to the cooking time.

