
If you’re a fan of creamy, no-bake desserts that come together in a snap, you’ll love this Lotus Biscoff icebox cake. Originating from the classic icebox cake tradition, this version takes a modern twist with the irresistible flavor of Lotus Biscoff cookies and spread. It’s the perfect treat for any occasion, from casual family dinners to elegant gatherings.
What makes this dessert so special is the combination of layers of velvety whipped cream and the rich, caramelized taste of Biscoff. The cookies soften as they chill, melding beautifully with the cream to create a melt-in-your-mouth experience. Trust me, this Lotus Biscoff icebox cake will become your go-to recipe when you need a crowd-pleaser without spending hours in the kitchen.
What is Biscoff Icebox Cake?
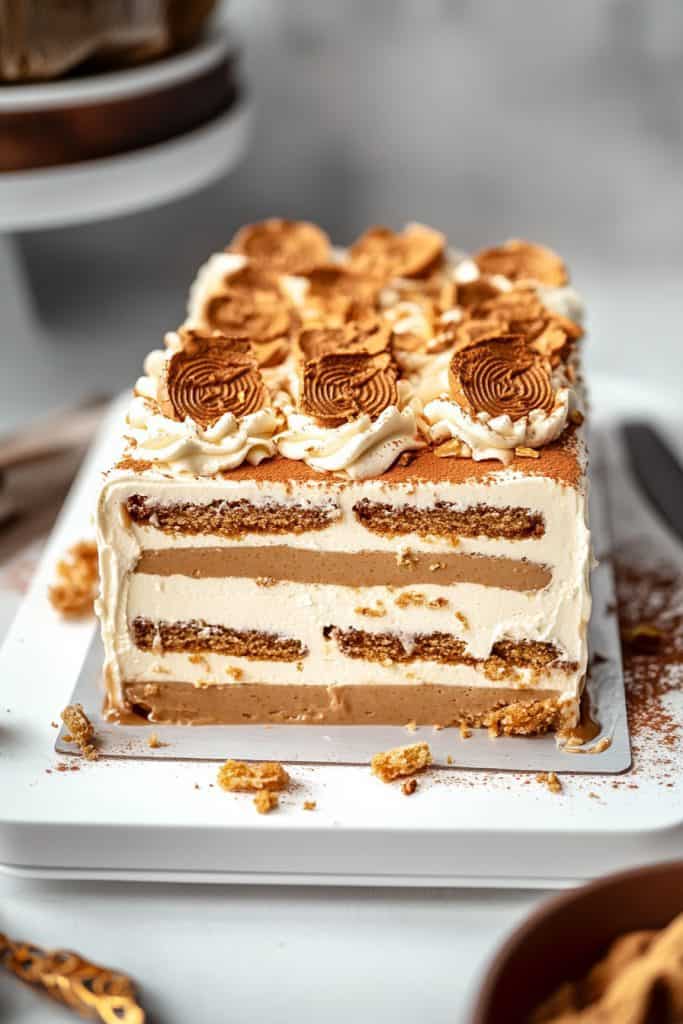
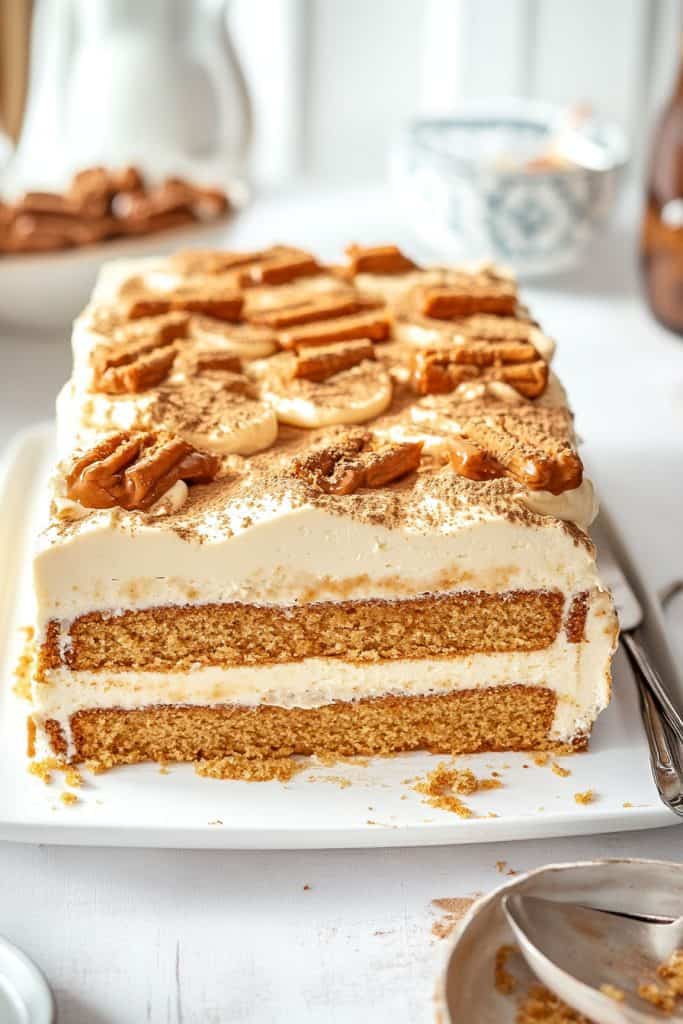
A Biscoff Icebox Cake is a no-bake dessert that combines the iconic Lotus Biscoff cookies with layers of velvety whipped cream to create an indulgent, creamy treat. The process is simple yet transformative: allowing the cookies to marinate and soften in the whipped cream results in a cake-like texture that’s both rich and luxurious.
To build this dessert, I start by layering Biscoff cookies at the bottom of a baking dish. Using a spatula, I then spread a generous layer of whipped cream over the cookies, ensuring even coverage. This layering process is repeated, creating multiple delicious strata of cookies and cream.
The cake is then placed in the refrigerator to chill. Over the course of several hours, the cookies absorb moisture from the whipped cream, becoming tender and cake-like. The final result is a harmonious blend of textures and flavors, perfect for any occasion.
- Layer Biscoff Cookies: Place a layer of Biscoff cookies at the bottom of a dish.
- Add Whipped Cream: Spread a generous layer of whipped cream over the cookies.
- Repeat Layers: Continue layering cookies and whipped cream until all ingredients are used.
- Chill: Refrigerate the assembled cake for several hours or overnight.
This dessert is a delightful combination of the distinctive caramel flavor of Biscoff cookies and the airy lightness of whipped cream, making it a crowd-pleasing favorite.
Ingredients
To create this delectable Lotus Biscoff Icebox Cake, you will need the following ingredients. Ensure you have everything prepped and ready for smooth assembly:
- Lotus Biscoff Cookies: 2 packages (approximately 8.8 oz each), divided into layers.
- Heavy Whipping Cream: 2 cups, chilled.
- Powdered Sugar: 1/2 cup, sifted.
- Vanilla Extract: 1 teaspoon, for flavor.
- Cream Cheese: 1 package (8 oz), softened.
- Biscoff Spread: 1 cup, plus extra for drizzling on top.
- Milk: 1 cup, for dipping the cookies.
- Chocolate Shavings: Optional, for garnish.
With these ingredients, you’re well on your way to crafting a rich, creamy, and irresistible dessert that will surely impress. Be sure each component is ready before you start layering, as this will make the assembly process seamless and enjoyable.
Tools and Equipment
Creating a Lotus Biscoff Icebox Cake requires a few essential tools and equipment to ensure the process goes smoothly and the result is perfect. Here is a list of what you’ll need and why each item is crucial:
- Mixing Bowl
- A large mixing bowl is essential for whipping the cream. I recommend using a stainless steel or glass bowl for easy clean-up and durability.
- Electric Hand Mixer or Stand Mixer
- To achieve the perfect whipped cream consistency, you will need an electric hand mixer or a stand mixer. This tool will save you time and energy compared to whipping by hand.
- Spatula
- A rubber spatula is ideal for gently folding ingredients together and for spreading the whipped cream evenly over the layers of cookies. It helps in scraping every bit of mixture from the bowls.
- 8×8 Baking Dish
- An 8×8 inch baking dish is the perfect size for this recipe. It allows for even layering and fits easily in the refrigerator.
- Measuring Cups and Spoons
- Accurate measurements are key to a perfect desert. Use measuring cups and spoons to ensure you add the right amount of each ingredient.
- Offset Spatula (Optional)
- For an even smoother finish on your whipped cream layers, an offset spatula can be very handy. It gives you better control while spreading the cream.
- Plastic Wrap or Aluminum Foil
- You’ll need plastic wrap or aluminum foil to cover the icebox cake while it chills in the refrigerator. This keeps it from absorbing other odors and flavors.
- Microplane or Fine Grater (Optional)
- If you choose to garnish with chocolate shavings or zest, a microplane or fine grater will help you achieve delicate, even shavings.
By having these tools and equipment on hand, the assembly and preparation process for your Lotus Biscoff Icebox Cake will be much more efficient and enjoyable. In the next section, I will guide you through the step-by-step process of creating this delightful dessert.
Directions
Follow these steps to transform your ingredients into a deliciously indulgent Lotus Biscoff Icebox Cake. This easy no-bake treat will impress your family and friends with its creamy layers and rich flavors.
Make the Lotus Cream
- Prepare the Whipped Cream: In a large mixing bowl, add 2 cups of heavy whipping cream. Use an electric hand mixer or stand mixer to whisk the cream on medium-high speed until soft peaks form. This should take about 3-4 minutes.
- Sweeten the Cream: Gradually add 3 tablespoons of powdered sugar and 1 teaspoon of vanilla extract to the whipped cream. Continue mixing until stiff peaks form. Be careful not to overwhip, as this can cause the cream to become grainy.
- Cream the Cheese: In another bowl, beat 8 ounces of cream cheese until it becomes smooth and creamy. This will ensure there are no lumps in your final mixture.
- Combine Components: Add the whipped cream mixture to the bowl with the cream cheese. Gently fold the two together using a spatula until they are fully combined. This will be your luscious Lotus cream.
- Layer the Cookies: In an 8×8 baking dish, place a single layer of Lotus Biscoff Cookies on the bottom. Try to cover as much surface area as possible by breaking some cookies if needed.
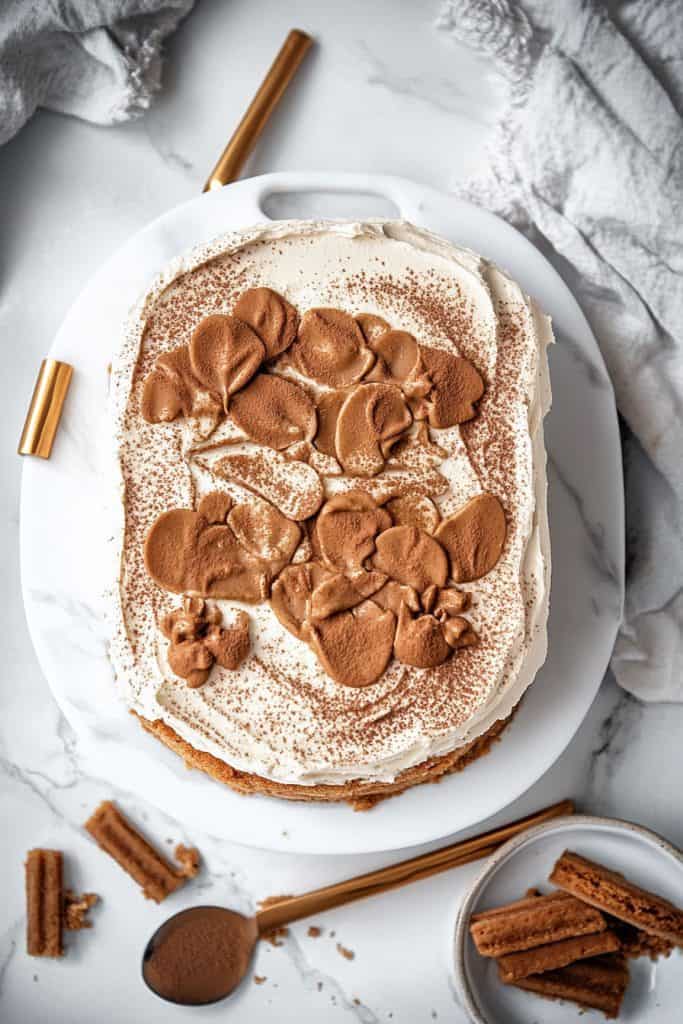
- Spread the Cream: Using an offset spatula, spread a generous layer of the Lotus cream over the cookies. Make sure it is evenly distributed to get uniform flavors in every bite.
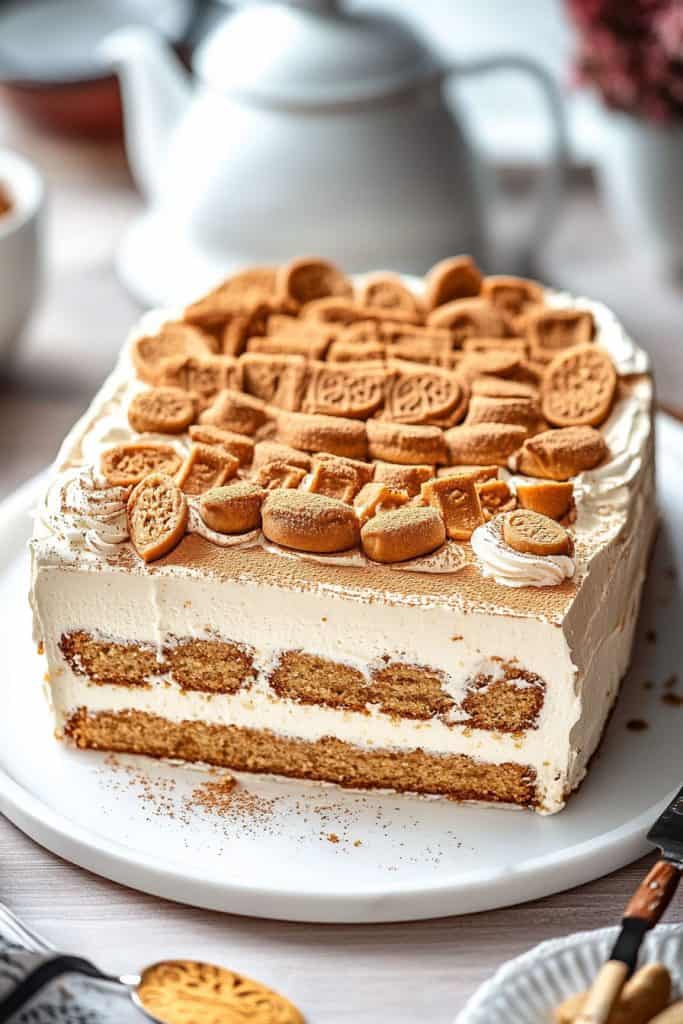
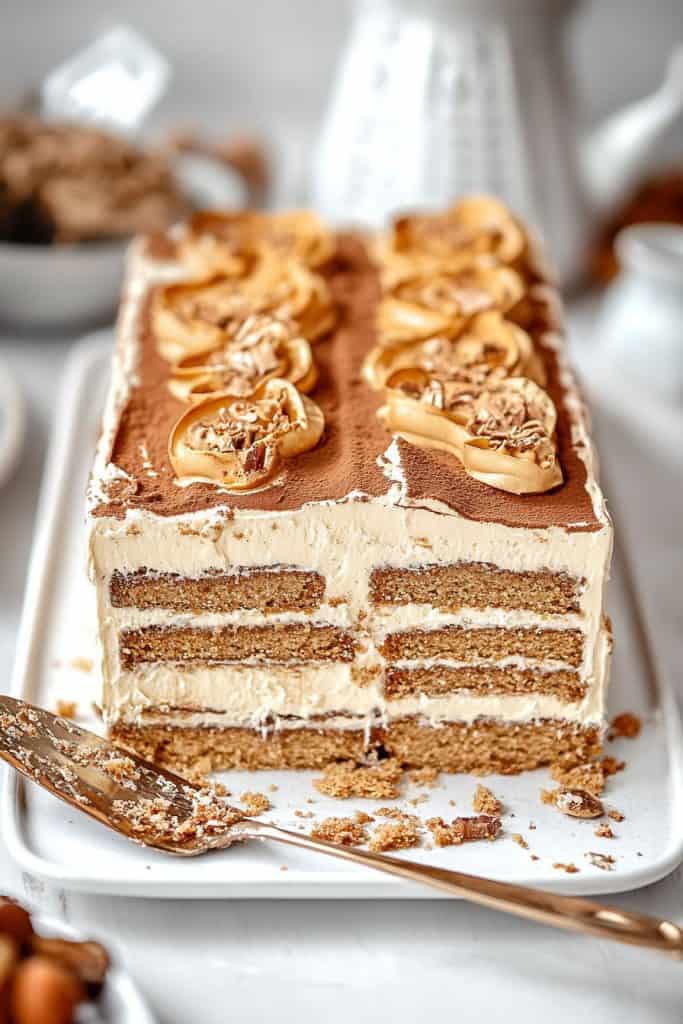
- Repeat Layers: Continue layering the cookies and cream, alternating between the two. Aim for at least three layers of each, ending with a layer of Lotus cream on top.
- Chill the Cake: Cover the baking dish with plastic wrap or aluminum foil. Place it in the refrigerator for at least 4 hours, or overnight if possible. This allows the cookies to soften and achieve a cake-like texture.
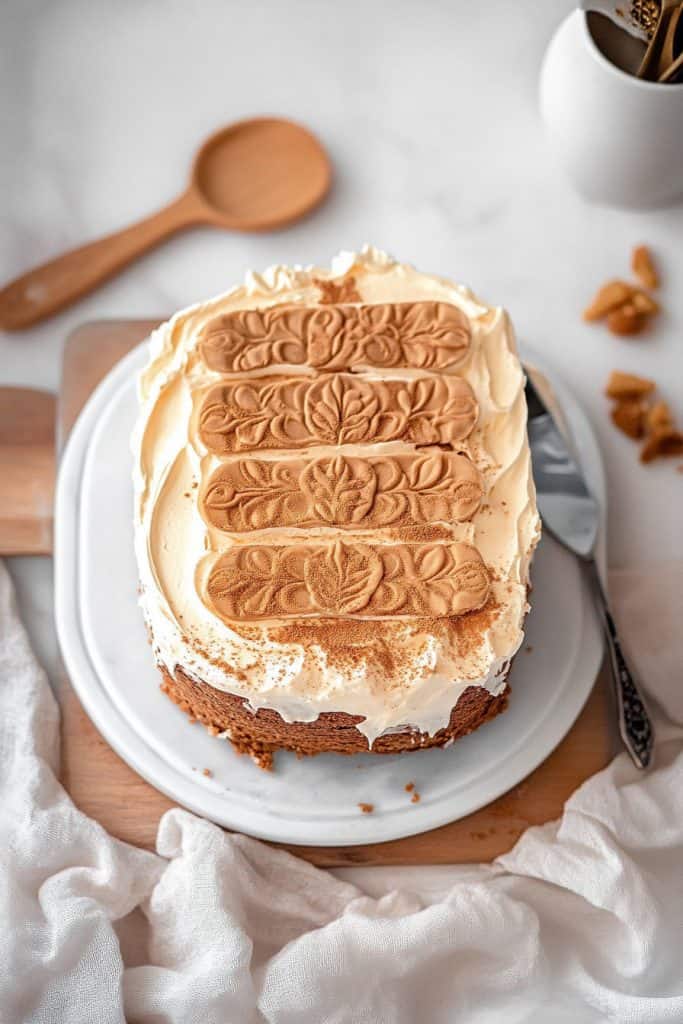
- Top and Serve: Before serving, you can optionally sprinkle some chocolate shavings on top using a microplane or fine grater. This adds a touch of elegance and extra flavor.
Your Lotus Biscoff Icebox Cake is now ready to be served. Enjoy this rich, creamy, no-bake dessert with your loved ones.
Tips and Tricks
Use Homemade Whipped Cream
For the best texture and flavor, I always recommend using homemade whipped cream. Store-bought alternatives can contain stabilizers that might affect the final texture of the cake. Simply whip heavy cream with a bit of powdered sugar and vanilla extract until stiff peaks form.
Chill the Beat a Bowl and Whisk
Chill your bowl and whisk in the refrigerator for about 15 minutes before whipping the cream. The cold temperature helps achieve stiff peaks faster and ensures a more stable whipped cream.
Layer Evenly for Better Texture
When layering the Biscoff cookies and whipped cream, ensure each layer is even. This guarantees that every bite has a balanced combination of the cookies and cream. Use an offset spatula to spread the whipped cream smoothly over the cookies.
Soak Cookies for Soften Texture
If you prefer a softer texture, lightly dip the Biscoff cookies in milk or coffee before layering them. This technique helps the cookies soften faster and gives the dessert a more cake-like consistency.
Customize with Flavors
Feel free to customize the whipped cream with additional flavors. I like to add a bit of espresso powder or cinnamon to enhance the caramel flavor of the Biscoff cookies. You can even add a splash of liqueur for an adult version.
Chill Time is Crucial
Allow the cake to chill in the refrigerator for at least 4 hours, but overnight is best. This time is crucial for the cookies to soften and for the flavors to meld together. Patience pays off with a perfect texture.
Add Toppings for Extra Flair
Before serving, get creative with toppings. Crushed Biscoff cookies, chocolate shavings, or a drizzle of caramel sauce can add extra flair to the dessert. These toppings not only enhance the presentation but also complement the flavors beautifully.
Slice with a Warm Knife
For clean, beautiful slices, dip a knife in warm water and wipe it before each cut. This trick prevents the whipped cream from sticking to the knife and ensures neat pieces of cake.
Store Properly
If you have leftovers, store the Biscoff Icebox Cake in an airtight container in the refrigerator. It stays fresh for up to 3 days. Just be sure to cover it well to prevent it from drying out or absorbing other odors from the fridge.
How to Store and Freeze
Storing in the Refrigerator
To keep your Lotus Biscoff Icebox Cake fresh and delicious, store it in the refrigerator. After assembling the cake, cover it tightly with plastic wrap or aluminum foil. Ensure that the entire cake is sealed to prevent it from absorbing any food odors from the fridge.
For the best texture and flavor, consume the cake within 3-4 days. The cookies continue to soften as it sits, enhancing the overall creamy and luscious texture.
Freezing the Cake
If you want to keep the cake longer, freezing is an excellent option. Here’s how I do it:
- Initially, let the assembled cake chill in the refrigerator for at least 4-6 hours or until it is set.
- Once set, wrap the entire cake tightly with plastic wrap. Ensure you cover it completely to avoid freezer burn.
- For added protection, wrap the cake again with aluminum foil or place it in a large, airtight container.
Defrosting and Serving
When you’re ready to enjoy the frozen cake, follow these simple steps:
- Transfer the cake from the freezer to the refrigerator. Let it thaw slowly for 12-24 hours.
- For a quicker option, allow the cake to sit at room temperature for 1-2 hours. Monitor it closely to ensure it doesn’t become too soft.
- Once thawed, slice with a warm knife for clean, neat cuts.
By following these storage and freezing tips, you can savor your Lotus Biscoff Icebox Cake whenever the craving strikes, keeping its delightful taste and texture intact.
Serving Tips
When it’s time to serve the Lotus Biscoff Icebox Cake, there are a few pointers that can elevate your presentation and enhance the flavors.
Chill Before Serving
Ensure the cake has been properly chilled for at least 4-6 hours or overnight. This allows the flavors to meld together and the cookies to soften just right.
Use a Warm Knife
For clean slices, dip your knife in hot water and wipe it dry before cutting. The warm blade will glide through the layers without making a mess.
Garnish Creatively
Top each slice with a dollop of whipped cream and a sprinkle of crushed Biscoff cookies. Fresh fruit like strawberries or raspberries can also add a pop of color and a tangy contrast.
Serve Cold
This dessert is best enjoyed cold. Serve it straight from the refrigerator for the freshest taste and firmest texture.
Plate Presentation
Use a cake server to carefully lift each slice onto dessert plates. Drizzle a bit of chocolate or caramel sauce on the plate for an added touch of elegance.
Pairing Suggestions
I recommend pairing this cake with a cup of hot coffee or tea. The rich flavors of the Biscoff cookies and creamy layers are complemented by a warm beverage.
By following these serving tips, you can ensure your Lotus Biscoff Icebox Cake looks stunning and tastes delightful, making you the star of any gathering.
Conclusion
Creating a Lotus Biscoff Icebox Cake is a rewarding experience that results in a dessert both visually stunning and delicious. By following the layering process and incorporating the tips I’ve shared, you’ll achieve a cake that impresses both in taste and presentation.
Remember to chill your cake thoroughly and use a warm knife for clean slices. Don’t hesitate to get creative with your garnishes and pairings to elevate the experience. This cake is sure to be a hit at any gathering, leaving your guests eager for more.