
Craving a delightful twist on a classic dessert? Dive into the world of Key Lime Cheesecake, where tangy key lime curd meets creamy cheesecake in a buttery graham cracker crust. This fusion of flavors creates a decadent treat that mirrors the beloved Key Lime Pie but with a cheesecake twist.
Key limes, known for their floral notes and lower acidity compared to regular limes, add a unique flavor profile to this dessert. If you can’t find key limes, bottled key lime juice is a handy alternative. Remember, the authentic Key Lime Cheesecake should have a subtle yellow hue, not a vibrant green often achieved with artificial dyes.
Ingredients
For the Crust
- 1 ½ cups graham cracker crumbs
- 6 tablespoons unsalted butter, melted
- ¼ cup granulated sugar
For the Cheesecake Filling
- 24 oz cream cheese, softened
- 1 cup granulated sugar
- 1 teaspoon vanilla extract
- 3 large eggs
- 1 tablespoon key lime zest
- ½ cup key lime juice
- 1 cup sour cream
- 2 tablespoons granulated sugar
- 1 teaspoon vanilla extract
- 1 tablespoon key lime zest
Equipment Needed
When preparing your Key Lime Cheesecake, it’s essential to have the right tools on hand to ensure a smooth and efficient baking process. Here are the key equipment you’ll need to create this delightful dessert:
Springform Pan
To bake your cheesecake perfectly, you’ll need a 9-inch springform pan. This pan allows for easy removal of the cake without damaging its delicate structure.
Mixing Bowls
Having various sizes of mixing bowls on hand will help you prepare different components of the cheesecake, from the crust to the filling, with ease.
Electric Hand Mixer
An electric hand mixer is essential for blending the cream cheese and other ingredients smoothly. It ensures a lump-free and creamy filling for your Key Lime Cheesecake.
Aluminum Foil
Heavy-duty aluminum foil is necessary to line the outside of the springform pan. This helps prevent leaks and water from seeping into the cheesecake as it bakes in a water bath.
Roasting Pan
Prepare a large roasting pan to create a water bath for baking the cheesecake. This gentle steam-baking technique helps prevent cracks in the cheesecake’s surface.
Baking Essentials
Standard baking tools such as measuring cups, measuring spoons, and a wire rack for cooling are essential for accurate measurements and proper baking techniques.
Oven
Of course, you’ll need an oven preheated to the correct temperature for baking the Key Lime Cheesecake to perfection.
Having these essential tools at your disposal will make the process of creating your Key Lime Cheesecake a breeze. Make sure to gather all the equipment before starting the recipe for a stress-free baking experience.
Instructions
Preparing the Crust
To begin, preheat the oven to 350°F and prepare a 9-inch springform pan by greasing it. Mix graham cracker crumbs, melted butter, and sugar until well combined, then press the mixture into the pan, ensuring it covers the bottom and comes up the sides slightly. Bake the crust for 15 minutes and set it aside to cool.
Making the Cheesecake Filling
Ensure all your ingredients are at room temperature for the best results. In a large mixing bowl, beat cream cheese until creamy, then add sugar gradually, mixing well. Add eggs one at a time, incorporating each one fully before adding the next. Finally, mix in vanilla extract, sour cream, key lime juice, and key lime zest until just combined.
Assembling the Cheesecake
Once the crust has cooled, pour the prepared cheesecake filling over it. Place the springform pan into a larger roasting pan and add hot water to the roasting pan to create a water bath. Bake the cheesecake in the water bath at 300°F for the specified time. Let the cheesecake cool completely before chilling it in the refrigerator.
Cooling and Setting
After baking your key lime cheesecake to perfection, it’s crucial to cool and set it properly before indulging in this delightful dessert. The cooling process helps the flavors meld together while setting ensures a firm and creamy texture that will elevate your cheesecake experience.
Refrigerator Instructions
- Cheesecake Cooling: Once the cheesecake is baked, let it rest at room temperature for about an hour before handling. After the cooling period, remove the springform pan from the oven and take off the foil. Place the cheesecake on a wire rack to cool completely. Next, cover the cheesecake with foil and refrigerate it for at least 6 hours or overnight.
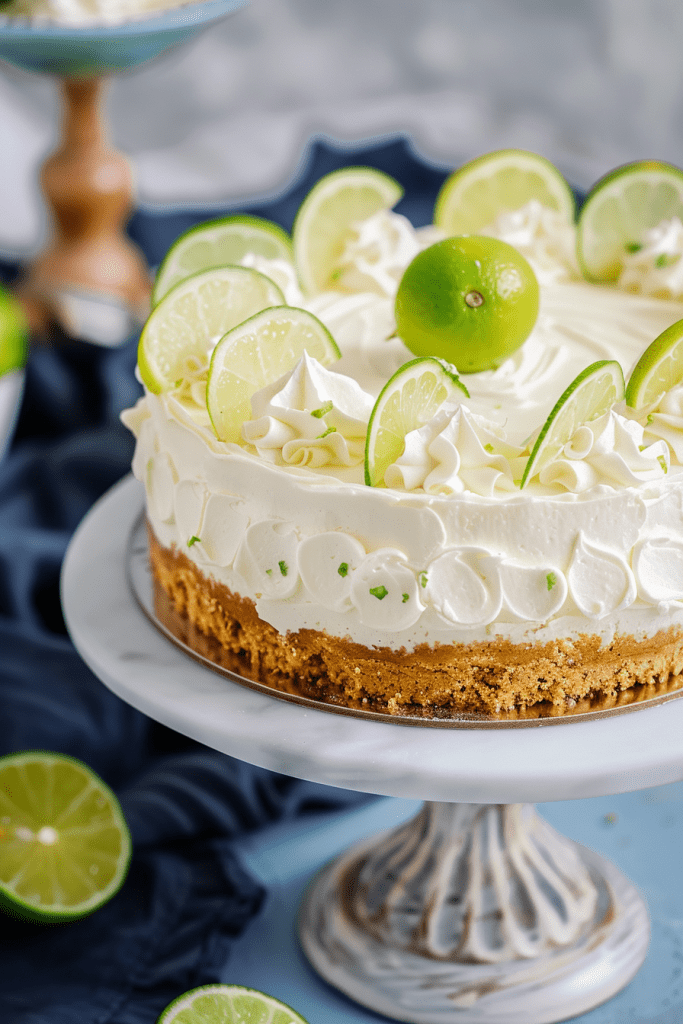
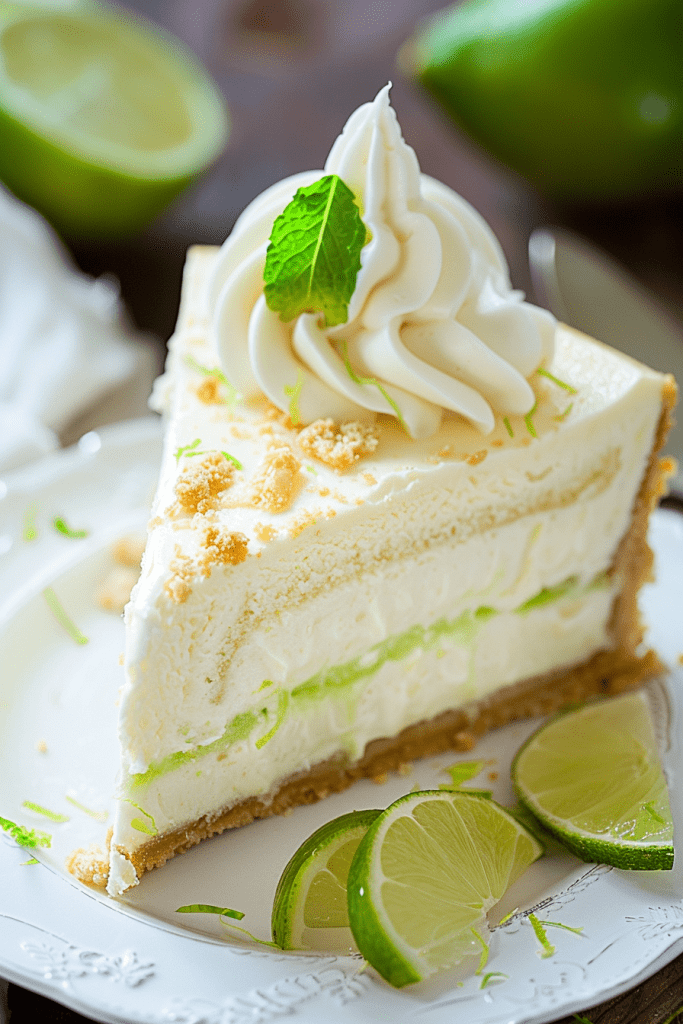
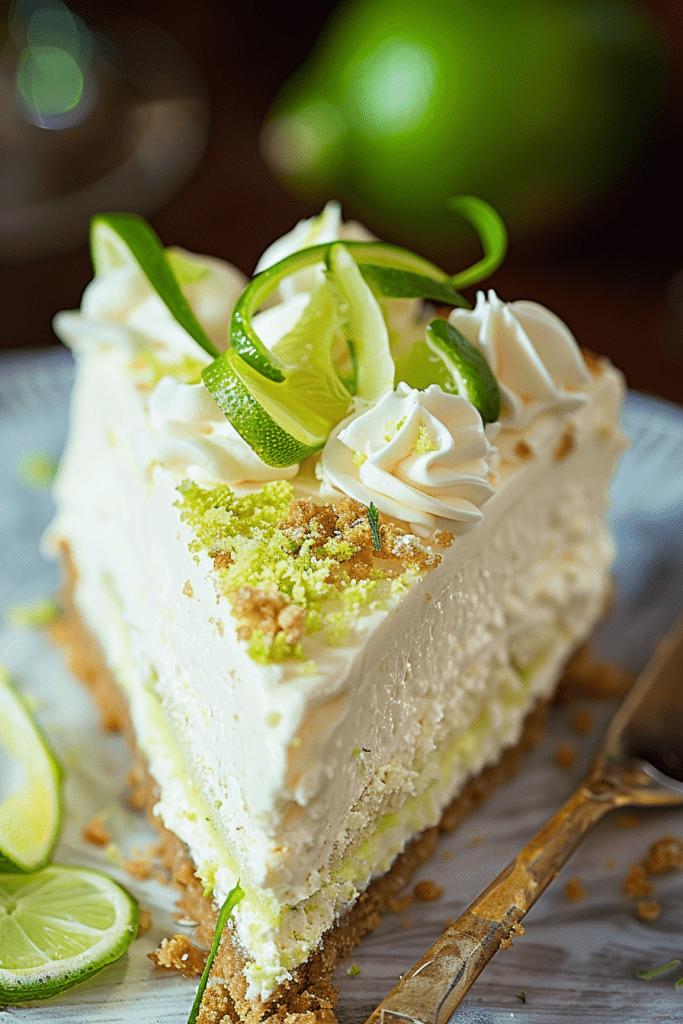
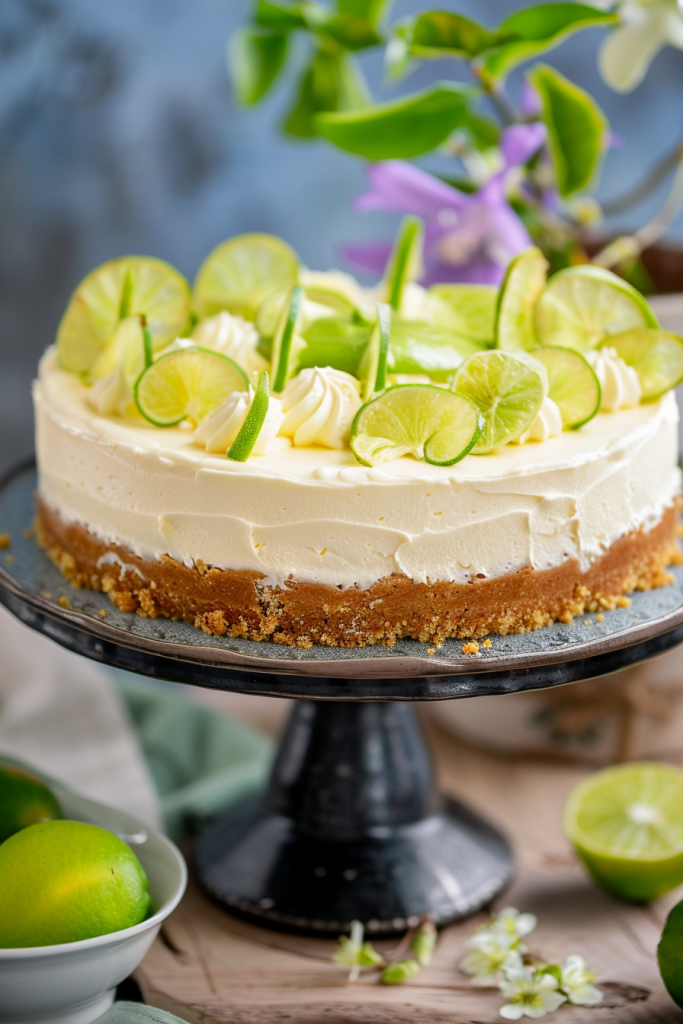
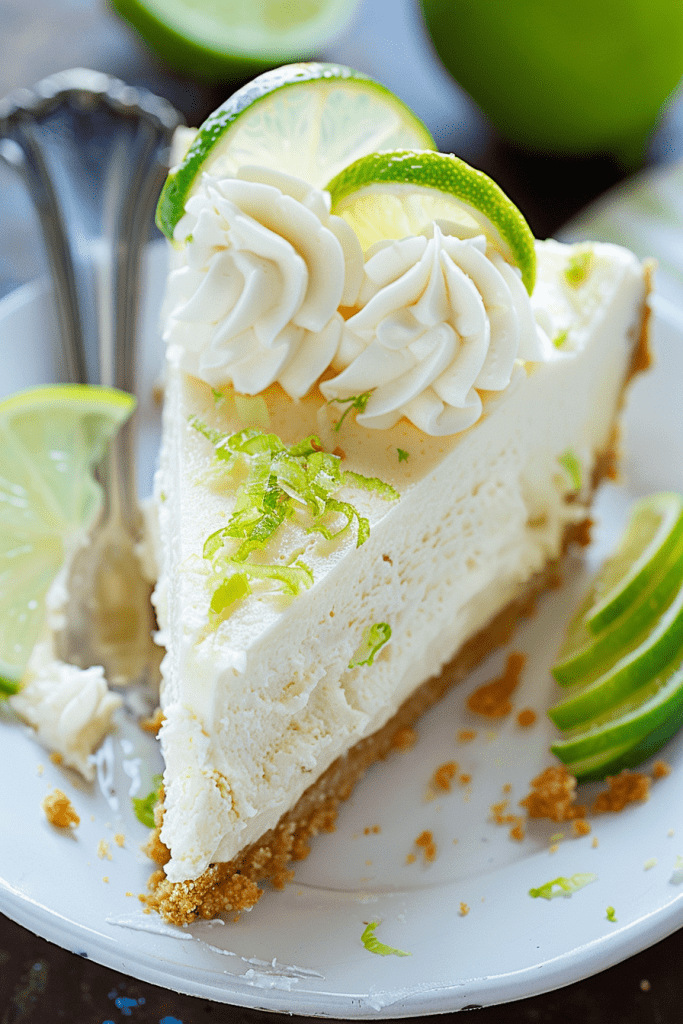
- Final Touches: When ready to serve, top your chilled key lime cheesecake with a generous amount of whipped cream. For an added burst of flavor, spread extra lime curd over the cheesecake before piping the whipped cream on top. Slice and savor each tangy and creamy bite of this delicious dessert.
- Storage Tips: To keep your leftover key lime cheesecake fresh, store it in an airtight container in the refrigerator for up to 3-4 days. This dessert is perfect for enjoying multiple times without losing its decadent taste.
- Preparing for Freezing: If you plan to freeze your key lime cheesecake for later enjoyment, ensure it is completely set in the refrigerator before proceeding.
- Wrapping for Freezing: To freeze the cheesecake, place the fully set and chilled dessert in the freezer. It’s best to wrap it tightly, either in several layers of plastic wrap or aluminum foil to prevent freezer burn and maintain its texture.
- Thawing before Serving: When you’re ready to enjoy your frozen key lime cheesecake, move it from the freezer to the refrigerator to thaw overnight. Allowing the dessert to thaw slowly in the fridge preserves its creamy consistency and flavors for a delightful treat.
Serving Suggestions
When it comes to serving your delicious key lime cheesecake, there are a few ways you can elevate the presentation and overall dining experience. Here are some serving suggestions that will make your dessert stand out:
1. Garnishes and Toppings:
Garnishing your key lime cheesecake adds both visual appeal and complementary flavors. Consider topping each slice with a dollop of whipped cream, a sprinkle of lime zest, and a fresh mint leaf for a pop of color and a burst of freshness.
2. Citrus Accompaniments:
Since key lime is the star of this dessert, consider serving your cheesecake with additional citrus elements. Fresh raspberries or sliced strawberries alongside a few lime wedges can enhance the tangy lime flavor of the cheesecake and provide a beautiful contrast in colors.
3. Texture Contrast:
For a delightful textural element, you can add a crunchy component to your serving. Crushed graham cracker crumbs sprinkled on top or a side of buttery shortbread cookies can offer a satisfying contrast to the creamy cheesecake.
4. Drink Pairings:
To complement the flavors of the key lime cheesecake, consider pairing it with a refreshing beverage. A zesty lemonade, a glass of champagne, or a cup of hot tea can all pair wonderfully with the tangy and creamy dessert.
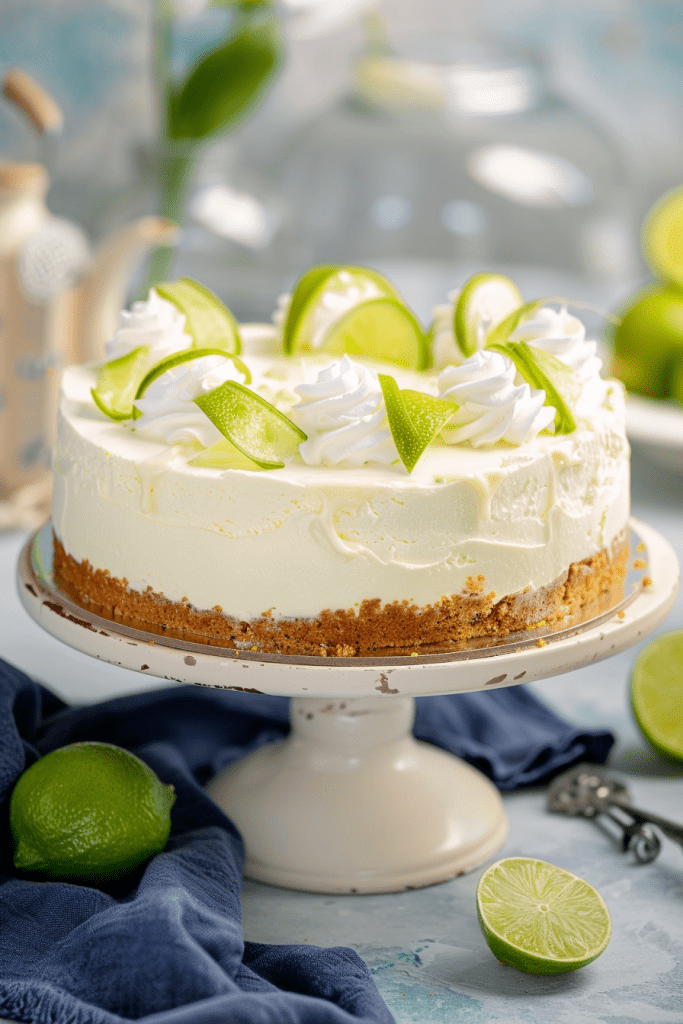
5. Plating Presentation:
Presentation is key when serving desserts, and key lime cheesecake is no exception. Use a decorative plate or cake stand to showcase your cheesecake slices beautifully. Drizzling a raspberry coulis or a lime-infused syrup on the plate can add a touch of elegance to the presentation.
By incorporating these serving suggestions, you can enhance the overall dining experience and leave your guests impressed with both the flavors and presentation of your key lime cheesecake.
How to Store
When it comes to storing your delightful Key Lime Cheesecake, proper handling is essential to maintain its freshness and flavor. Here’s how you can store your cheesecake for optimal results:
Refrigerating
After indulging in your scrumptious Key Lime Cheesecake, it’s crucial to keep any leftovers refrigerated to preserve its taste and texture. Here’s a simple guide on refrigerating your cheesecake:
- Ensure the cheesecake is completely cooled at room temperature before refrigerating.
- Use a knife to loosen the cheesecake from the springform pan’s rim before refrigerating.
- Cover the cheesecake with plastic wrap or airtight container before storing it in the refrigerator.
- Your Key Lime Cheesecake can be stored in the refrigerator for up to 5 days, ensuring it remains fresh and delicious throughout.
Freezing
If you want to save your Key Lime Cheesecake for a later indulgence, freezing is a fantastic option. Follow these steps to freeze your cheesecake properly:
- Once the cheesecake has completely cooled, carefully remove it from the springform pan.
- Wrap the cheesecake with plastic wrap followed by a final layer of aluminum foil to prevent freezer burn.
- You can freeze your Key Lime Cheesecake for up to 3 months for future enjoyment.
- When ready to devour, thaw the frozen cheesecake overnight in the refrigerator for the best taste and texture.
- Avoid freezing cheesecake with any toppings; add them when serving to maintain their freshness and appeal.
By following these storage tips, you can savor your Key Lime Cheesecake at its best, whether served fresh or enjoyed from the freezer.
Conclusion
Key Lime Cheesecake is a delightful dessert that offers a perfect blend of tangy lime flavor and creamy goodness. By mastering the art of preparation, serving, and storage, you can enjoy this indulgent treat at its best. Whether you choose to serve it fresh or freeze for later, following the right techniques will help preserve its taste and texture. With the tips provided in this article, you can elevate your Key Lime Cheesecake game and impress your guests with a dessert that’s not only delicious but also visually appealing. So, go ahead, whip up a Key Lime Cheesecake using the insights shared here, and savor every creamy, zesty bite.