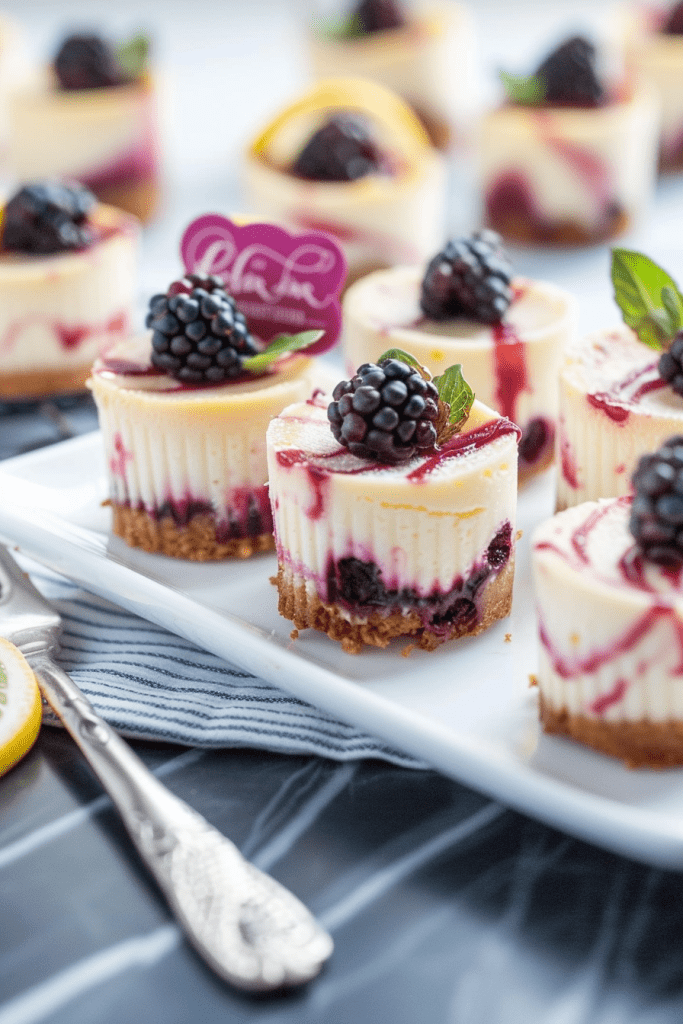
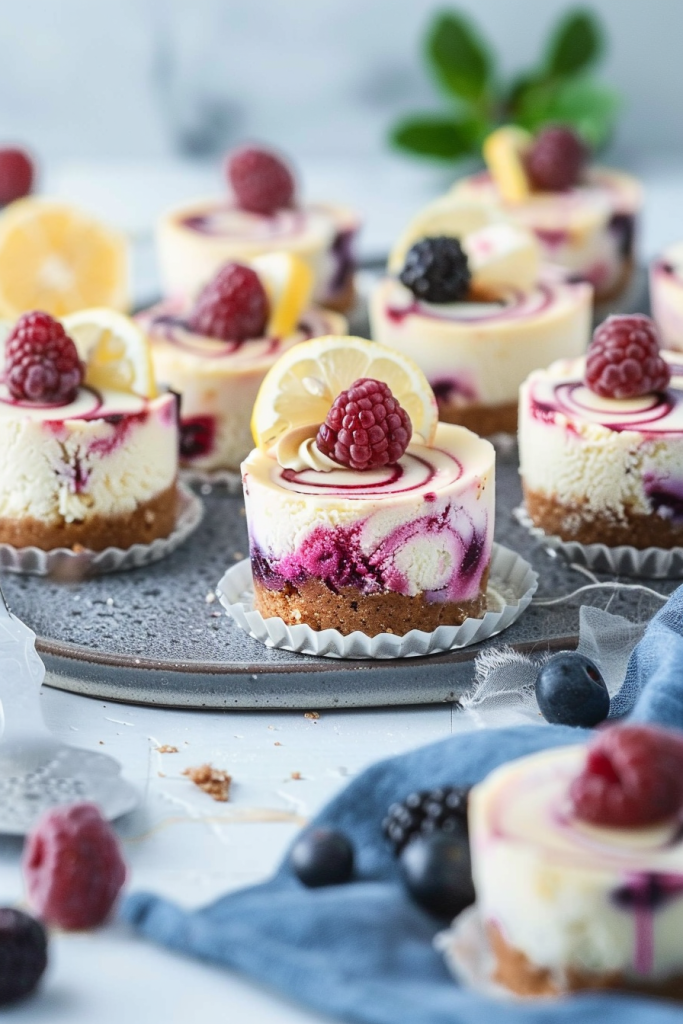
Craving a delightful treat that’s bursting with fruity flavors? These lemon berry swirl mini cheesecakes are a must-try! Combining the tangy zest of lemon with the sweetness of berries, these mini delights are a perfect blend of creamy and refreshing.
Crafted with a luscious lemon cheesecake filling, a buttery graham cracker crust, and a vibrant berry swirl, these mini cheesecakes are a delightful twist on the classic dessert. Whether you’re hosting a gathering or simply treating yourself, these mini cheesecakes are sure to impress with their individual portions and irresistible taste.
With a hint of citrus and a burst of berries in every bite, these mini lemon berry swirl cheesecakes are a delightful way to indulge without the guilt of sharing. Perfect for any occasion, these mini treats are a crowd-pleaser that will leave everyone craving more.
Ingredients
These lemon berry swirl mini cheesecakes require a few key ingredients to bring out their delightful flavors. Below are the components you’ll need for the berry swirl, crust, and cheesecake filling.
For the Berry Swirl
- 1 cup (155 g) frozen mixed berries
- 2 tablespoons granulated sugar
For the Crust
- 24 PARTNERS Free for All Kitchen Olive Oil & Sea Salt Crackers, or Double Chocolate Brownie Thins
- 1 tablespoon granulated sugar (omit for Double Chocolate Brownie Thin crust)
- 3 tablespoons extra-virgin olive oil (substitute unsalted butter, melted, for Double Chocolate Brownie Thin crust)
For the Cheesecake Filling
- 12 ounces (340.2 g) cream cheese, softened
- 3/4 cup (150 g) granulated sugar
- 1 tablespoon cornstarch
- 2 large eggs
- 3 tablespoons heavy cream
- 2 teaspoons lemon extract (omit for Double Chocolate Brownie Thin crust)
- 1 teaspoon vanilla bean paste (extract may be substituted)
- 1/8 teaspoon kosher salt
- Drizzled raspberry sauce & fresh raspberries (optional)
Equipment Needed
To prepare these delectable lemon berry swirl mini cheesecakes, you will require some basic kitchen tools to ensure smooth and effortless baking. Here is a list of essential equipment you will need:
- Muffin Tins
- Cupcake Liners
- Food Processor (for crushing Nilla Wafers into crumbs)
- Mixer (hand mixer or stand mixer with a paddle attachment)
- Measuring Cups and Measuring Spoons
- Plastic Wrap (for covering the cheesecakes while they chill in the fridge)
Having these tools ready will streamline the baking process and help you create perfect mini cheesecakes that are sure to impress your guests.
Preparation Steps
Preparing the Berry Swirl
- Cook the Berries: Place the frozen mixed berries and granulated sugar in a small pot. Set the heat to medium-low and cook the mixture, stirring occasionally, for 5-10 minutes. This will allow the berries to break down and release their juices, forming a syrupy consistency.
- Puree and Strain: Once the berries are cooked, transfer the mixture to a food chopper and puree until smooth. Next, strain the sauce through a fine-mesh sieve into a bowl to remove any seeds and pulp. Let the berry sauce cool completely before using. This will ensure a smooth swirl in the cheesecake filling.
Making the Crust
- Process the Crackers: In a food processor, combine the PARTNERS Free for All Kitchen Olive Oil & Sea Salt Crackers (or Double Chocolate Brownie Thins) and the granulated sugar (if using). Process until the mixture resembles fine crumbs.
- Mix with Oil or Butter: Transfer the crumbs to a bowl and stir in the extra-virgin olive oil, or melted butter if using the brownie thins, until the mixture is evenly moistened and holds together when pressed.
- Prepare the Pan: Lightly grease a mini-cheesecake pan. Place about one tablespoon of the crumb mixture into each well of the pan. Use the back of a spoon or a small glass to press the crumbs firmly into an even layer at the bottom. This will form the base for your cheesecakes.
Making the Cheesecake Filling
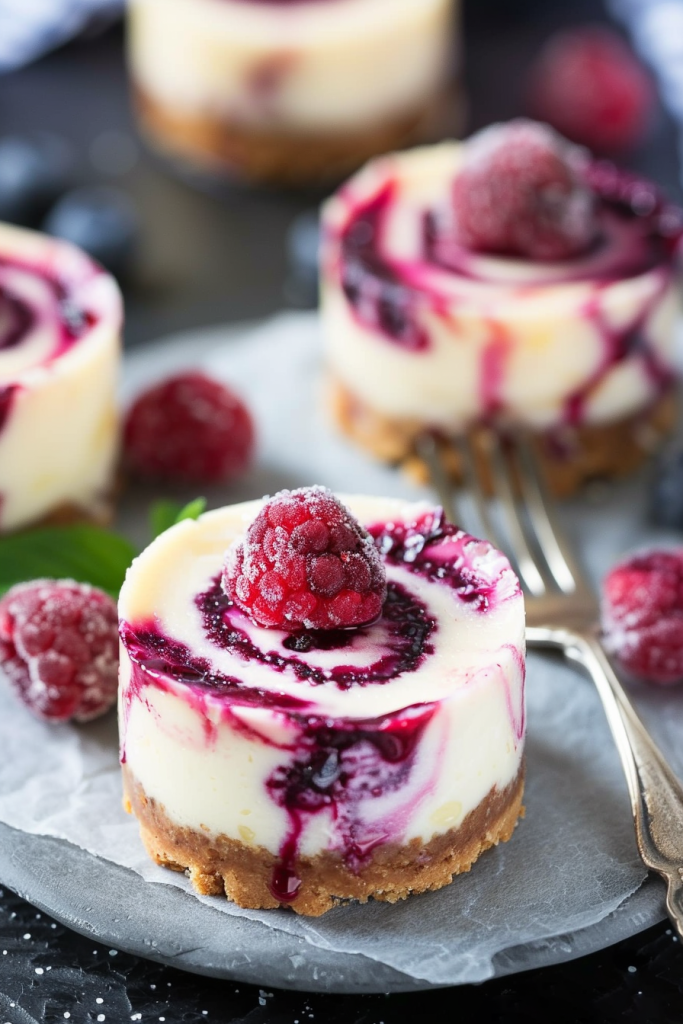
- Add Berry Swirl: Drizzle about a teaspoon of the cooled berry sauce over the top of the cheesecake batter in each well. Use a toothpick or skewer to gently swirl the berry sauce into the batter, creating a marbled effect.
- Beat the Cream Cheese: Preheat your oven to 300°F (150°C). In a large mixing bowl, combine the softened cream cheese, granulated sugar, and cornstarch. Use a mixer with a paddle attachment to beat the mixture on medium speed until it becomes smooth and creamy.
- Add Eggs and Flavorings: Add the eggs one at a time, beating well after each addition. Scrape down the sides and bottom of the bowl with a silicone spatula to ensure everything is well incorporated. Stir in the heavy cream, lemon extract (if using), vanilla bean paste, and kosher salt. Mix until the ingredients are just combined, being careful not to overbeat the batter.
- Fill the Wells: Divide the cheesecake batter evenly among the prepared crusts in the mini-cheesecake pan. Fill each well almost to the top.
Baking and Cooling
Baking Instructions
- Bake the Cheesecakes: Once assembled, place the mini-cheesecake pan in the preheated oven. Bake for 22-25 minutes. The cheesecakes are done when they are set around the edges but still have a slight jiggle in the center. Avoid overbaking, as this can cause the cheesecakes to crack.
Cooling and Chilling
- Initial Cooling: Remove the pan from the oven and let the cheesecakes cool in the pan for about 20 minutes. This initial cooling helps the cheesecakes set further without cracking.
- Refrigerate: Once the cheesecakes have cooled to room temperature, transfer the pan to the refrigerator. Chill the cheesecakes for at least 2 hours, or until they are completely set and cold. This chilling time allows the flavors to meld and the texture to firm up.
- Unmold and Serve: Carefully remove the cheesecakes from the pan. If using a springform mini-cheesecake pan, run a thin knife around the edges to release them easily. Serve them chilled, optionally garnished with fresh raspberries, a drizzle of the remaining berry sauce, or a sprinkle of lemon zest for added flair.
Assembling the Mini Cheesecakes
Preparing the Crust
- Divide the Crust Mixture: Take your prepared crust mixture and evenly distribute about one tablespoon into each well of the greased mini-cheesecake pan. Press down gently with the back of a spoon or a tamper to create a compact, even base.
Adding the Cheesecake Filling
- Spoon the Filling: Fill each crust-lined well with the prepared cheesecake filling, leaving a small space at the top to prevent overflow. Use the back of a spoon or a small offset spatula to smooth the tops for a neat finish.
Swirling in the Berry Sauce
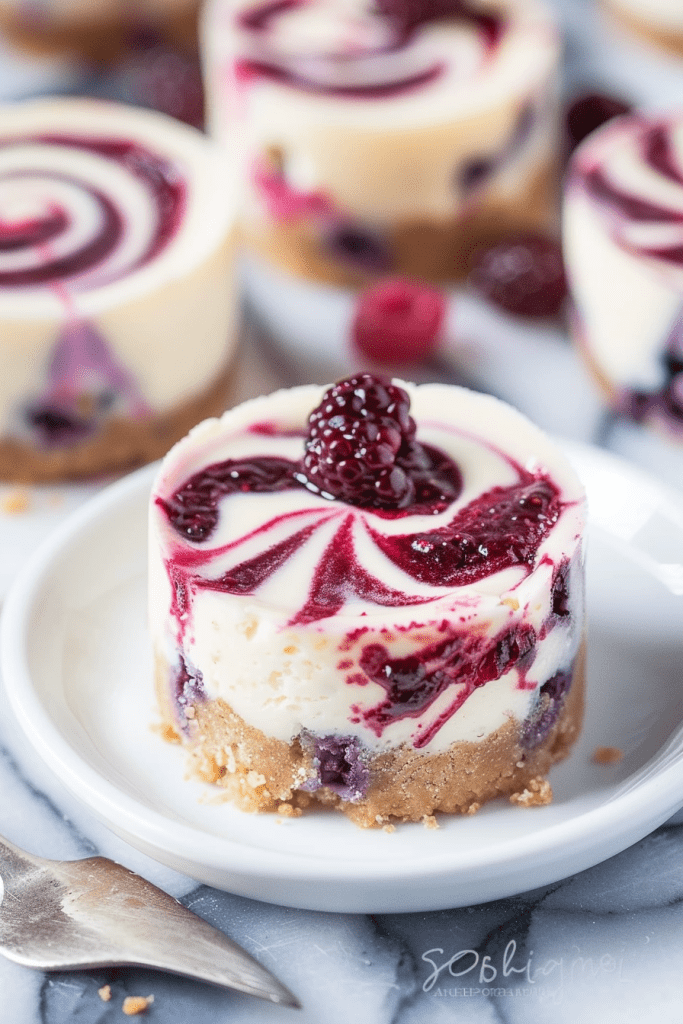
- Add the Berry Swirl: Using a teaspoon, place a small amount of the cooled berry sauce on top of each cheesecake. Take a toothpick or skewer and gently swirl the sauce in circular patterns to create a marbled effect. Be careful not to mix too deeply.
Serving Suggestions
- Garnish with Fresh Berries: For a vibrant touch, top each mini cheesecake with fresh berries such as raspberries, blueberries, or a combination. This not only enhances the presentation but adds a burst of fresh flavor.
- Drizzle with Lemon Curd: Add a tangy twist by drizzling lemon curd over the chilled cheesecakes. This complements the lemon extract in the filling and brings an extra citrusy zing.
- Sprinkle with Crushed Graham Crackers: For additional texture, sprinkle a light layer of crushed graham crackers over the top. This adds a pleasant crunch that contrasts with the creamy filling.
- Serve with Whipped Cream: Add a dollop of freshly whipped cream on the side of each cheesecake. The creamy lightness of the whipped cream pairs beautifully with the rich cheesecake.
- Pair with Lemon Sorbet: Serve alongside a scoop of lemon sorbet for a refreshing and palate-cleansing dessert experience.
Storing and Freezing
Refrigeration Instructions
- Storing in the Fridge: Once the cheesecakes have been chilled and set, transfer them to an airtight container. They can be stored in the refrigerator for up to 3 to 4 days. This helps maintain their freshness and delicious taste.
Freezing and Thawing Tips
- Freezing the Cheesecakes: If you’d like to keep them for a longer period, freezing is a great option. First, allow the cheesecakes to cool completely. Wrap each individual cheesecake tightly in plastic wrap to prevent freezer burn, then place them in a freezer-safe bag or container. They can be stored in the freezer for up to 3 months.
- Thawing: When ready to enjoy, transfer the desired number of cheesecakes from the freezer to the refrigerator. Allow them to thaw slowly overnight or for several hours until they reach the desired temperature.
By following these detailed instructions, you’ll ensure your lemon berry swirl mini cheesecakes are beautifully presented, thoroughly enjoyed, and properly stored for future delight. Indulge in these mouthwatering treats at your leisure!
Conclusion
Creating these delightful lemon berry swirl mini cheesecakes is a rewarding experience. The burst of berry flavor combined with the zesty lemony filling makes them a perfect treat for any occasion. By following the simple steps outlined in this recipe, you can easily whip up a batch of these mini cheesecakes in no time. Whether you serve them as a sweet ending to a meal or as a special treat for yourself, these mini cheesecakes are sure to impress your taste buds. Get ready to indulge in these irresistible bite-sized delights!
PrintLemon Berry Swirl Mini Cheesecakes Recipe
A delightful and refreshing dessert, these lemon berry swirl mini cheesecakes combine a creamy lemon filling with a vibrant berry swirl. Perfect for gatherings or an indulgent treat, these bite-sized cheesecakes are as beautiful as they are delicious!
- Prep Time: 30
- Cook Time: 25 minutes
- Total Time: 2 hours 55 minutes (including chilling time)
- Yield: 12 mini cheesecakes 1x
- Category: Dessert
- Cuisine: American
Ingredients
For the Berry Swirl:
- 1 cup (155 g) frozen mixed berries
- 2 tablespoons granulated sugar
For the Crust:
- 24 PARTNERS Free for All Kitchen Olive Oil & Sea Salt Crackers (or Double Chocolate Brownie Thins)
- 1 tablespoon granulated sugar (omit if using brownie thins)
- 3 tablespoons extra-virgin olive oil (substitute with melted unsalted butter for brownie thins crust)
For the Cheesecake Filling:
- 12 ounces (340 g) cream cheese, softened
- 3/4 cup (150 g) granulated sugar
- 1 tablespoon cornstarch
- 2 large eggs
- 3 tablespoons heavy cream
- 2 teaspoons lemon extract (omit for brownie thins crust)
- 1 teaspoon vanilla bean paste (vanilla extract can be substituted)
- 1/8 teaspoon kosher salt
Optional Toppings:
- Fresh raspberries
- Drizzled berry sauce
- Lemon zest or whipped cream
Instructions
Step 1: Prepare the Berry Swirl
- Cook the Berries: In a small saucepan, combine the frozen berries and sugar over medium-low heat. Stir occasionally for 5–10 minutes, until the berries break down and become syrupy.
- Puree and Strain: Blend the mixture in a food processor or chopper until smooth, then strain through a fine-mesh sieve to remove seeds. Set aside to cool completely.
Pro Tip: Allow the berry sauce to cool fully before swirling into the cheesecake filling to prevent it from thinning the batter.
Step 2: Make the Crust
- Crush the Crackers: Place the crackers and sugar (if using) in a food processor. Pulse until finely ground.
- Combine with Oil: Mix the crumbs with olive oil (or melted butter for brownie thins crust) until evenly moistened.
- Line the Pan: Lightly grease a mini-cheesecake pan. Add about 1 tablespoon of crumb mixture to each well, pressing firmly with a spoon or tamper to form an even crust.
Common Mistake: Avoid over-packing the crust, as it can harden excessively during baking.
Step 3: Make the Cheesecake Filling
- Beat the Cream Cheese: Preheat the oven to 300°F (150°C). In a large bowl, mix the softened cream cheese, granulated sugar, and cornstarch using a paddle attachment on medium speed until creamy and smooth.
- Add the Eggs: Blend in the eggs one at a time. Scrape down the bowl after each addition to ensure a smooth batter.
- Incorporate Liquids: Stir in the heavy cream, lemon extract (if using), vanilla bean paste, and salt. Mix until just combined.
Pro Tip: Do not overmix the batter, as it can incorporate air and cause the cheesecakes to crack during baking.
Step 4: Assemble the Cheesecakes
- Fill the Wells: Divide the cheesecake filling evenly among the crust-lined wells, filling nearly to the top.
- Add the Swirl: Drizzle 1 teaspoon of the cooled berry sauce on top of each cheesecake. Use a toothpick or skewer to create a marbled pattern by gently swirling the sauce into the batter.
Step 5: Bake and Cool
- Bake: Place the pan in the oven and bake for 22–25 minutes, or until the edges are set but the centers still jiggle slightly.
- Cool: Remove the cheesecakes from the oven and let them cool in the pan for 20 minutes. Then, transfer the pan to the refrigerator to chill for at least 2 hours, or until fully set.
Common Mistake: Overbaking the cheesecakes can cause cracks; they should be slightly jiggly in the center when removed from the oven.
Step 6: Serve
- Once chilled, carefully remove the cheesecakes from the pan.
- Top with fresh raspberries, a drizzle of remaining berry sauce, whipped cream, or a sprinkle of lemon zest for garnish. Serve cold and enjoy!
Notes
Serving Suggestions:
- Serve your mini cheesecakes with a scoop of lemon sorbet for a refreshing pairing.
- Add crushed graham crackers for a crunchy textural contrast.
Storage Tips:
- Refrigerator: Store cheesecakes in an airtight container for up to 4 days.
- Freezer: Wrap each cheesecake tightly in plastic wrap, then place in a freezer-safe bag. Freeze for up to 3 months. Thaw overnight in the refrigerator before serving.
Tips & Tricks:
- Always use room-temperature cream cheese to avoid lumps in the filling.
- A mini-cheesecake pan with removable bottoms makes unmolding easier.
- For a crisp crust, pre-bake the crumbs for 5 minutes at 300°F (150°C) before adding the filling.
This recipe is a show-stopper at any event or a sweet indulgence for yourself. With balanced flavors and a creamy, tangy finish, these mini treats will become a household favorite!

