
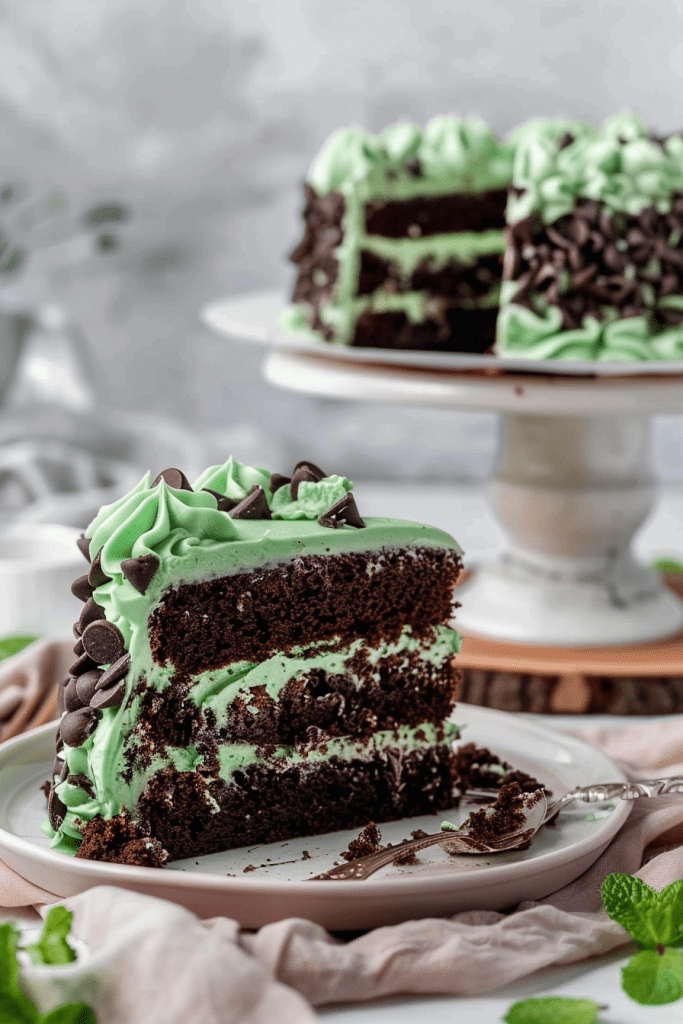
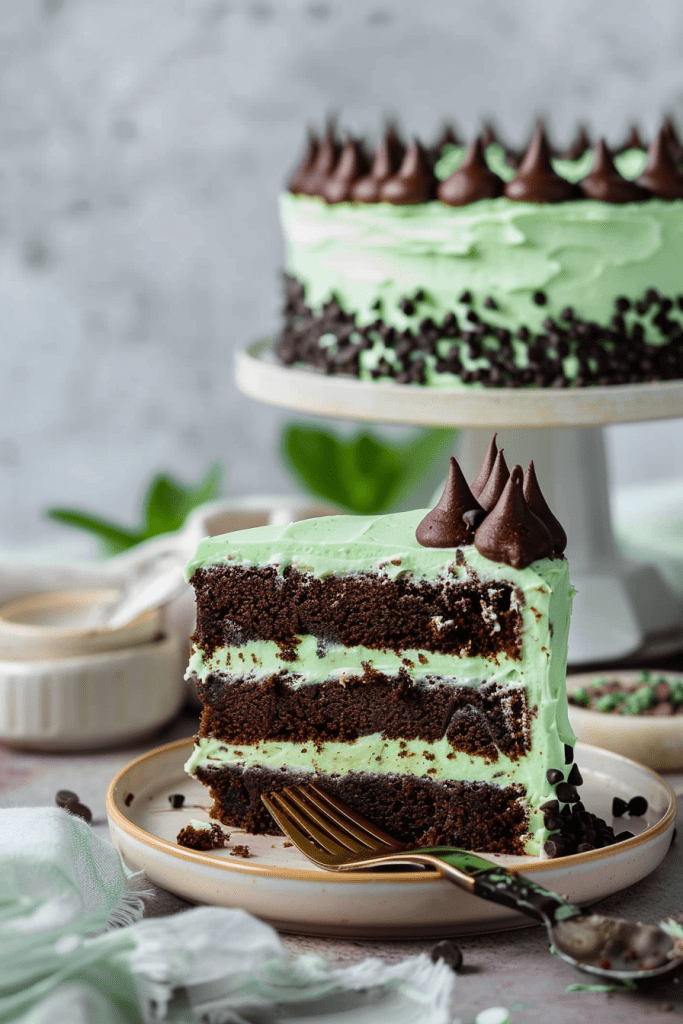
Craving a delightful twist on a classic chocolate cake? Look no further than the irresistible allure of mint chocolate chip cake recipes. Imagine a moist, tender chocolate base infused with the perfect hint of mint, all crowned with a luscious mint chocolate chip buttercream frosting. This crowd-pleasing dessert is a celebration of flavors that will have your taste buds dancing with joy.
Indulge in the richness of this cake that mirrors the beloved ice cream flavor flawlessly. The marriage of deep chocolate tones and refreshing mint notes in every bite is a true delight. Whether for a special occasion or a casual gathering, this cake is sure to impress even the most discerning palates. Get ready to surprise your friends and family with a treat that’s both decadent and delicious, leaving everyone craving more.
Total Time: 2 hours + 1 hour chilling
Yield: 10-12 slices
Ingredients
Creating a mint chocolate chip cake starts with gathering the essential ingredients that will make this delightful dessert a reality. Below are the items you will need for the chocolate cake layers and the mint chocolate chip frosting.
For the Mint Chocolate Cake
- 1 3/4 cup (230g) all purpose flour (see notes for GF option in Variations section)
- 3/4 cup (65g) dutch process cocoa powder
- 1 1/2 tsp baking powder
- 1 tsp baking soda
- 1/2 tsp salt
- 1 3/4 cup (360g) granulated sugar
- 1/2 cup (120ml) canola or vegetable oil
- 2 large eggs, room temp
- 2 tsp vanilla extract
- 1/4 tsp peppermint extract
- 3/4 cup (190ml) buttermilk, room temp (store-bought or DIY: 3/4 cup milk + 3/4 tsp white vinegar/lemon juice, let sit 5 min*)
- 3/4 cup (175ml) hot water
For the Mint Chocolate Chip Buttercream
- 1 1/2 cups (330g) unsalted butter, room temp
- 4 cups (480g) powdered sugar
- 1–2 tbsp milk
- 1 tsp peppermint extract
- 3–4 drops green gel food coloring (blue and brown gel coloring optional)
- 4 oz dark or semisweet chocolate, finely chopped
Equipment Needed
When preparing this delicious mint chocolate chip cake recipe, having the right equipment is essential to ensure a smooth baking process and a delectable final result. Here are the tools and equipment you will need:
For Baking the Cake Layers:
- Three 6-inch or two 8-inch round cake pans
- Parchment paper circles to line the bottom of the cake pans
- Nonstick cooking spray or butter for greasing the cake pans
- Cake sleeves (optional)
For Making the Cake Batter:
- Large mixing bowl
- Medium mixing bowl
- Whisk for mixing ingredients
- Measuring cups and spoons
- Mixing spoon or spatula
- Electric mixer (hand or stand, optional but helpful)
For Making the Mint Chocolate Chip Buttercream:
- Stand mixer or hand mixer
- Large mixing bowl
- Offset spatula for spreading frosting
- Piping bag and decorating tips (optional, for frosting decorations)
Having these essential tools and equipment ready will make your baking experience more enjoyable and ensure that your mint chocolate chip cake turns out perfectly every time.
Instructions
Mint Chocolate Cake
- Preheat the oven to 350°F (175°C) and prepare either (3) 6″ round cake pans or (2) 8″ round cake pans. Coat in nonstick cooking spray and place a parchment paper round at the bottom of each pan. If you have cake sleeves, use those as well.
- In a medium bowl, whisk together the flour, cocoa powder, baking powder, baking soda, and salt. Set aside.
- In a large mixing bowl, whisk together the sugar and oil, followed by the eggs, vanilla, and peppermint extract.
- Now alternating with the dry ingredients and buttermilk, mix in the dry ingredients, buttermilk, dry ingredients, buttermilk, dry ingredients. Mix until just smooth after the last addition.
- Carefully stir in the hot water. The batter should be very thin now.
- Evenly distribute the batter among your prepared cake pans.
- Bake for 35-40 minutes or until a toothpick inserted into the center of each cake comes out clean.
- Allow the cakes to cool in their pans for about 30 minutes, then turn the cakes out onto a cooling rack and chill in the refrigerator for about 1 hour. If you need to store them overnight, let them cool completely at room temperature and then wrap in plastic wrap before chilling.
Mint Chocolate Chip Buttercream & Assembly
- Once the cakes have chilled, make the buttercream.
- In a large bowl using a hand or stand mixer with the whisk attachment, mix the butter until smooth.
- Mix in the powdered sugar, 1 cup at a time, alternating with the milk (start with 1 tbsp milk, add more if needed). Add the peppermint extract. Beat until light and fluffy.
- Now mix in your green food coloring, just until you get a light green pastel color. You can stop there or follow it up with 1 drop of blue gel food coloring and a half a drop of brown. This will give you a more natural mint color.
- Now for the chocolate: make sure it’s chopped as finely as possible without it turning into complete dust. If chopped by hand, you likely have a good mix of small bits and chocolate powder. Try not to add too much of the powdered chocolate into the buttercream. Scoop up about 1/2 cup of the chocolate with your hands and gently shake off any powdered bits. Fold this gently into the buttercream. Leave any remaining chopped chocolate for decoration.
- To assemble, level off the cake layers if needed using a serrated knife. Place one layer on your serving plate or cake stand.
- Spread an even layer of buttercream over the first cake layer. Top with the second layer (and third, if using 6-inch pans), spreading buttercream between each.
- Chill the stacked cake for about 30 minutes to set the buttercream slightly. This makes frosting the outside easier.
- Slather a thick layer of buttercream all around the outside of the cake. Smooth out the sides and top using an offset spatula. As mentioned in the decorating tips below, using an offset spatula instead of a cake scraper helps prevent dragging the chocolate chunks.
- Use the remaining chopped chocolate for decoration, if desired (e.g., pressing onto the sides or sprinkling on top).
- Now slice and enjoy!
Decorating Tips
Decorating a mint chocolate chip cake is the fun part where you can unleash your creativity and make your cake visually stunning. Here are some decorating tips to help you achieve a beautifully decorated mint chocolate chip cake:
Applying Frosting
When frosting your mint chocolate chip cake, apply a thick layer of frosting around the outside of the cake. Instead of using a cake scraper which might drag the chocolate pieces, gently smooth out the sides using an offset spatula. Don’t worry about achieving a perfect application; the charm of this cake lies in its messy, homemade look resembling a bowl of mint chip ice cream.
Adding Final Touches
To add the final touches to your mint chocolate chip cake, after applying the frosting, consider pressing the reserved finely chopped chocolate (or additional mini chocolate chips) up the side of the cake for a simple yet delightful decoration. If you prefer decorative swirls on top of the cake, you might need to make extra frosting (increase the recipe by 50%) and use a piping tip like an Ateco 848 for elegant swirls. Experiment with different decorations to personalize your mint chocolate chip cake and make it visually appealing.
How to Store the Cake
After creating your delicious mint chocolate chip cake, proper storage will ensure it stays fresh and enjoyable for longer periods. Here are some simple steps to help you store your cake based on your needs:
Counter or Refrigerator:
- Use an airtight cake carrier or wrap the cake loosely in plastic wrap.
- If wrapping in plastic, use toothpicks inserted into the cake (away from decorations) to prop the plastic away from the frosting.
- Alternatively, arrange sliced cake pieces in a single layer in an airtight container.
- If airtight, you can leave the cake out at room temperature for up to 24 hours (best freshness) or store it in the refrigerator for up to 5 days.
Freezer:
- For longer storage, place the whole frosted cake (uncovered) in the freezer for a couple of hours to firm up the frosting before wrapping it well in a double layer of plastic wrap, followed by a layer of foil.
- You can also store individual slices wrapped well in plastic wrap and foil, or placed in a freezer-safe airtight container.
- The cake will keep well in the freezer for up to 3 months.
- Allow the cake to thaw in the refrigerator overnight before serving.
By following these storage tips, you can enjoy your mint chocolate chip cake for several days or even weeks, ensuring every bite is just as delicious as the first.
Variations and Substitutions
When it comes to making variations and substitutions for this mint chocolate chip cake recipe, you have a few options to cater to dietary preferences or restrictions. Here are some ideas to adapt the recipe:
Gluten-Free Adaptation
For a gluten-free version of this cake, you can substitute the all-purpose flour with a high-quality 1:1 gluten-free baking flour blend (one that contains xanthan gum). Make sure the blend is suitable for cakes to maintain the texture and structure. Double-check that all other ingredients like baking powder and extracts are certified gluten-free. Follow the recipe steps as usual, replacing the flour accordingly, and enjoy a gluten-free mint chocolate chip cake.
Vegan Option
To make this cake vegan-friendly, you will need to make a few adjustments. Replace the butter with a quality plant-based butter substitute (sticks work well for frosting). Use a dairy-free alternative for the buttermilk (like almond, soy, or oat milk mixed with vinegar as described in the ingredient notes). Check that the chocolate you use is vegan-friendly. Substitute the eggs with a suitable egg replacer like flax eggs (1 tbsp flaxseed meal + 3 tbsp water per egg, let sit 5 min) or a commercial egg replacer. Use plant-based milk (like almond, soy, or coconut cream) instead of dairy milk in the frosting. By making these swaps, you can create a delicious vegan mint chocolate chip cake.
Conclusion
Creating a mint chocolate chip cake is a delightful experience that combines rich chocolate flavors with refreshing mint. From mixing the batter to frosting the layers, each step contributes to a decadent treat perfect for any occasion. Decorating tips add a personal touch, while storage suggestions ensure lasting freshness. Whether following the recipe as is or exploring gluten-free or vegan adaptations, the versatility of this cake allows for creativity in the kitchen. With its visually stunning appearance and delicious taste, a mint chocolate chip cake is sure to impress and satisfy any sweet tooth. Enjoy the process of baking and savoring this indulgent dessert with loved ones.
PrintMint Chocolate Chip Cake
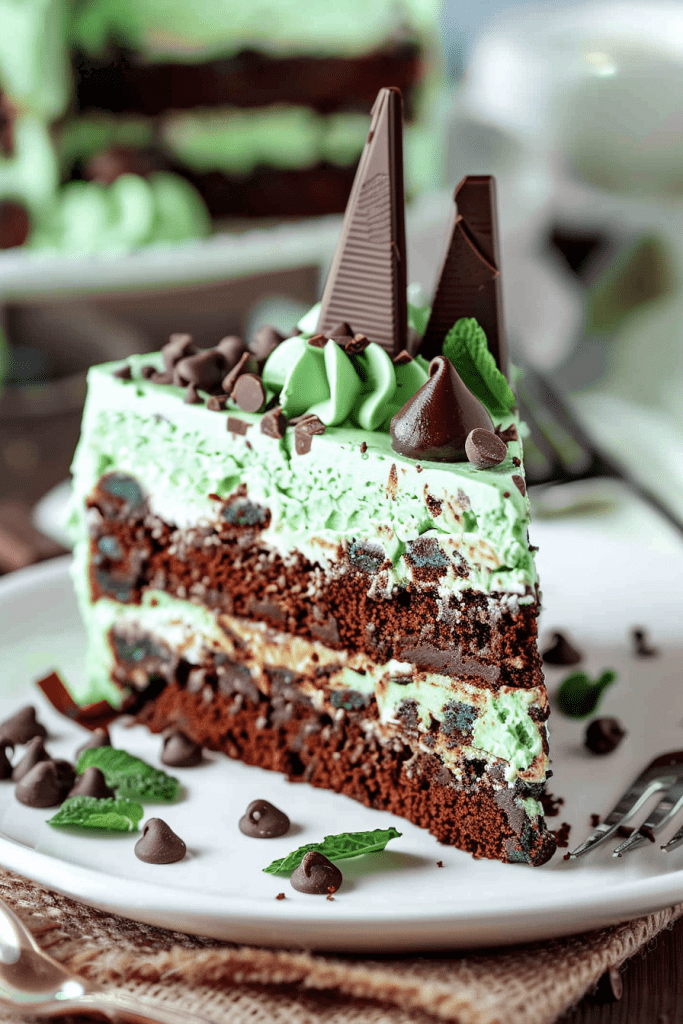
Whip up this delightful Mint Chocolate Chip Cake! Imagine moist, deeply chocolatey cake layers infused with a cool hint of mint, all wrapped up in a creamy, dreamy mint buttercream loaded with tiny chocolate pieces. It tastes just like the beloved ice cream flavor and is perfect for birthdays, holidays, or just because!
- Prep Time: 50 minutes
- Cook Time: 40 minutes
- Total Time: Approx. 2 hours 40 minutes (Included Chilling time)
- Yield: 10–12 slices 1x
- Category: Dessert, Cake
- Cuisine: American
Ingredients
For the Mint Chocolate Cake:
- 1 3/4 cup (230g) all purpose flour
- 3/4 cup (65g) dutch process cocoa powder
- 1 1/2 tsp baking powder
- 1 tsp baking soda
- 1/2 tsp salt
- 1 3/4 cup (360g) granulated sugar
- 1/2 cup (120ml) canola or vegetable oil
- 2 large eggs, room temperature
- 2 tsp vanilla extract
- 1/4 tsp peppermint extract
- 3/4 cup (190ml) buttermilk, room temperature (See Notes*)
- 3/4 cup (175ml) hot water
For the Mint Chocolate Chip Buttercream:
- 1 1/2 cups (330g) unsalted butter, room temperature
- 4 cups (480g) powdered sugar
- 1–2 tbsp milk
- 1 tsp peppermint extract
- 3–4 drops green gel food coloring (optional: 1 drop blue + 1/2 drop brown for natural mint color)
- 4 oz dark or semisweet chocolate, finely chopped
Instructions
- Get Ready: Preheat oven to 350°F (175°C). Grease and line the bottoms of three 6-inch OR two 8-inch round cake pans with parchment paper.
- Dry Mix: In a medium bowl, whisk together flour, cocoa powder, baking powder, baking soda, and salt.
- Wet Mix: In a large bowl, whisk sugar and oil. Then whisk in the room temperature eggs, vanilla extract, and peppermint extract until combined.
- Combine: Add the dry ingredients and buttermilk to the wet ingredients alternately, beginning and ending with the dry mix (Dry, Buttermilk, Dry, Buttermilk, Dry). Mix until just combined – don’t overmix!
- Add Water: Gently stir in the hot water. The batter will be thin.
- Bake: Divide batter evenly between your prepared pans. Bake for 35-40 minutes, or until a wooden skewer inserted into the center comes out clean.
- Cool Down: Let cakes cool in their pans for about 30 minutes before turning them onto a wire rack. Chill the layers in the fridge for at least 1 hour (this makes frosting easier!).
- Make Buttercream: While cakes chill, beat the room temperature butter in a large bowl with a mixer until smooth and creamy. Gradually add the powdered sugar, 1 cup at a time, alternating with 1-2 tablespoons of milk, until smooth. Beat in the peppermint extract.
- Color & Chocolate: Add green food coloring drop by drop until you reach your desired minty shade (add blue/brown for a more muted green, if you like). Gently fold in about 1/2 cup of the finely chopped chocolate (try to leave out excess powder). Save the rest for decorating!
- Assemble: If needed, level the tops of your chilled cake layers. Place one layer on your serving plate. Spread a generous layer of buttercream on top. Repeat with remaining layers.
- Chill Again: Pop the stacked cake in the fridge for about 30 minutes to let the buttercream layers firm up slightly.
- Frost: Cover the outside of the cake with the remaining buttercream. Use an offset spatula for gentle smoothing to avoid dragging the chocolate chips. Decorate with leftover chopped chocolate if desired.
- Serve: Slice and share your amazing homemade Mint Chocolate Chip Cake!
Notes
- Serving: This cake is fantastic served slightly chilled or at room temperature. Perfect with a dollop of whipped cream or vanilla ice cream!
- DIY Buttermilk: No buttermilk? No problem! Add 3/4 teaspoon of white vinegar or lemon juice to 3/4 cup of regular milk. Let it sit for 5 minutes before using.
- Frosting Tip: For smooth sides without dragging the chocolate bits, use an offset spatula rather than a bench scraper. Gently does it! Chop the chocolate finely, but try to avoid adding too much fine chocolate ‘dust’ to the buttercream – scoop the bits with your hands to shake off excess powder.
- Storage: Keep the cake in an airtight container. It’s best enjoyed within 1 day at room temperature, or store it in the refrigerator for up to 5 days. You can also freeze well-wrapped slices or the whole cake for up to 3 months; thaw in the fridge before serving.