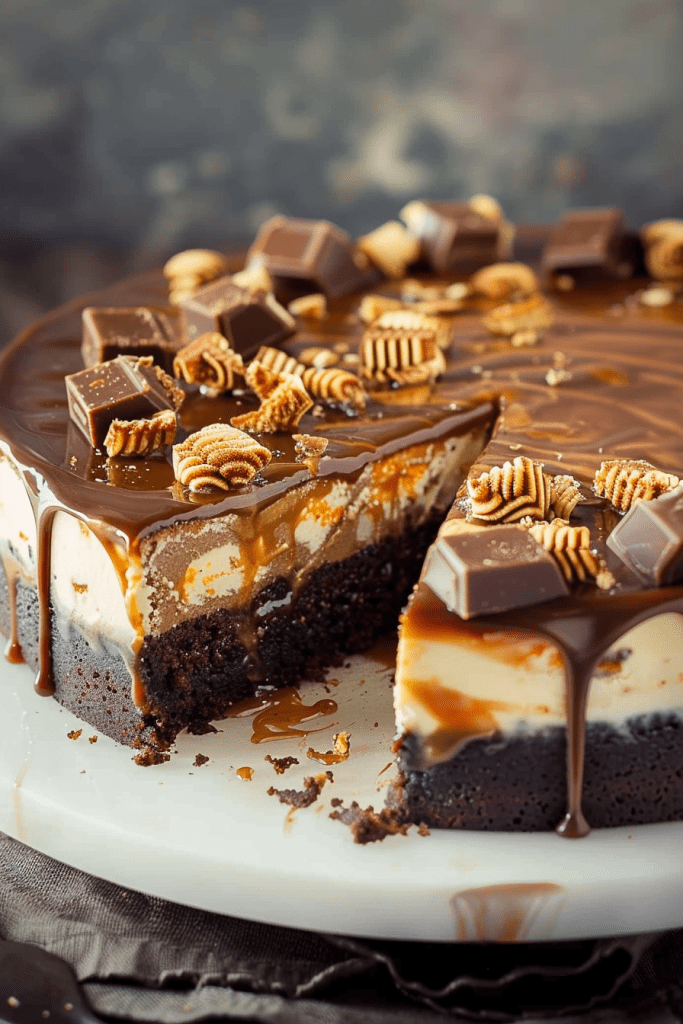
Indulge in the decadent world of Snickers cheesecake recipes! This creamy delight, with its Oreo crust and generous chunks of Snickers, is a dessert lover’s dream. Perfect for repurposing Halloween candy, this cheesecake is a crowd-pleaser that will have your taste buds dancing.
Crafted with care and updated to perfection, this Snickers cheesecake is a creamy masterpiece that simply melts in your mouth. The blend of peanut butter and chocolate swirls, topped with salted caramel, peanuts, and Snickers bars, creates a symphony of flavors that is sure to satisfy your sweet cravings. Whether you’re a cheesecake enthusiast or simply a dessert connoisseur, this recipe is a must-try for anyone looking to elevate their dessert game.
Ingredients
In crafting this exquisite Snickers cheesecake, each ingredient plays a vital role in bringing together a symphony of flavors and textures. Below are the crucial components that will transform into a delightful dessert masterpiece.
For the Oreo Crust
- 22 Oreos (cream filling included)
- 5 tablespoons of melted butter
For the Cheesecake Filling
- Cream cheese
- Granulated sugar
- Eggs
- Vanilla extract
- Funsized Snickers candy bars
For the Caramel Peanut Layer
- Sweetened condensed milk
- Butter
- Milk chocolate morsels
- Salt
- Sweetened condensed milk
- Butter
Equipment Needed
To create this decadent Snickers cheesecake, you will need the following essential equipment:
1. 9-inch square baking pan
- Parchment paper for lining the pan, allowing for easy removal of the cheesecake.
2. Mixing Bowls
- Use several mixing bowls to prepare different components of the cheesecake such as the crust, peanut butter cheesecake, and chocolate cheesecake layers.
3. Hand or Stand Mixer
- A hand mixer or stand mixer is essential for achieving a smooth and creamy cheesecake filling without any lumps.
4. Spatula
- A spatula will come in handy for scraping down the sides of the mixing bowl and ensuring all ingredients are well incorporated.
5. Measuring Cups and Spoons
- Use measuring cups and spoons to accurately measure all ingredients for the perfect balance of flavors in your Snickers cheesecake.
6. Oven
- Preheat your oven to 350°F (177°C) to bake the cheesecake to perfection.
- Chilling the cheesecake overnight in the refrigerator is key to achieving the ideal New York Style cheesecake texture.
Having these equipment ready will make the process of preparing your Snickers cheesecake smooth and enjoyable.
Preparation
As I delve into creating this mouthwatering Snickers cheesecake, the preparation is key to setting the stage for a delectable dessert experience. Let’s start by perfecting the crust and mixing the cheesecake filling to achieve that rich, creamy texture that will leave you craving for more.
Preparing the Crust
To begin, preheat your oven to 325 degrees Fahrenheit while greasing an 8 or 9-inch springform pan with cooking spray. In a large bowl, combine crushed wafers, butter, and salt, pressing the mixture into the bottom of the prepared pan and up the sides.
Mixing the Cheesecake Filling
In another large bowl, using a hand mixer or stand mixer, beat cream cheese and sugar until smooth. Add eggs one at a time, followed by vanilla and sour cream. Incorporate flour and salt, beating until just combined. Pour half of the filling over the crust and reserve one cup of the mixture.
Next, stir melted chocolate into the reserved cup of cheesecake mixture, creating a decadent swirl effect. Dollop the chocolate mixture over the filling and swirl with a knife. Pour the remaining plain batter over the swirls to create a mesmerizing pattern.
Wrap the bottom of the pan in aluminum foil, place it in a roasting pan, and pour boiling water until it reaches halfway up the sides of the baking pan. Bake the cheesecake until the center slightly jiggles, usually about 1 hour and 30 minutes.
With the crust and filling perfectly prepared, you’re well on your way to creating a Snickers cheesecake masterpiece that will impress your guests and tantalize their taste buds.
Baking the Cheesecake
Baking the cheesecake is a crucial step to ensure a smooth and creamy texture that will wow your taste buds. Here’s how to perfect the baking process to create a decadent Snickers cheesecake.
Water Bath Setup
To bake a flawless Snickers cheesecake, setting up a water bath is key. The water bath helps regulate the temperature, preventing cracks and ensuring a velvety texture. Here’s how to set it up:
- Place your prepared springform pan with the cheesecake into a large roasting or baking tin with high sides.
- Fill the roasting tin with boiling water, ensuring it reaches about halfway up the sides of the springform pan.
- Carefully place the setup in a preheated oven to bake your cheesecake to perfection.
- Ensure the oven is preheated to 350°F (177°C) before baking.
- Use the lower third position in the oven for even baking.
- After baking, let the cheesecake cool in the oven for an hour to prevent cracks.
- Transfer the cheesecake to the fridge to cool overnight, enhancing its New York Style texture.
- For extra flair, top your cheesecake with salted caramel, peanuts, and more Snickers bars before serving.
- Store any leftovers in the fridge for up to 5 days or freeze for up to 3 months. Thaw overnight in the fridge before indulging in the creamy goodness again.

Assembling the Cheesecake
Adding the Caramel Peanut Layer
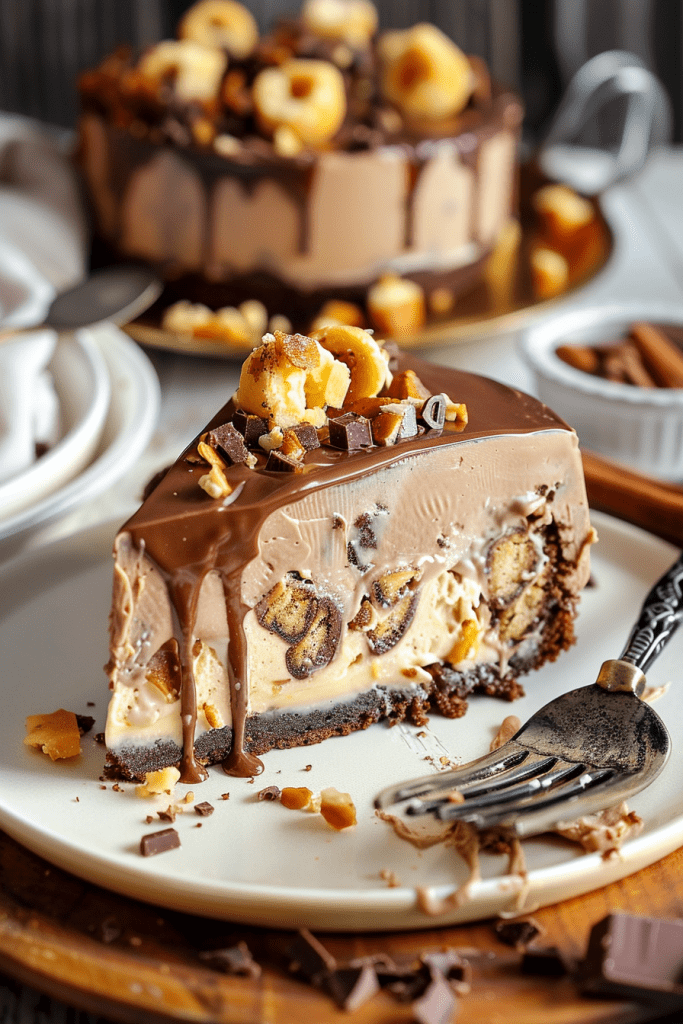
It’s time to elevate the decadence of the Snickers cheesecake by adding the irresistible caramel peanut layer. This layer perfectly blends chewy caramel and crunchy peanuts to enhance the overall texture and flavor profile of the cheesecake.
To create this luscious layer, melt Snickers bars with butter over low heat until smooth. Then, gradually add confectioners’ sugar and milk to achieve the ideal consistency. Stir until smooth and pour over the chilled cheesecake to set.
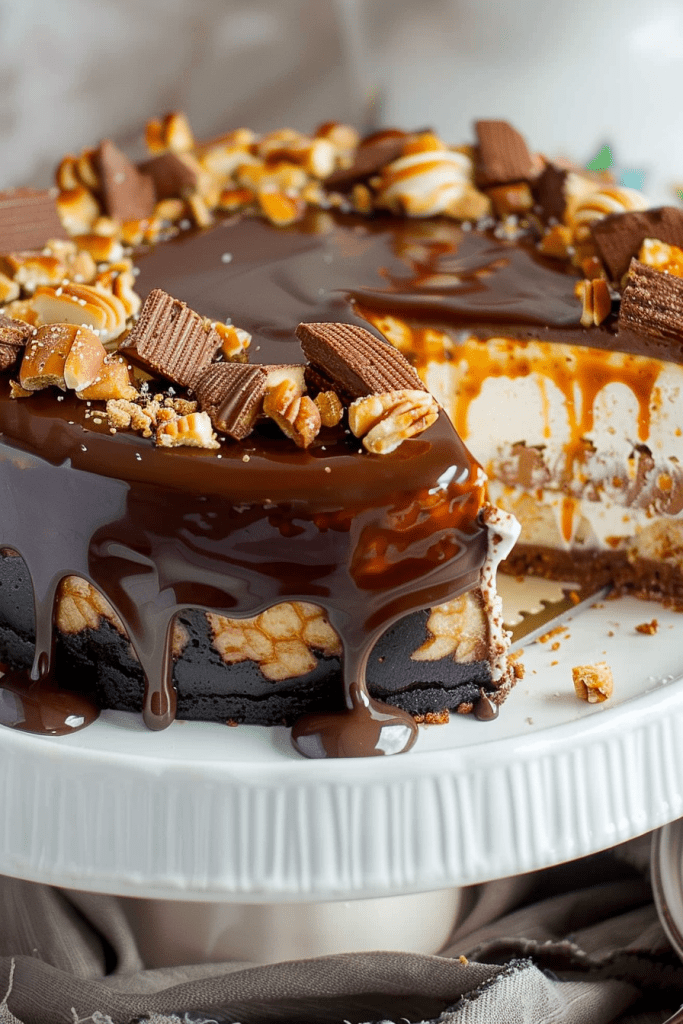
Topping with Chocolate Ganache
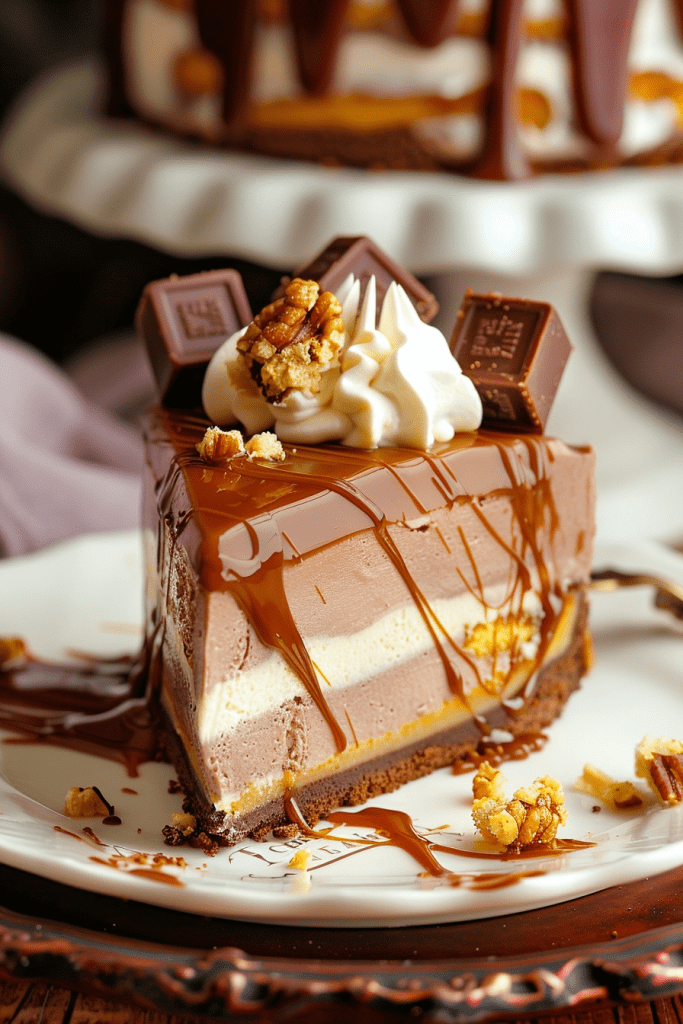
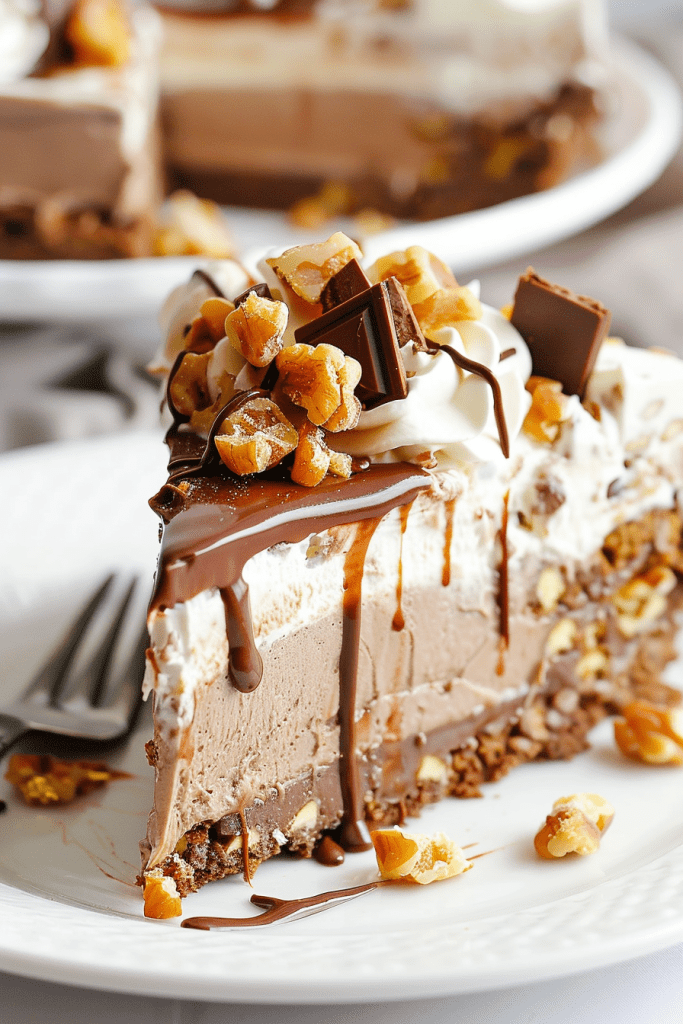
To complete the masterpiece, crown the Snickers cheesecake with a rich dark chocolate ganache. The ganache not only adds a luxurious touch but also provides a glossy finish that complements the other flavors perfectly.
Simply heat dark chocolate and double cream together until smooth and pourable. Carefully pour the ganache over the cheesecake, allowing it to cascade down the sides for a visually stunning presentation. Once set, your Snickers cheesecake is ready to indulge in its decadent glory.
Serving and Presentation
When it comes to serving and presenting this indulgent Snickers cheesecake, attention to detail is key to enjoying its flavors to the fullest. From expertly cutting the cheesecake to adding the final touches, let’s ensure every slice is as delightful as the first bite.
Cutting the Cheesecake
To achieve clean, picture-perfect slices of this luscious Snickers cheesecake, follow these steps:
- Before cutting, ensure the cheesecake has chilled in the refrigerator for at least 6 hours to set properly.
- Using a sharp knife, run the blade under hot water and wipe it dry. The heat helps in a smoother cut through the cheesecake.
- Slowly glide the knife through the layers, starting from one edge to create neat portions.
- Rinse and dry the knife between each cut for precise slices.
- Serve the slices on chilled plates for a stunning presentation.
Final Touches and Plating
Elevate the visual appeal of your Snickers cheesecake with these final touches:
- Drizzle a generous amount of chocolate and caramel sauce over each slice for an added touch of decadence.
- Sprinkle chopped peanuts or mini chocolate chips on top to enhance the texture and flavor contrast.
- Garnish with additional Snickers bars or a dollop of whipped cream for a delightful finish.
- Serve the cheesecake on a decorative platter to showcase its layers and textures elegantly.
- Don’t forget to chill any leftovers promptly to maintain the cheesecake’s freshness and flavors.
By following these simple steps for cutting and plating, you can ensure that each serving of this Snickers cheesecake is as visually appealing as it is delicious, making it a perfect treat for any occasion.
Storing and Freezing Tips
When it comes to preserving your delicious Snickers cheesecake, proper storage and freezing techniques are essential for maintaining its flavor and texture. Follow these guidelines to keep your cheesecake fresh and ready to enjoy whenever you crave a sweet treat.
Refrigeration Guidelines
After indulging in a slice of Snickers cheesecake, make sure to promptly refrigerate any leftovers. Transfer the cheesecake to an airtight container or cover it securely with plastic wrap. Store it in the refrigerator for up to 5 days to preserve its creamy goodness.
How to Freeze and Thaw
If you want to save your Snickers cheesecake for a later date, freezing is the way to go. To freeze the cheesecake, wrap it securely in foil or place it in an airtight container. The cheesecake can be frozen for up to 3 months. When you’re ready to enjoy it again, thaw the cheesecake overnight in the refrigerator for the best results. Whether you freeze the whole cheesecake or individual slices, ensure they are well wrapped to prevent freezer burn and preserve the cheesecake’s delectable flavors.
Conclusion
Creating Snickers cheesecake is a delightful way to indulge in a decadent dessert that combines the rich flavors of peanut butter, chocolate, caramel, and Snickers bars. With its creamy texture, Oreo crust, and generous Snickers chunks, this dessert is a showstopper for any occasion. By following the detailed instructions provided, you can easily assemble this masterpiece and impress your guests with its harmonious flavor blend. Remember to store the cheesecake properly to maintain its freshness and taste. Whether you’re serving it at a party or enjoying a slice at home, Snickers cheesecake is sure to be a crowd-pleaser. So go ahead, whip up this delicious treat, and savor every luscious bite!